Mitered Granny Square Afghan Crochet Pattern
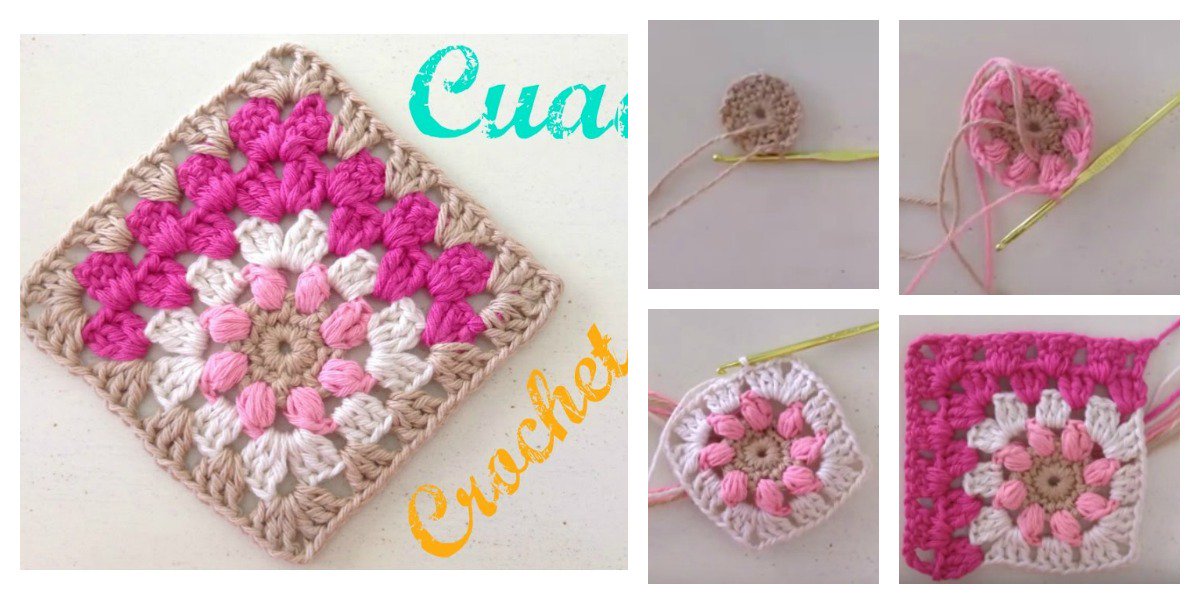
Free Mitered Granny Square Afghan Crochet Pattern

Mitered is a reference to the way how pieces fit together to form a point in products such as picture frames.

With this Free Mitered Granny Square Afghan Crochet Pattern, you’ll see how it get its name during the process of creating a beautiful granny square afghan.

The pattern is awesome. I love the combination of colors used in the pictures below. You can certainly choose the color you like. It’s not as difficult as it seems.

Table
  1. Mitered Granny Square Afghan Crochet Pattern
  2. Step-by-Step Instructions for Making a Decorated Afghan Block
    1. Step 1: Create the Afghan Block
    2. Step 2: Create the Flower Decoration
    3. Step 3: Assembling the Afghan Block
  3. Creative Ways to Use Your Crochet Afghan Block
    1. 1. Blanket Assembly
    2. 2. Wall Hanging
    3. 3. Pillow Cover
    4. 4. Table Runner

Mitered Granny Square Afghan Crochet Pattern

Free Mitered Granny Square Afghan Crochet Pattern

All you need to do is to follow the instructions and you will be able to make at least a small blanket by using these adorable squares.

hqdefault

They are perfect gifts for baby shower or newborns. Enjoy.

Step-by-Step Instructions for Making a Decorated Afghan Block

Step 1: Create the Afghan Block

Basic Block Pattern

  1. Foundation Chain:
    • Chain 26 stitches for a square block measuring approximately 6x6 inches. Adjust the number of chains to achieve your desired size.
    Example:
    Ch 26.
    
  2. First Row:
    • Work 1 double crochet (dc) in the 4th chain from the hook, then continue dc across the row.
    Example:
    Row 1: Dc in the 4th ch, dc across. (24 dc)
    
  3. Subsequent Rows:
    • Turn and chain 3 to start the next row. Continue working dc in each stitch until you have about 10-12 rows.
  4. Finishing Off:
    • Cut the yarn, leaving a long tail for sewing. Pull through the last stitch to secure.

Step 2: Create the Flower Decoration

Simple Crochet Flower Pattern

  1. Start with a Magic Ring:
    • Use your flower color yarn to create a magic ring.
    Round 1: 6 sc in magic ring. (6 sc)
    
  2. Increase for Petals:
    • Round 2: Work 2 sc in each stitch around.
    Round 2: 2 sc in each st around. (12 sc)
    
  3. Creating Petals:
    • Round 3: 1 dc in the next stitch, 2 dc in the next stitch; repeat around to create the petal shape.
    Round 3: *1 dc in next st, 2 dc in next st; repeat around.* (18 stitches)
    
  4. Finish Off:
    • Cut the yarn and pull through to secure.

Step 3: Assembling the Afghan Block

  1. Attach the Flower:
    • Position the flower in the center of the block. Use your yarn needle to sew the flower onto the block securely.
  2. Add Leaves (Optional):
    • Create small leaves using green yarn. You can use a simple leaf pattern, such as chaining and working into the chains to create a small leaf shape.
    Example Leaf Pattern:
    Ch 6, sc in 2nd ch from hook, hdc in next ch, dc in last 3 ch, and slip stitch back down the other side. Fasten off.
    
  3. Attach Leaves:
    • Sew the leaves to the block next to the flower for added decoration.

Creative Ways to Use Your Crochet Afghan Block

1. Blanket Assembly

  • Join multiple blocks together to create a beautiful afghan blanket. You can use different colored blocks to create a patchwork effect.

2. Wall Hanging

  • Hang a single decorated block as a piece of art on your wall. Use a wooden dowel to stretch and display it.

3. Pillow Cover

  • Sew a few blocks together to create a cover for a throw pillow, adding a cozy touch to your living room.

4. Table Runner

  • Line up several blocks to create a colorful table runner, perfect for holiday decorations or casual dining.

How useful was this post?

Click on a star to rate it!

Average rating 3 / 5. Vote count: 7

No votes so far! Be the first to rate this post.

CHECK MORE CROCHET PATTERNS