3D Butterfly Stitch in Crochet: Easy Guide
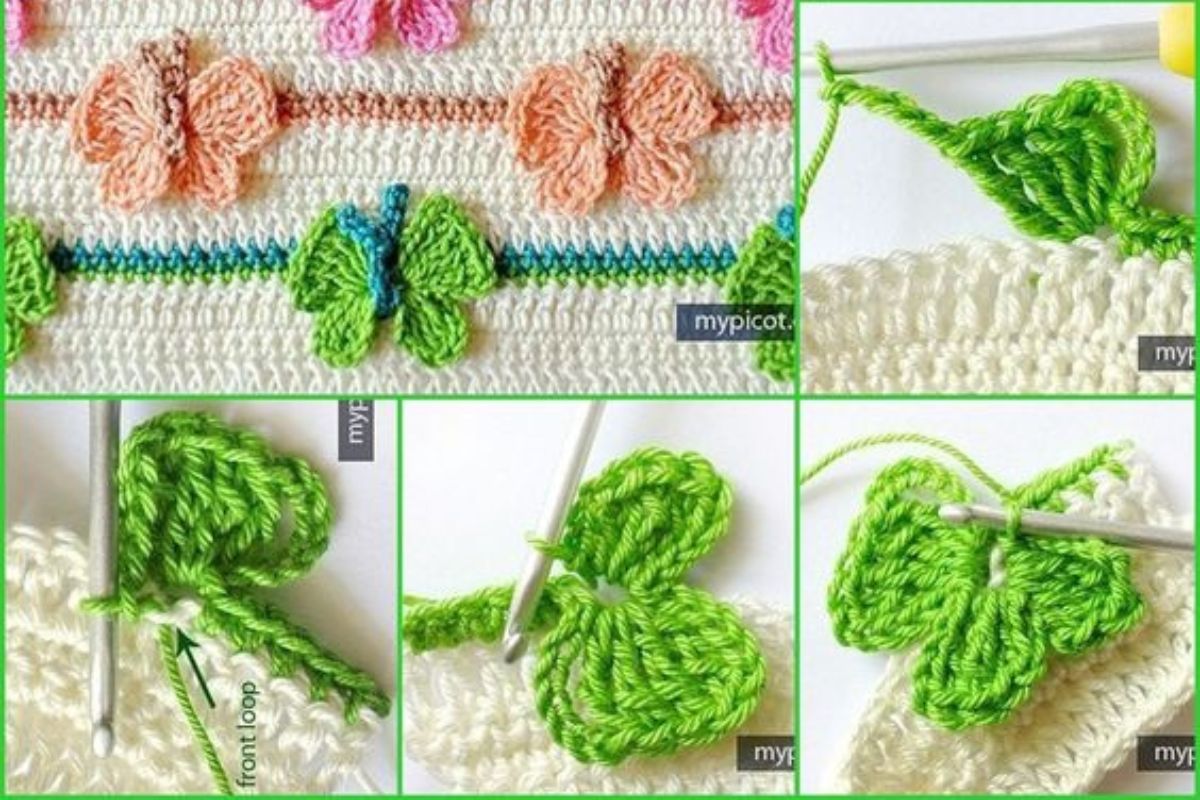
Welcome to our easy guide on the fascinating 3D butterfly stitch in crochet.
With this fun technique, you can create stunning butterflies that will add a whimsical touch to your crochet projects. Whether you're a beginner or an experienced crocheter, our step-by-step tutorial will help you master this dimensional butterfly crochet pattern and take your skills to new heights.
In this guide, we will walk you through the process of understanding the basic butterfly stitch and then show you how to add dimension and depth to create the 3D effect. We'll also provide valuable tips and tricks to perfect your stitches and explore different ways to incorporate the 3D butterfly stitch into various crochet projects.
Basic Butterfly Stitch
Before diving into the world of 3D butterfly stitch in crochet, it's essential to grasp the fundamentals of the basic butterfly stitch.
This foundation is key to mastering the dimensional and eye-catching 3D version. In this section, we will guide you through the step-by-step process of creating the basic butterfly stitch, ensuring you have a strong base to create stunning crochet butterflies.
Adding Dimension 3D Butterfly Stitch
Take your crochet skills to new heights with the captivating 3D butterfly stitch in crochet. This innovative technique allows you to add depth and dimension to your crochet projects, bringing your butterflies to life.
In this section, we will guide you through the process of creating the mesmerizing 3D effect, step by step. Get ready to embark on a journey of creativity and watch as your butterflies take flight.

Step 1: Building the Foundation
To begin, make sure you have a solid understanding of the basic butterfly stitch. If you're new to this stitch, refer to our detailed tutorial in Section 2 for a thorough explanation. This foundation is crucial for creating the 3D effect.
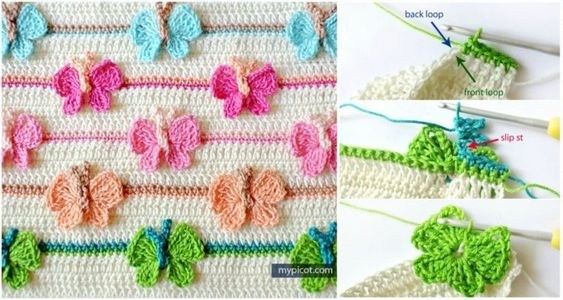
Step 2: Adding Height
Now that you have a strong foundation, it's time to bring your butterflies to life. To create dimension, you'll be working additional stitches that lift your butterfly wings off the fabric. This technique gives them a three-dimensional appearance.
Start by identifying the stitches where you want to add height. Typically, these are the center stitches of the butterfly's wings. Use the crochet hook to insert it below the center stitch and pull up a loop.
Next, complete a double crochet stitch by yarning over, inserting the hook into the same stitch again, and pulling up another loop. Yarn over once more and pull through the first two loops on the hook. Repeat this process until you've reached the desired height.
Step 3: Shaping the Wings
After adding height, it's time to shape the butterfly wings. This is where your creativity truly shines. Experiment with different stitch combinations and techniques to achieve the desired shape and texture.
Consider using puff stitches, picots, or even creating small clusters of stitches to mimic the delicate patterns on a butterfly's wings. Don't be afraid to play around and let your imagination guide you.
Step 4: Finishing Touches
Once you've shaped the wings to your satisfaction, it's time to finish the 3D butterfly stitch. Secure your last stitch and weave in any loose ends to ensure a clean and polished look.
Now that you've mastered the art of creating the 3D butterfly stitch in crochet, the possibilities are endless. Incorporate these dimensional butterflies into various projects, such as blankets, scarves, or even as standalone decorations. Let your hooks and yarn soar as you create stunning pieces that will captivate and inspire.
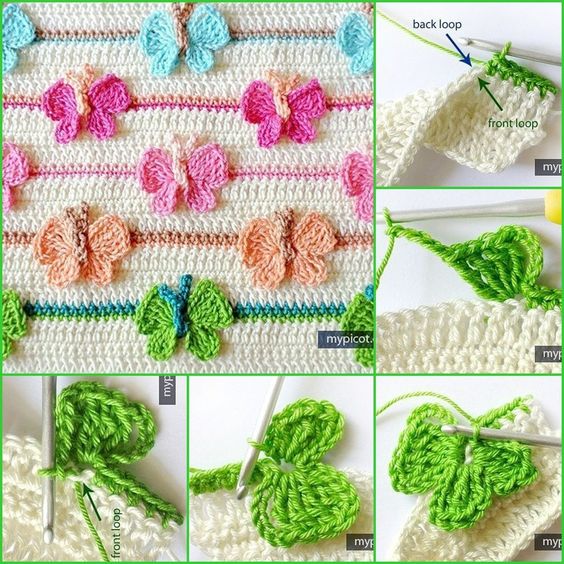
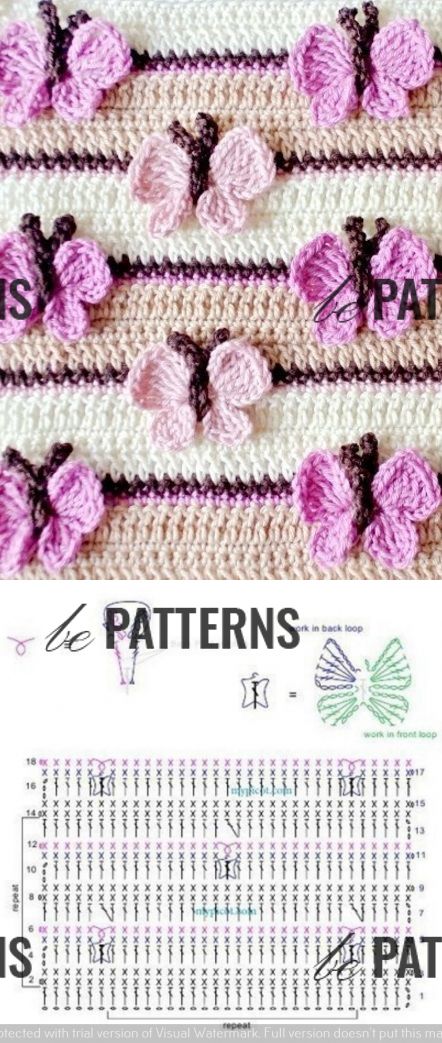
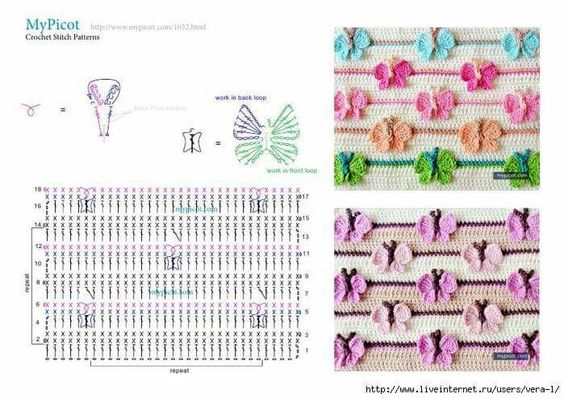
Incorporating the 3D Butterfly Stitch in Projects
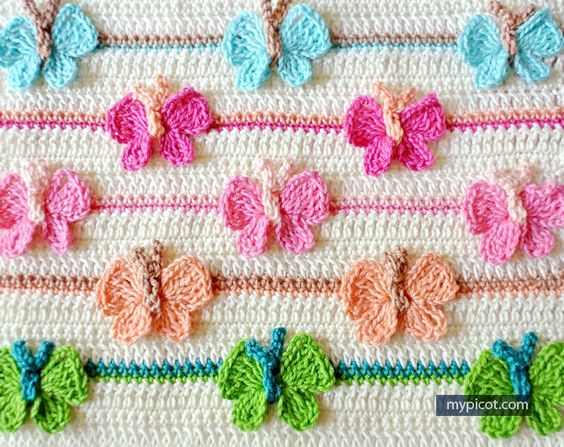
Now that you've mastered the 3D butterfly stitch in crochet, it's time to explore creative ways to incorporate this dimensional butterfly crochet pattern into your projects. Whether you're working on scarves, blankets, or other innovative crochet projects, the 3D butterfly stitch will add a touch of whimsy and elegance.
Find Crochet Design Inspiration
If you're seeking crochet design inspiration, look no further than the versatility of the 3D butterfly stitch. Let your imagination run wild as you envision how these beautiful butterflies can enhance your creations. Browse through crochet patterns, online forums, and social media platforms for innovative ideas that blend seamlessly with the dimensional butterfly crochet pattern.
Experiment with Different Applications
The innovative crochet projects you can create with the 3D butterfly stitch are limitless. Consider incorporating these delightful butterflies along the edges of a blanket to create a whimsical border or adding them as accents on scarves for a touch of elegance. You can even adorn hats, bags, or shawls with these intricate motifs to make a fashion statement.
Combine the 3D Butterfly Stitch with Other Crochet Techniques
Unleash your creativity by experimenting with unique combinations of advanced crochet techniques alongside the 3D butterfly stitch. Try incorporating different stitches, such as popcorn stitch or crocodile stitch, to further enhance the depth and texture of your creations. By combining these techniques, you'll take your crochet designs to new heights.
With the 3D butterfly stitch in crochet as your newfound tool, your projects will become showcases of innovation and beauty. Let the dimensional butterfly crochet pattern inspire your creativity and captivate others with the unique charm of these intricate butterflies.
Create the Butterfly Wings
Begin by making the wings of the butterfly using the 3D butterfly stitch. To do this, follow these steps:
- Start with a slipknot and chain the desired number of stitches for the width of the wings.
- For the first row, double crochet into the 4th chain from the hook and into each chain across.
- Chain 3 and turn your work.
- Next, we will be working the butterfly stitch. Double crochet into the first stitch and chain 3.
- Working into the same stitch, *double crochet, chain 3, and double crochet*. Repeat from * to * until the end of the row.
- Chain 3 and turn your work.
- Repeat steps 4 and 5 for the desired number of rows, creating the 3D effect in the wings.
- Finish the wings by double crocheting into each stitch across the row.
- Fasten off and weave in any loose ends.
Congratulations on mastering the art of the 3D butterfly stitch in crochet! With this skill, you have the power to bring a touch of whimsy and creativity to all your future crochet projects. The 3D butterfly stitch opens up a world of possibilities, allowing you to create beautiful butterflies that will amaze and inspire others.
By incorporating the 3D butterfly stitch into your crochet designs, you can elevate your projects to new heights. Whether you're making scarves, blankets, or other innovative crochet pieces, the dimensional and lifelike butterflies will add a unique and enchanting touch.
Let the 3D butterfly stitch be your design inspiration as you explore different patterns, colors, and combinations. Embrace the freedom to experiment and create your own crochet masterpieces. With each project, your crochet skills will continue to grow, leading to more innovative and impressive creations.
CHECK MORE CROCHET PATTERNS