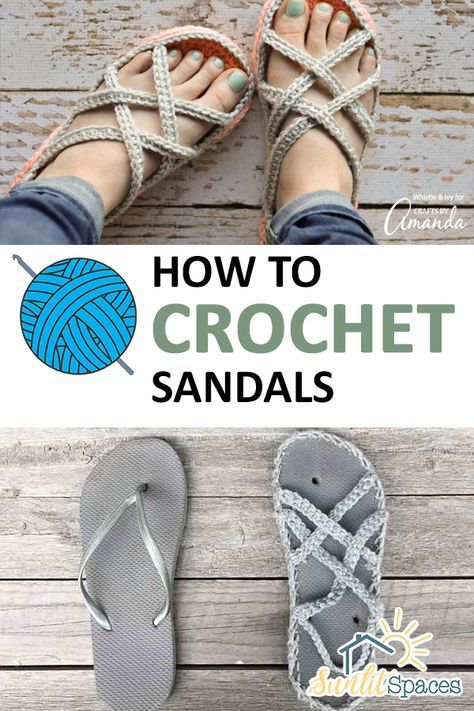
Get Your Crochet Sandals Free Pattern Here!

The crochet sandals free pattern is perfect for making a comfortable and stylish pair of sandals for spring or summer. Whether you're a DIY enthusiast or a crochet beginner, this pattern is easy to follow and will guide you through each step of the process.
With this crochet sandals tutorial, you'll learn how to create your own handmade sandals with just a few basic materials. No need to spend a fortune on store-bought sandals when you can make your own that are customized to fit your style and preferences.
Designed with beginners in mind, this easy crochet sandals pattern will walk you through the process of creating the perfect pair of sandals. The step-by-step instructions, accompanied by clear photos, will ensure that even if you're new to crochet, you'll be able to create beautiful sandals in no time.
Crochet Sandals
If you're worried about not having the right skills or lacking experience, don't worry! This crochet sandals pattern is beginner-friendly, making it accessible to everyone who wants to try their hand at creating their own footwear.
Looking to follow the pattern at your own pace? Don't worry, we've got you covered! The crochet sandals pattern PDF is available for download, allowing you to access it whenever you want. You can even print it out and have it on hand while you work on your crochet sandals.
So why wait? Dive into the world of crochet sandals and start creating your own stylish and comfortable footwear today!

Key Takeaways:
- Create your own stylish and comfortable crochet sandals with a free pattern.
- This tutorial is perfect for beginners, with step-by-step instructions and photos.
- Download the crochet sandals pattern PDF for easy access.
- Customize your sandals to match your style and preferences.
- Enjoy the satisfaction of wearing handmade footwear.
Materials and Gauge
To create your own crochet sandals, you'll need a few essential materials. The key materials for the project include:
- Worsted weight/aran yarn (size 4 medium) cotton yarn: This type of yarn provides the perfect balance of softness and durability for your crochet sandals.
- Hooks F(3.75mm): This hook size will allow you to achieve the right tension and stitch definition for your project.
- A yarn needle: This tool will help you weave in ends and finish off your sandals neatly.
- 1/2 inch thick quilter's batting: Adding quilter's batting to the soles of your sandals will provide extra comfort with each step you take.
- Optional plastic canvas: If you desire additional sole structure and durability, you can use plastic canvas as a layer in between the outer and inner soles of your sandals.
Ensuring the correct gauge is crucial for the fit and size of your crochet sandals. The gauge for the pattern is 16 single crochet (sc) stitches and 18 sc rows per 4 inches. This gauge should be achieved using the F(3.75mm) hook and worsted weight yarn.
Finished Measurements
The finished measurements of the soles are provided for each size, allowing you to choose the perfect fit for your crochet sandals. These measurements ensure that your sandals will be comfortable and easy to wear.
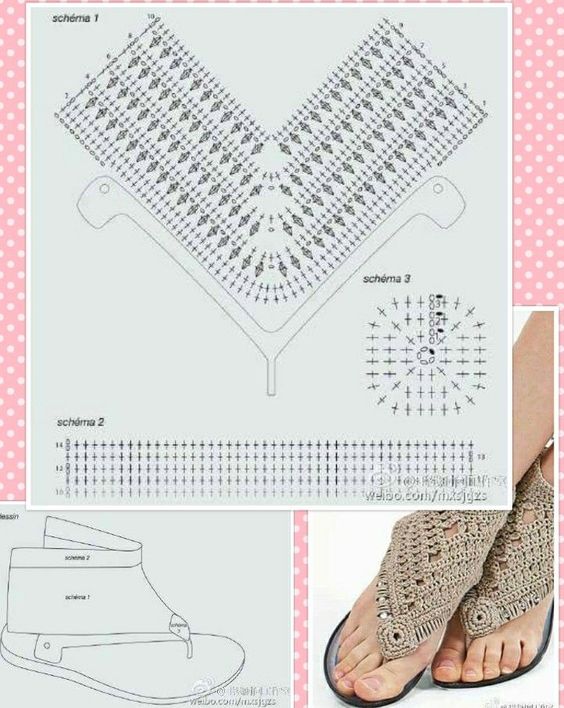
Sole Pattern
The sole pattern is a crucial component of crocheting your own sandals. It provides the foundation for a comfortable fit and allows you to customize the size according to your needs. The pattern consists of separate instructions for the right sole and the left sole, ensuring a perfect fit for each foot.
To create the crochet sandals sole, you will follow detailed rounds and stitch counts for each size. The soles are worked in the round without turning, which creates a seamless finish. Each round is completed by working the last stitch into the same stitch as the beginning chain, maintaining a smooth and professional look.
Throughout the pattern, special tips and considerations are provided to help you along the way. This includes guidance on counting stitches, checking gauge, and achieving the desired fit. It's important to pay attention to these details to ensure that your sandals turn out exactly as you envision.
Accompanying photos are included throughout the pattern to assist you visually. These visuals will guide you through each step, making the process easier and more enjoyable. With the help of the detailed instructions and helpful images, you'll be able to crochet the perfect soles for your sandals.
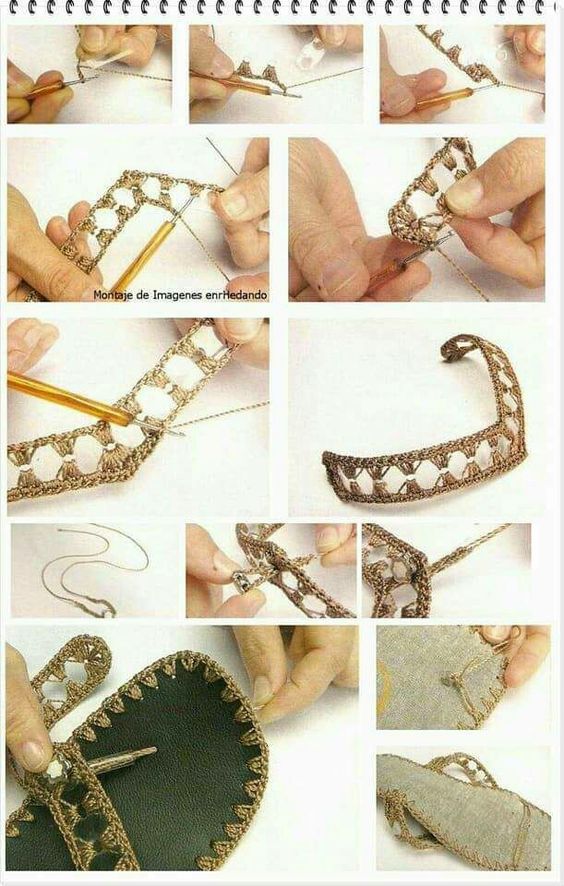
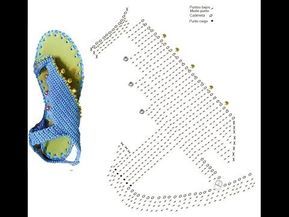

Joining the Soles
Once both the right and left soles for your crochet sandals are completed, it's time to join them together. This step is crucial for creating a sturdy and durable pair of sandals. The joining process involves slip stitching the two layers of the soles together, with the plastic canvas and quilter's batting sandwiched in between.
Here are the instructions for joining the soles:
- Place the right side of the soles, with the slip stitches visible, facing up.
- Align the edges of the right and left soles, making sure they match up perfectly.
- Insert your hook through the corresponding slip stitches on both soles, joining them together.
- Yarn over and pull through, creating a slip stitch to secure the soles together.
- Continue slip stitching around the entire perimeter of the soles, working through the slip stitches on both sides.
- Make sure to work the slip stitches tightly and evenly to ensure a secure joining.
By slip stitching the soles together, you create a seamless join that adds strength and structure to your crochet sandals. The plastic canvas and quilter's batting between the layers provide additional comfort and cushioning for your feet.
For visual reference and guidance, here is an image illustrating the joining process:
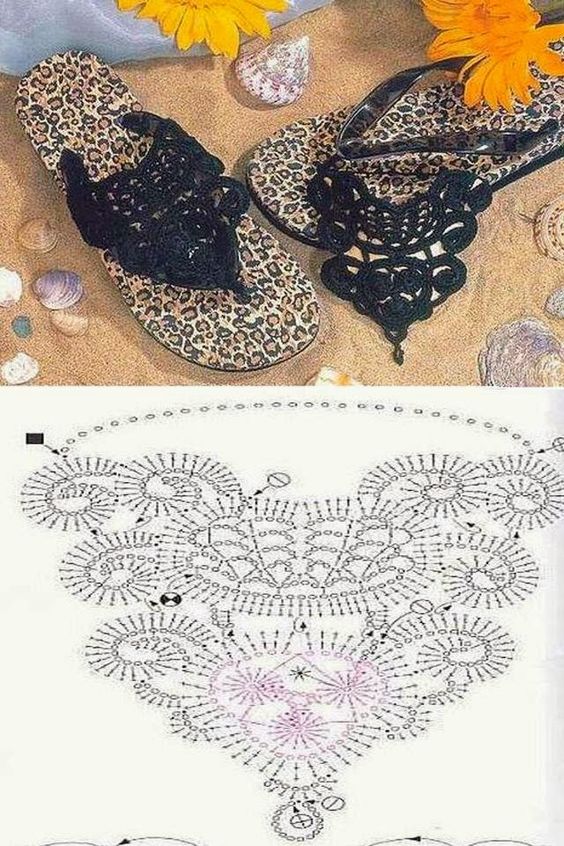
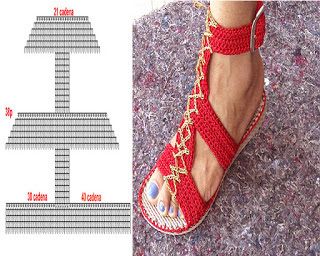
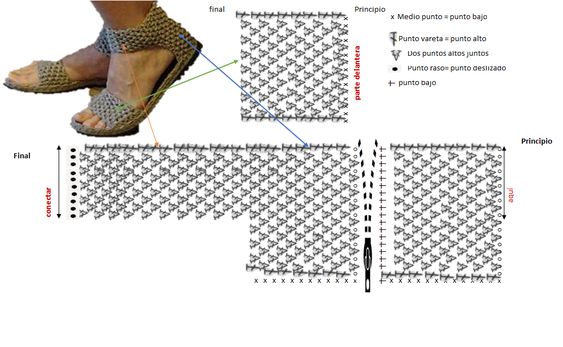
Toe Top Pattern
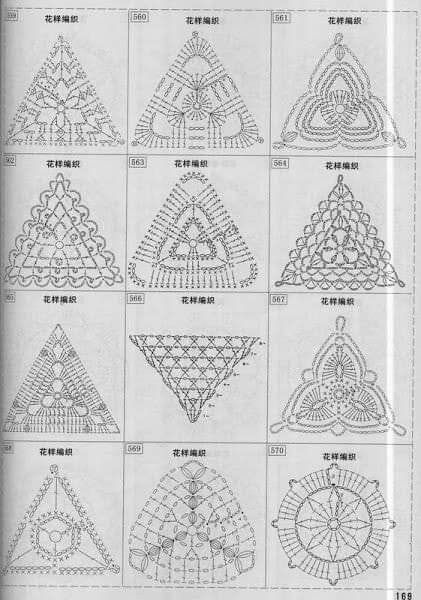
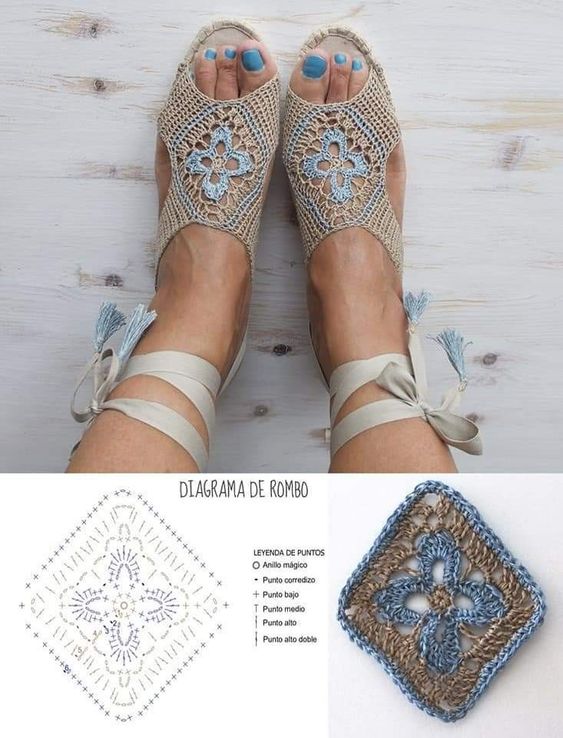
The toe top pattern is a crucial component of creating your own crochet sandals. This pattern is worked separately from the sole pattern and adds a sturdy slipper-like structure to your sandals. One of the highlights of this pattern is the option to create a beautiful lacey toe design, giving your sandals an elegant touch.
When it comes to working the toe top pattern, you have two options. You can follow the detailed written instructions provided, which guide you through each step. Alternatively, if you prefer a visual representation, there is also a chart available for reference.
To complete the crochet sandals, the toe top is sewn onto the right side of the sole where the slip stitches are visible. This ensures a secure and neat finish to your sandals. If you need guidance during the sewing process, there are accompanying photos in the pattern to assist you.
With the toe top pattern, you can elevate your crochet sandals to the next level, adding style and durability to your handmade creations.
CHECK MORE CROCHET PATTERNS