Easy Guide: How to Crochet a Hair Bun Cover

I'm excited to share with you an easy guide on how to crochet a hair bun cover. In this tutorial, I will provide step-by-step instructions for creating a beautiful handmade hair accessory. Whether you're a beginner or an experienced crocheter, you'll be able to follow along and create your own hair bun cover with ease.
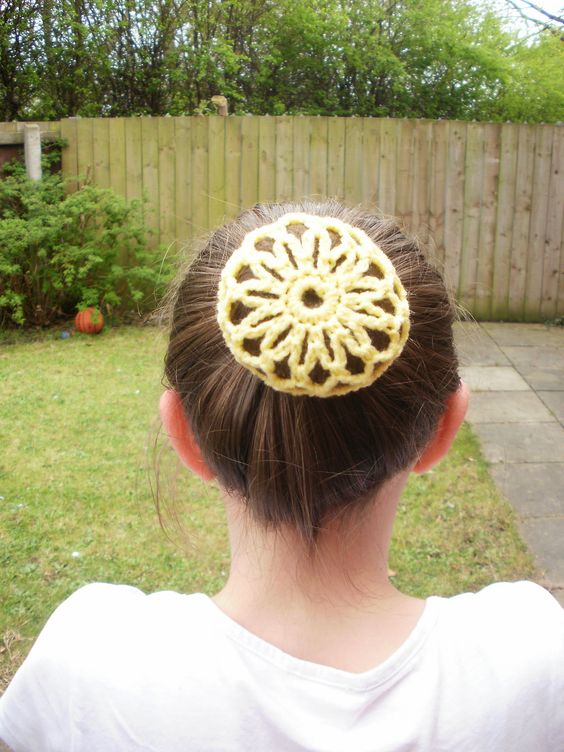
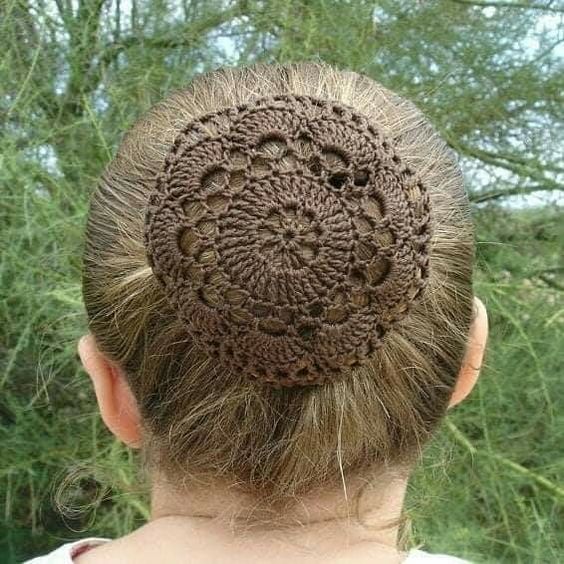
Crocheting a hair bun cover is a wonderful way to add a stylish touch to your hairstyles.
It's a fun and rewarding DIY project that allows you to customize your accessories to match your personal style. Whether you're attending a special event or simply want to elevate your everyday look, a crochet hair bun cover is the perfect addition.
Crochet a Hair Bun Cover
To get started, you'll need a few essential materials. This includes a size "1" or 2.35 mm steel hook, approximately 15-25 yards of #10 crochet thread in the color of your choice, a yarn needle, a medium 4mm hair elastic, a sewing needle, sewing thread, and Czech Glass Seed Beads 8/0. If you have fine or thin hair, you may also need a hair "donut" bun maker for added volume.
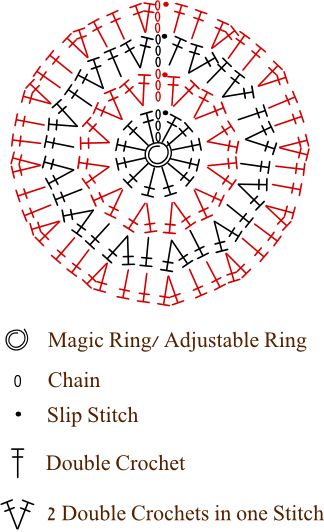
Now that you have all the materials ready, let's dive into the step-by-step process of crocheting a hair bun cover. We will begin by creating a ring around the hair elastic for a secure fit. Then, we will work through several rounds of stitches, including chain, slip stitch, single crochet, half double crochet, and double crochet. Don't worry if these terms sound unfamiliar, as I will guide you through each stitch along the way.
In conclusion, crocheting a hair bun cover is a rewarding and creative way to enhance your hairstyles. With this easy guide, you'll have the knowledge and skills to create your very own handmade hair accessory. So grab your crochet hook and thread, and let's get started on this fun and stylish project!

Key Takeaways:
- Learn how to crochet a hair bun cover with this easy tutorial
- Customize your own handmade hair accessory to match your personal style
- Gather the necessary materials, including a crochet hook, thread, and hair elastic
- Follow step-by-step instructions for creating a secure and stylish hair bun cover
- Add a touch of elegance to your hairstyles with a crocheted hair bun cover
Materials and Measurements for Crocheting a Hair Bun Cover
To crochet a hair bun cover, you will need a few essential materials. These include:
- A size "1" or 2.35 mm steel hook
- Approximately 15-25 yards of #10 crochet thread in the color of your choice
- A yarn needle
- A medium 4mm hair elastic
- A sewing needle
- Sewing thread
- Czech Glass Seed Beads 8/0
You may also need a hair "donut" bun maker if you have fine or thin hair.

How to Crochet a Hair Bun Cover Step by Step
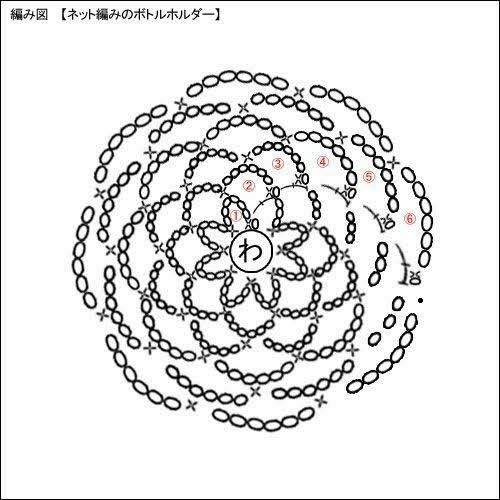
Now that you have all the materials and measurements, it's time to start crocheting your hair bun cover. The pattern begins with creating a ring around the hair elastic for a secure fit. We will use a combination of stitches, including chain, slip stitch, single crochet, half double crochet, and double crochet, to create a beautiful handmade crochet bun cover.
To start, take your size "1" or 2.35 mm steel hook and attach the #10 crochet thread to the hair elastic by creating a slip knot. Insert your hook through the elastic loop and pull the thread through the loop, securing it tightly around the elastic. This will serve as the foundation for your bun cover.
Next, create a chain of stitches around the elastic. Start by making a slip stitch around the elastic, followed by a chain of stitches around the elastic. This will create a ring that will act as the base for your bun cover.
Once you have created the ring, you can start working on the body of the bun cover. We will be working in rounds, starting from the center and working our way outwards. Each round will consist of a combination of chain stitches and different crochet stitches.
Begin with a round of single crochet stitches. Insert your hook through the next chain stitch, yarn over, and pull through both loops on the hook. Continue making single crochet stitches around the ring, making sure to work evenly and maintain a consistent tension.
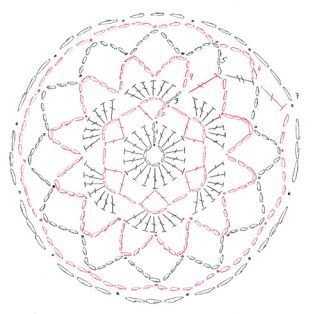
Continue working in rounds, gradually increasing the number of stitches in each round to create a beautifully textured pattern. You can experiment with different crochet stitches, such as half double crochet and double crochet, to add variety and depth to your bun cover.
Repeat the pattern of stitches for several more rounds until your bun cover reaches the desired size. Remember to adjust the number of stitches and rounds based on your measurements to ensure a perfect fit. Finish off your bun cover by fastening off the thread and weaving in any loose ends.
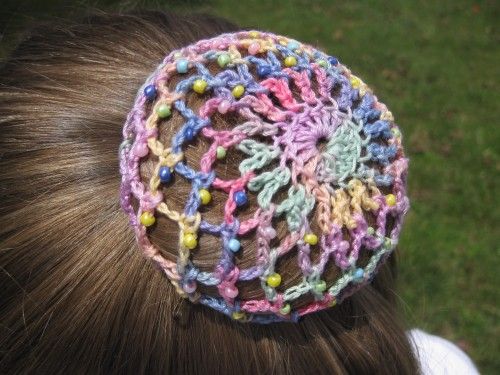
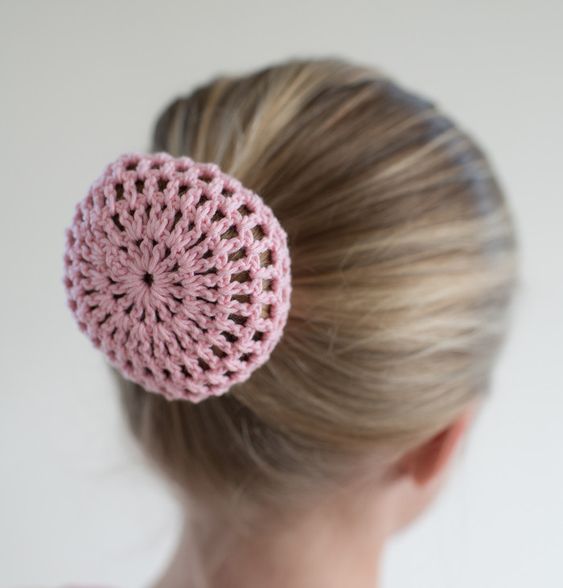
Once you have completed your handmade crochet bun cover, you can easily slip it over your hair bun for a chic and stylish look. This crochet hair bun cover tutorial is perfect for beginners and allows you to create a unique and personalized hair accessory.
CHECK MORE CROCHET PATTERNS