6 Day Star Blanket Crochet: A Step-by-Step Guide to Creating Your Own Cozy Masterpiece

There’s something magical about a crochet project that comes together quickly but also leaves you with a stunning result. One such project is the 6 Day Star Blanket Crochet. Whether you're a beginner or an experienced crocheter, this blanket pattern will challenge your skills and reward you with a cozy, colorful creation perfect for snuggling up on chilly evenings or adding a vibrant touch to your home decor.
The 6 Day Star Blanket is more than just a blanket; it's a journey into the world of intricate crochet patterns and vibrant color combinations. This project takes its name from the fact that many crocheters can complete it in just six days, though your speed will depend on how much time you dedicate to your work.
In this guide, we will walk you through everything you need to know to create your very own 6 Day Star Blanket. From choosing yarn to mastering the stitch techniques, you’ll be prepared to tackle this beautiful project from start to finish.
6 Day Star Blanket
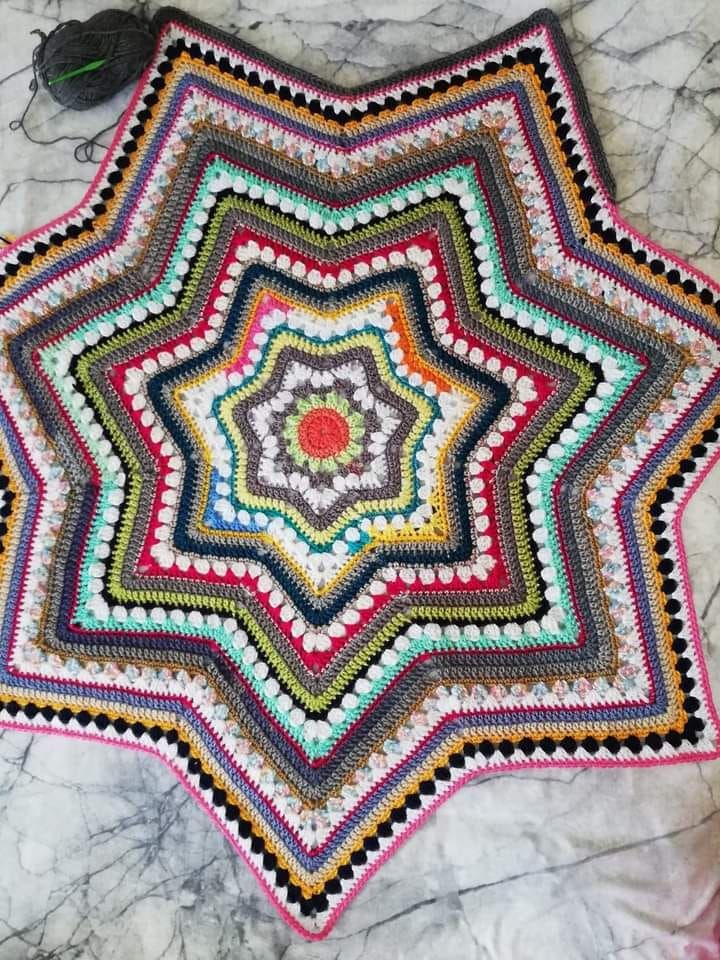
The 6 Day Star Blanket is not just a simple crochet pattern; it’s a statement piece that adds both warmth and style to any room.
Materials Needed for the 6 Day Star Blanket Crochet
Before you start, gather all the materials you’ll need to create your 6 Day Star Blanket. Here’s a list of the essentials:
- Yarn: Choose a worsted weight yarn (4-ply) in multiple colors for the star effect. The amount of yarn needed will depend on the size of the blanket you wish to create.
- Crochet Hook: A size H-8 (5mm) crochet hook is typically recommended, but always check your yarn label for any specific hook size suggestions.
- Scissors: To trim yarn ends when you finish each color change.
- Yarn Needle: To weave in the yarn ends once you’ve completed the blanket.
- Stitch Markers: Optional, but can help you keep track of the beginning of each round.

Step-by-Step Guide to Crochet the 6 Day Star Blanket
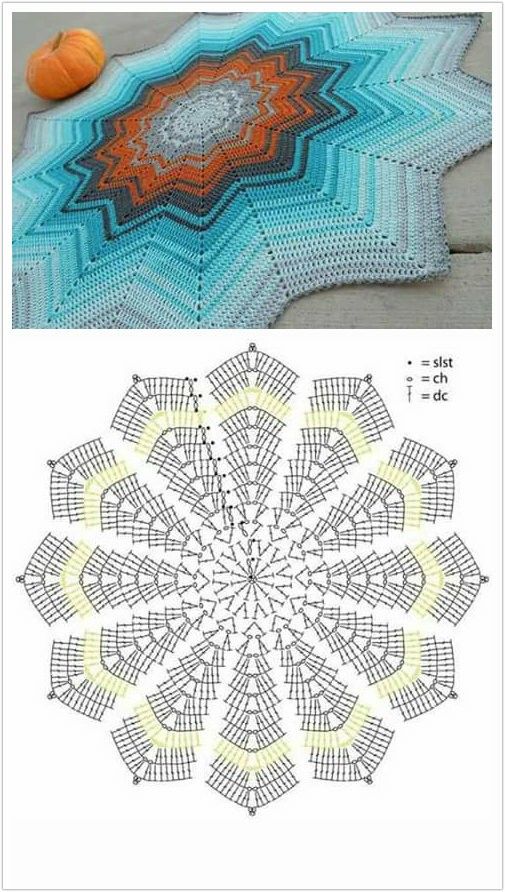
Now that you have all your materials ready, let’s dive into the steps for making the 6 Day Star Blanket Crochet. This blanket is worked in the round, starting from the center and expanding outward in a beautiful star-shaped pattern.
Step 1: Begin the Star Center
- Make a Magic Circle: Start with a magic circle or adjustable ring to form the center of the star. This method ensures that the center is tight, leaving no hole in the middle.
- Round 1:
- Chain 3 (counts as the first double crochet) and work 11 double crochets into the magic circle.
- Join with a slip stitch to the top of the beginning chain 3 to close the round.
- You should have 12 double crochets in total. This forms the first round of your star.
- Round 2:
- Chain 3, then work 2 double crochets into each stitch around. You will have 24 double crochets at the end of this round.
- Join with a slip stitch to the top of the beginning chain.
Step 2: Forming the Star Points
Now, you’ll begin forming the points of your star. These will give the blanket its stunning geometric look.
- Round 3:
- Chain 3 (counts as the first double crochet), then work 2 double crochets in the same stitch.
- Skip the next stitch, and in the following stitch, work 3 double crochets.
- Repeat this pattern of skipping one stitch and working three double crochets into the next stitch until you’ve completed the round.
- This round creates the first set of points for your star.
- Round 4:
- For the next round, repeat the pattern from Round 3. You’ll be working in the same manner, but the number of double crochets in each point will increase, creating more definition and length for each star point.
- Continue Rounds:
- Continue expanding the blanket by following the pattern for each additional round. The key to achieving the star blanket effect is the consistent increase in stitches to form the points and edges. Make sure you are always increasing in the same manner to maintain symmetry.
Step 3: Add Color to Your Star Blanket
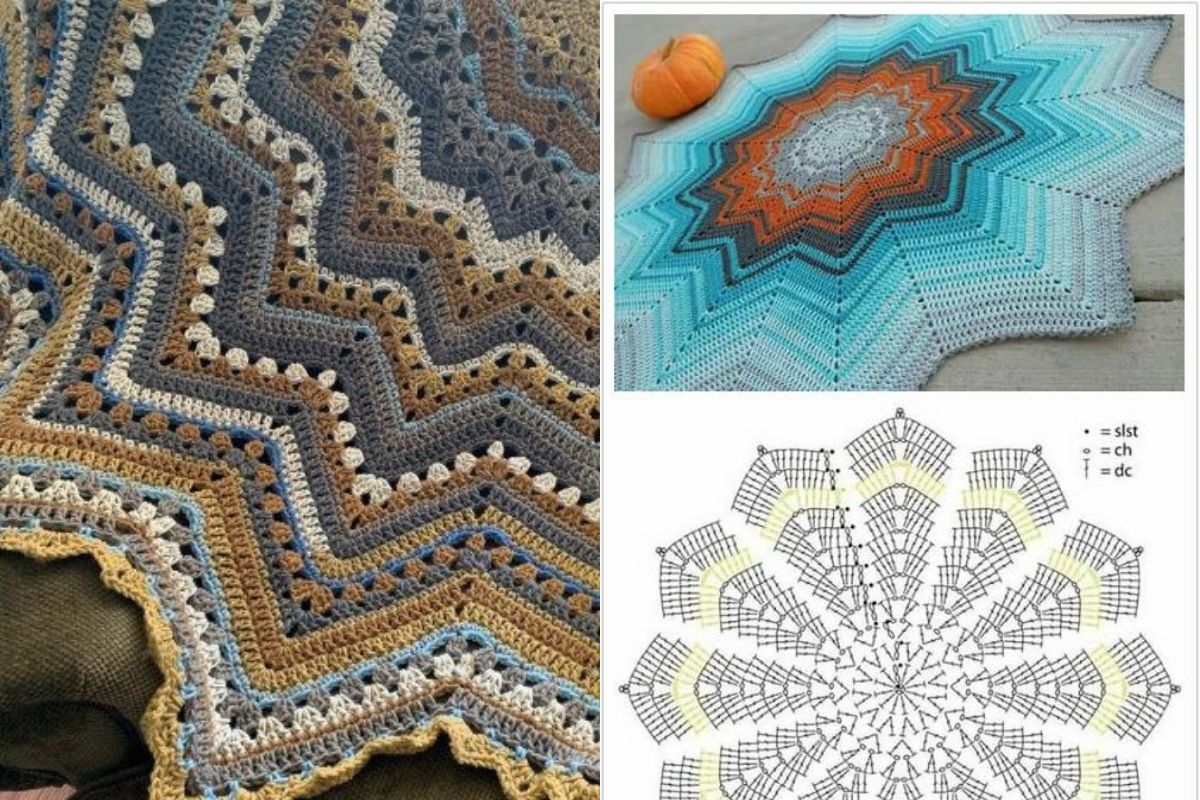
The fun part of the 6 Day Star Blanket Crochet is the color changes. You can choose to use multiple colors for a vibrant, rainbow-style effect, or stick with more subtle shades like cream, gray, and gold for a more classic look.
- Color Changes:
- To change color, simply drop the current color and begin the new color in the stitch you want the change to occur.
- Use slip stitches to join the new color, and be sure to weave in the ends after each change.
- Color Placement:
- You can alternate colors between the star points or follow a more randomized color pattern. There’s no limit to how creative you can get with your color placement!


Source: crochetkingdom.com/ripplestar
Step 4: Complete the Blanket and Add Border
Once you’ve crocheted enough rounds to achieve your desired size, it’s time to add the border. This will help your blanket look polished and finished.
- Border:
- For the border, work single crochet stitches around the entire blanket, making sure to evenly space your stitches.
- You can also add a shell stitch border for a more decorative finish.
- Weaving in Ends:
- Use a yarn needle to weave in any loose ends from your color changes. This ensures that the blanket looks clean and neat.
The 6 Day Star Blanket Crochet is the perfect project for anyone looking to create a beautiful, cozy, and colorful blanket in a short amount of time. Whether you're a beginner or a seasoned crocheter, this project will allow you to explore your creativity while producing a functional and stunning piece.
Add your own flair with color changes and custom borders, and soon you’ll have a crochet masterpiece that will keep you warm for years to come!
CHECK MORE CROCHET PATTERNS