Egg Covers Yarn Craft – A Fun and Festive DIY Project
Egg Covers made from yarn are a delightful way to add a crafty touch to Easter treats. These adorable handmade covers not only make chocolate eggs more festive but also serve as charming decorations or small gifts.
In this guide, you'll learn how to crochet or knit unique egg covers, explore different design ideas, and get creative with patterns, colors, and embellishments.
Egg Covers are more than just a decoration. They bring charm, warmth, and a handmade touch to Easter treats. Ideal for Easter baskets, classroom treats, or party favors. If you're new to crochet or knitting, these covers are a fun and manageable DIY craft.
Egg Covers Yarn Craft
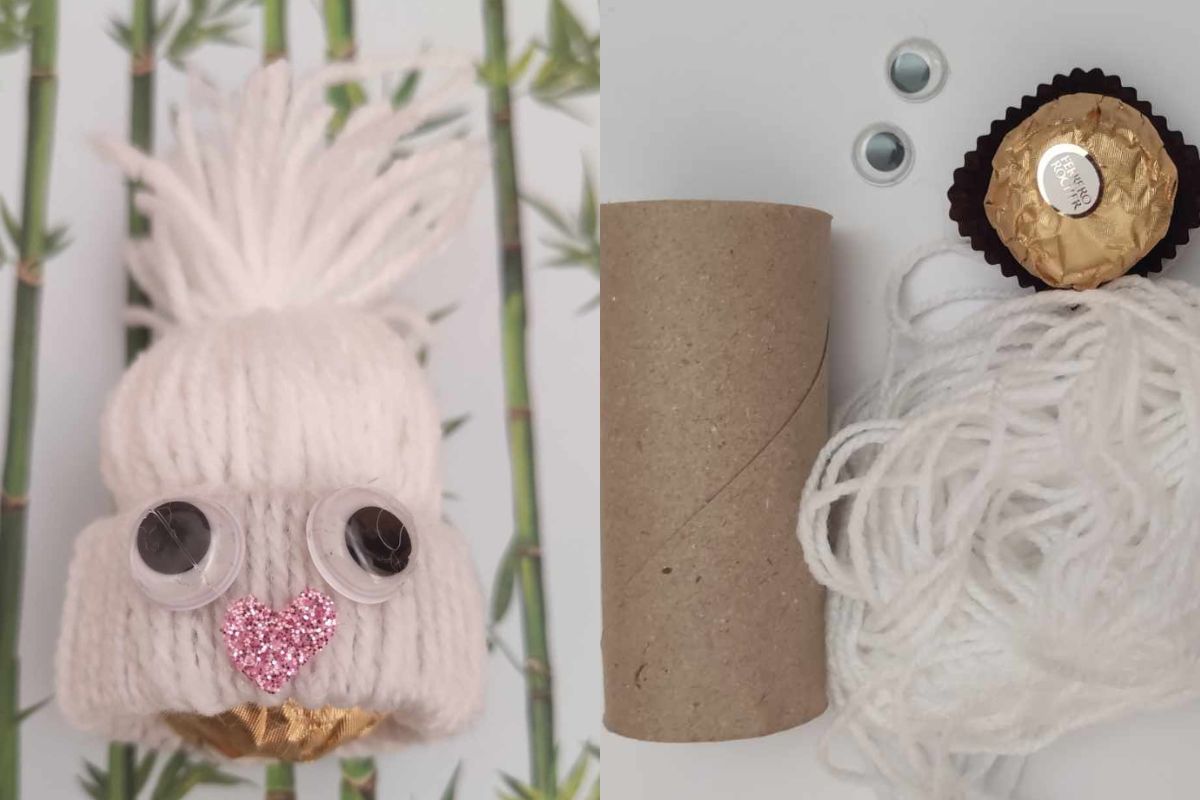
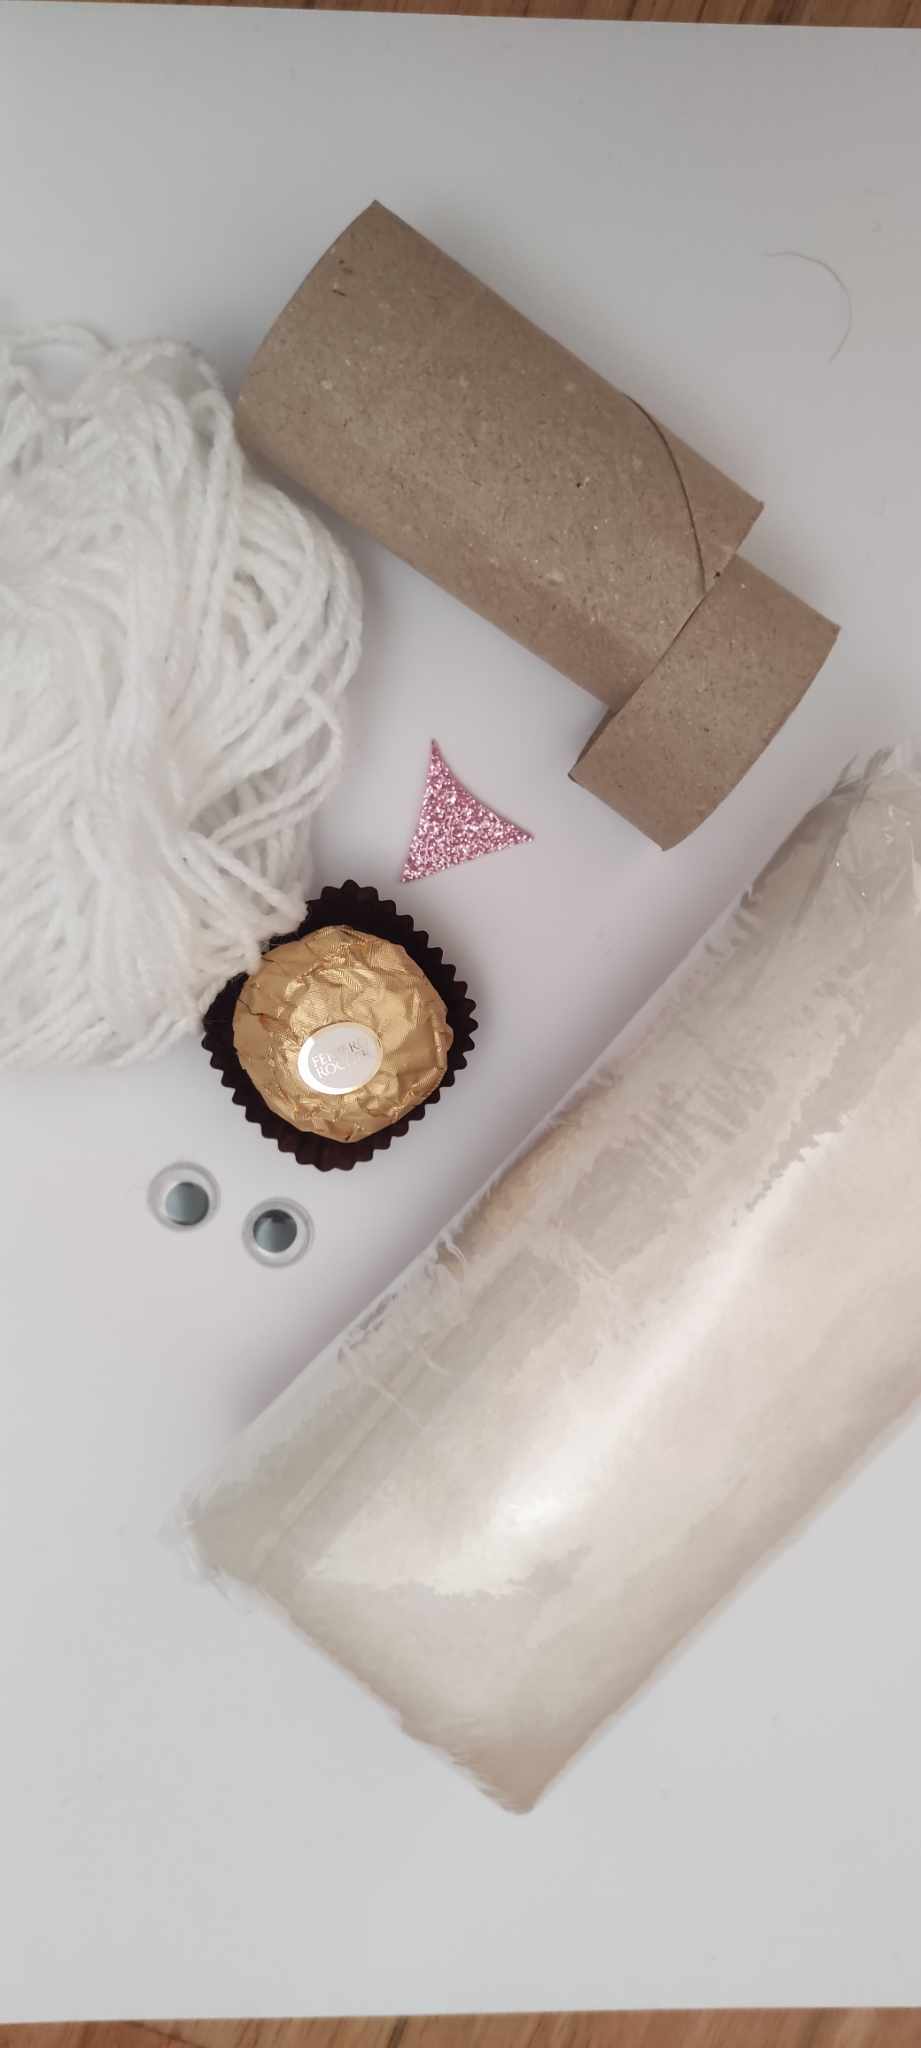
Materials You’ll Need
Before starting, gather the following supplies:
- Yarn (various pastel or bright colors)
- Toilet paper roll (trimmed to ¾ inch)
- Scissors
- Googly eyes
- Felt sheets (for beak, ears, nose, and mouth)
- Glue gun or craft glue
- Poly-fill stuffing
- Cadbury Creme Eggs (or other small chocolate eggs)
Step-by-Step Guide to Crafting a Yarn Creme Egg Cover
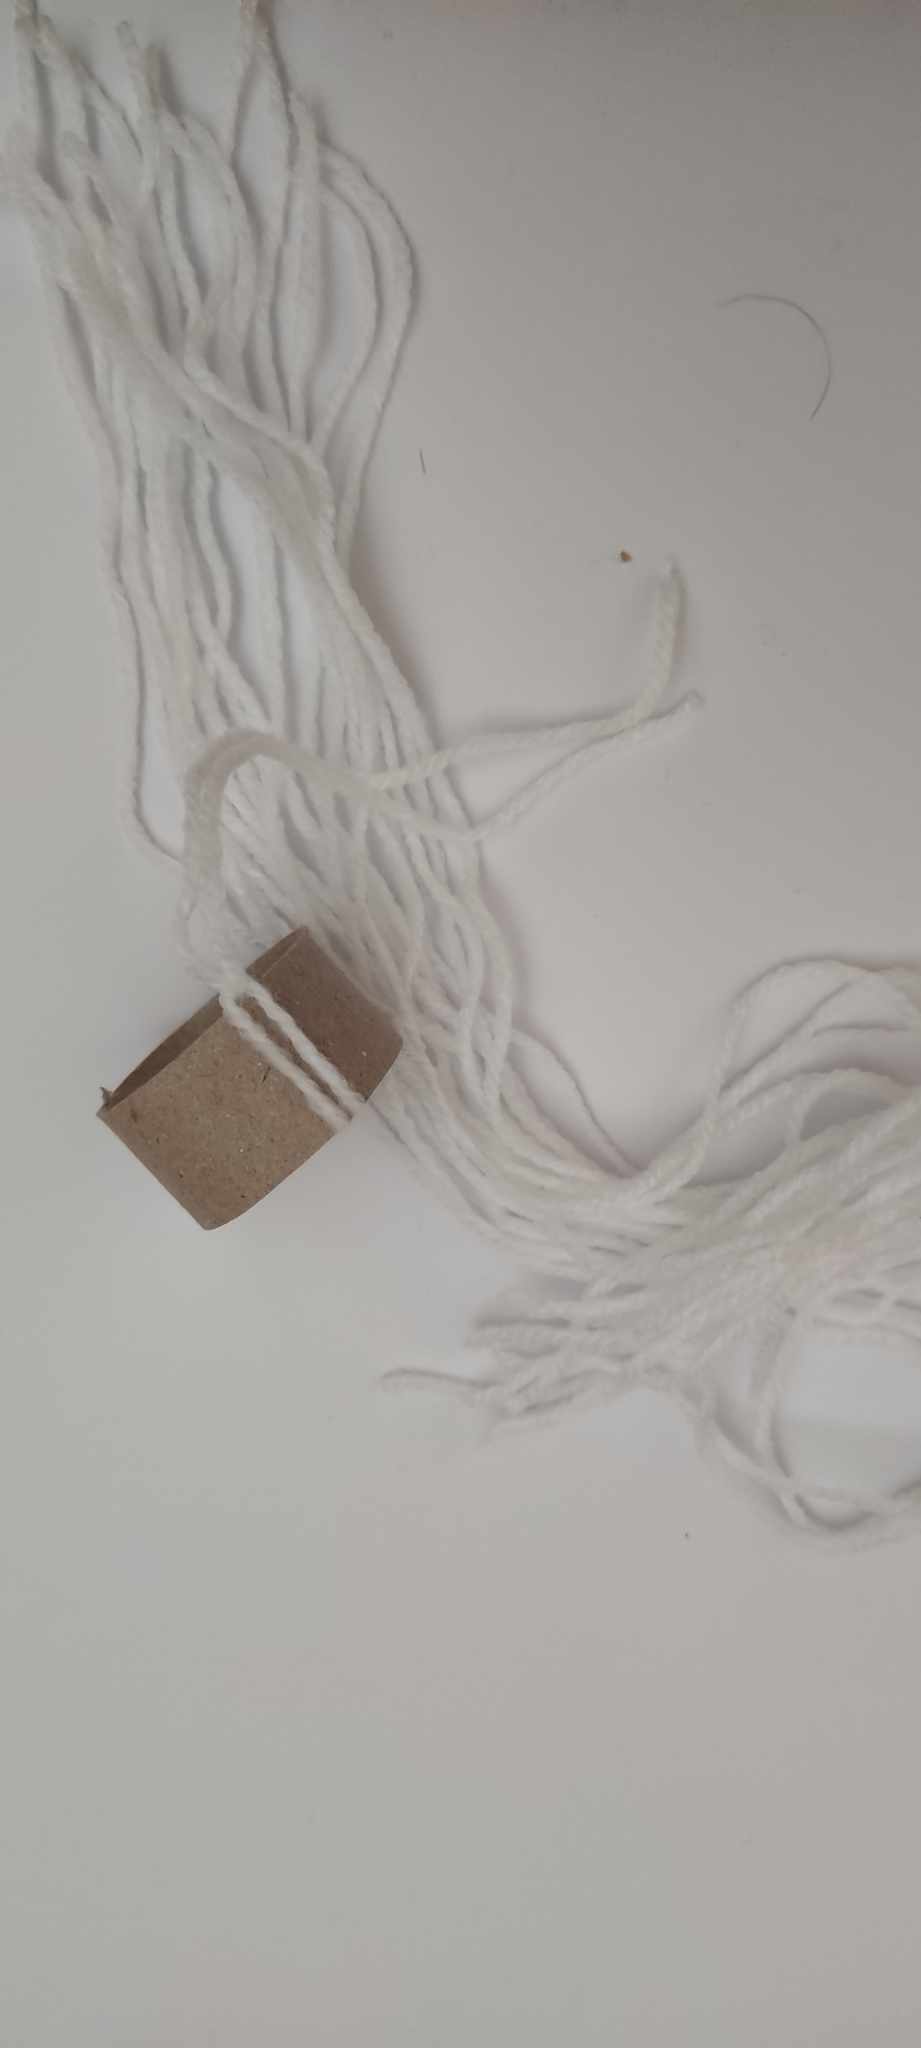
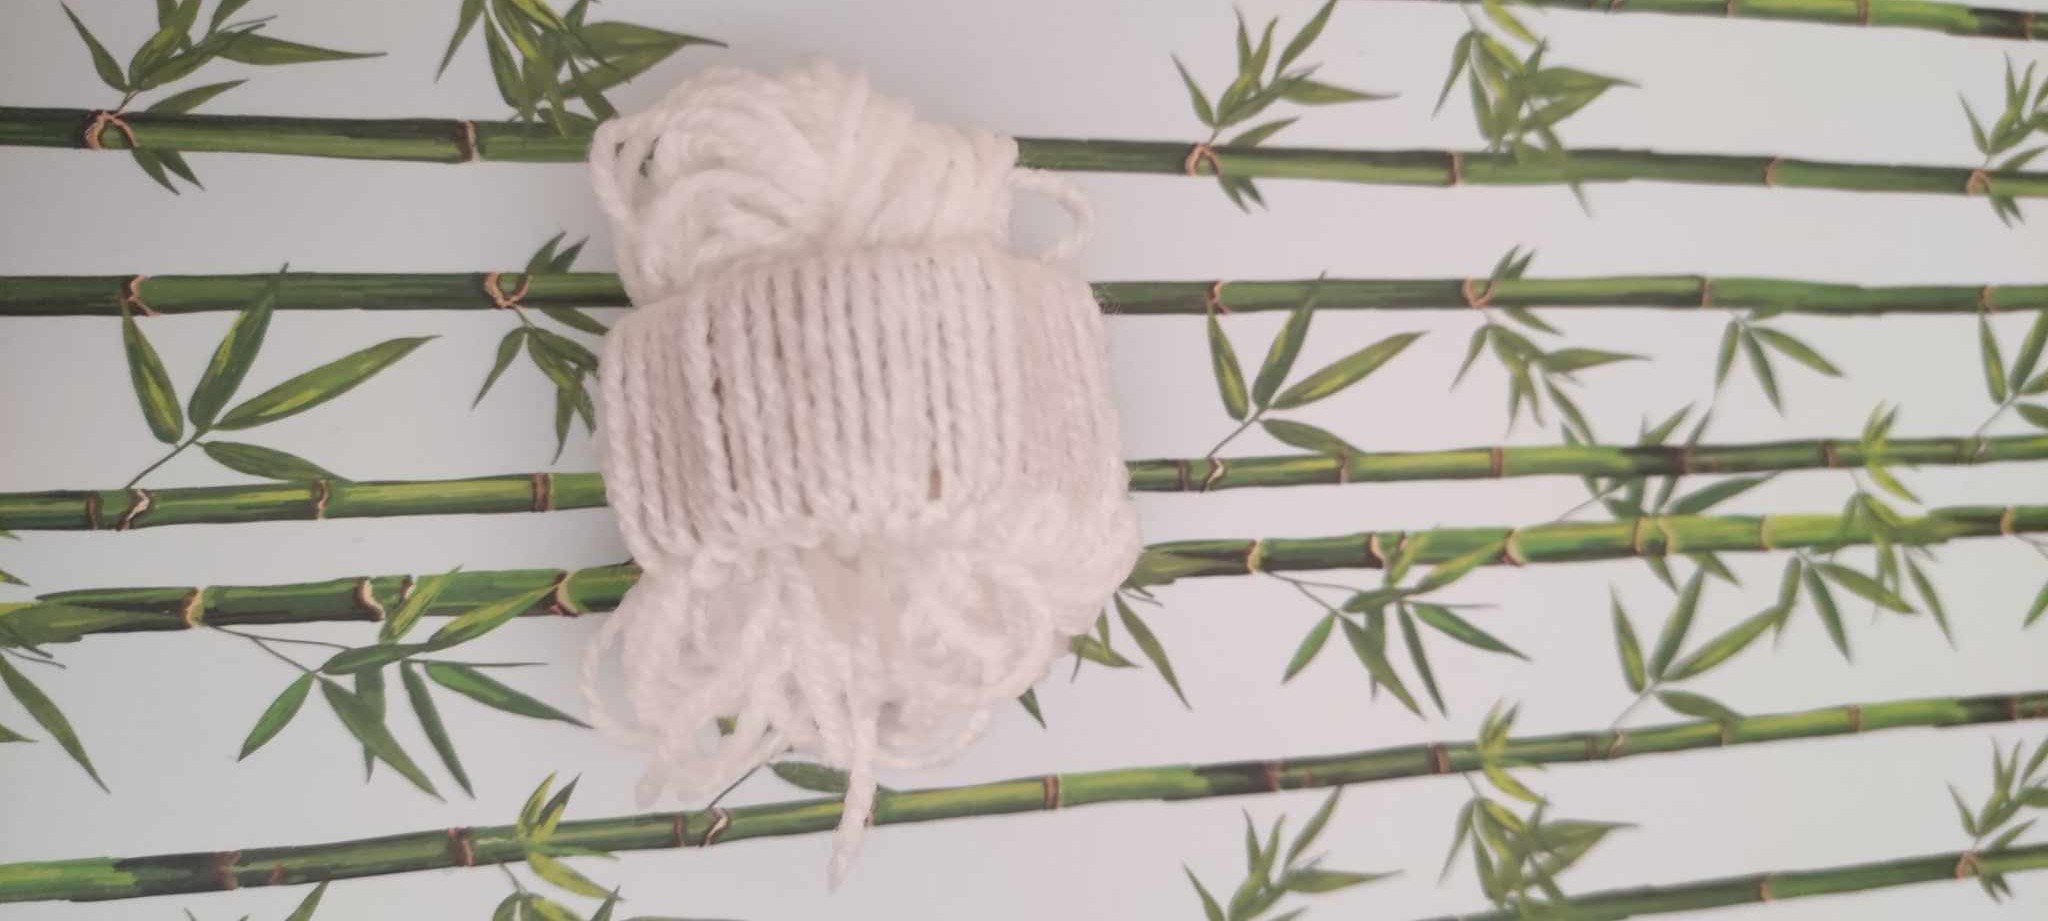
Step 1: Cutting Your Materials
- Cut 40 strands of yarn, each approximately 12 inches (30 cm) long.
- Trim your paper roll to ¾ inch (2 cm) to create a small ring.
Step 2: Wrapping and Cinching the Yarn
- Take a strand of yarn and fold it in half.
- Insert the loop into the paper roll, then pull the yarn ends through the loop to tighten.
- Repeat this process all around the brim of the roll until it is fully covered with yarn.
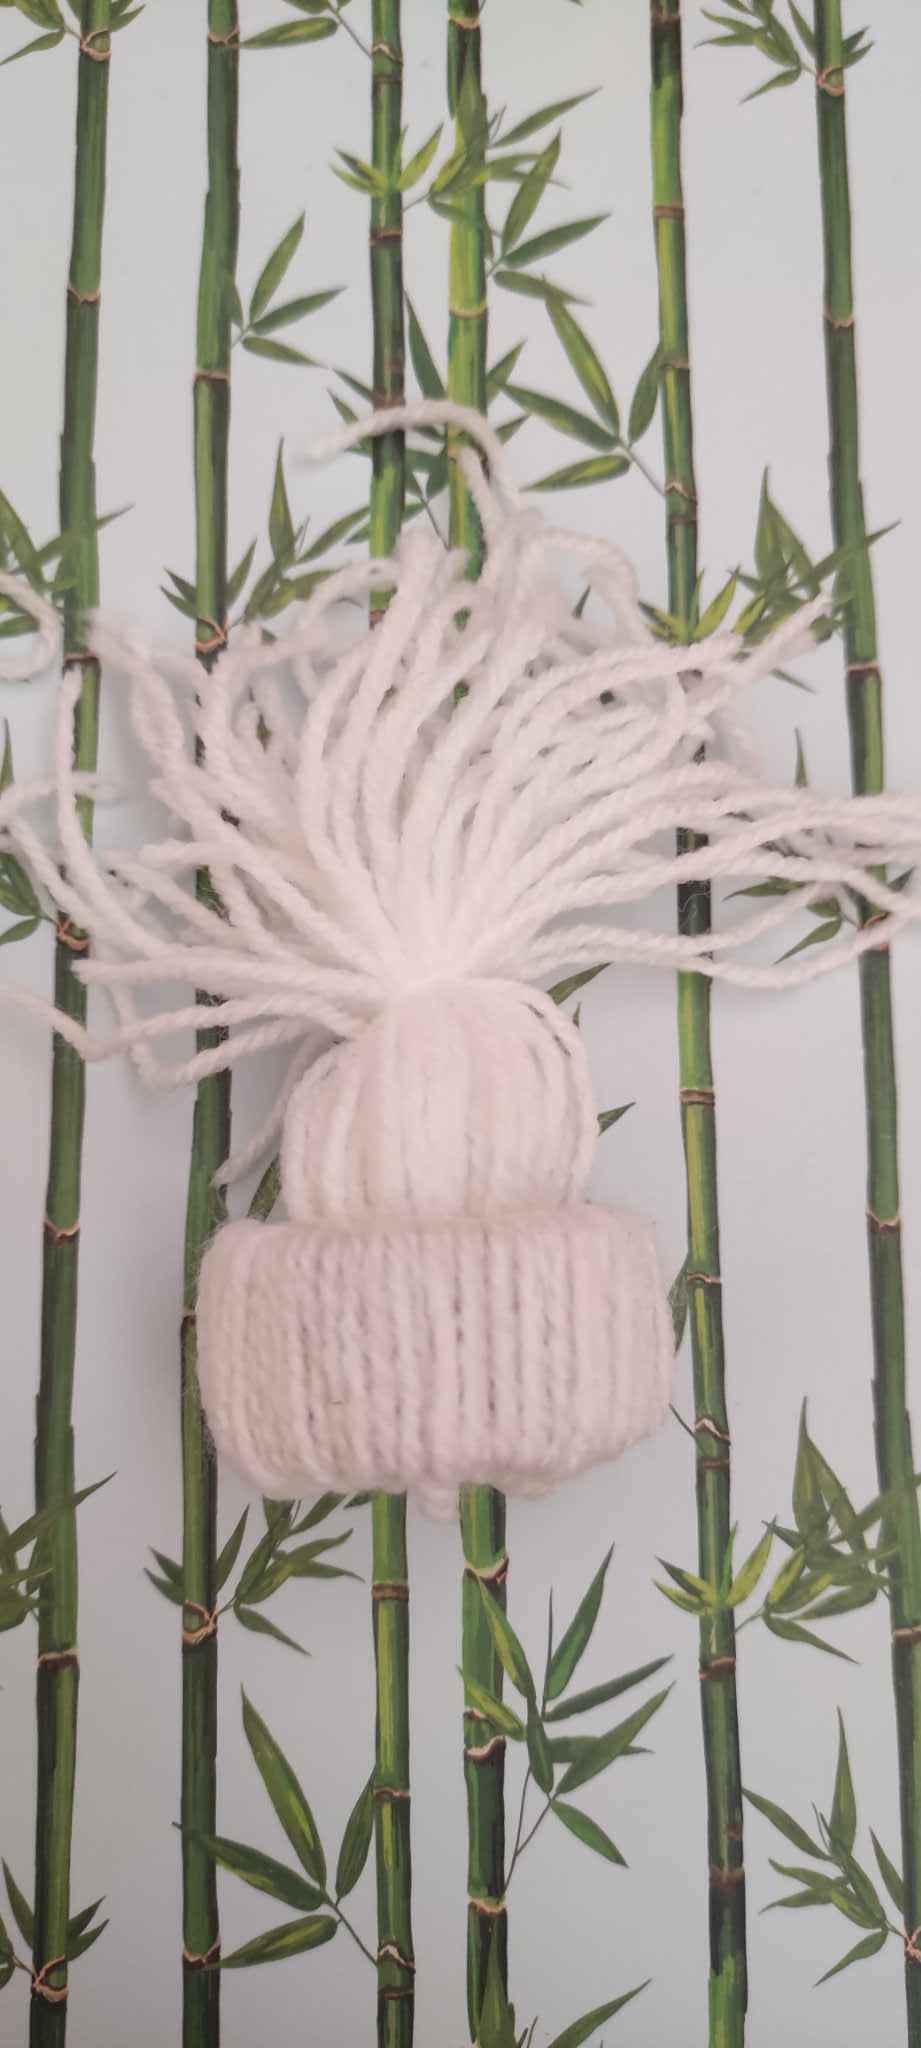
Step 3: Threading Yarn Ends Through the Loop
- Once all strands are attached, gently push all loose yarn ends through the center of the ring, pulling them to the other side.
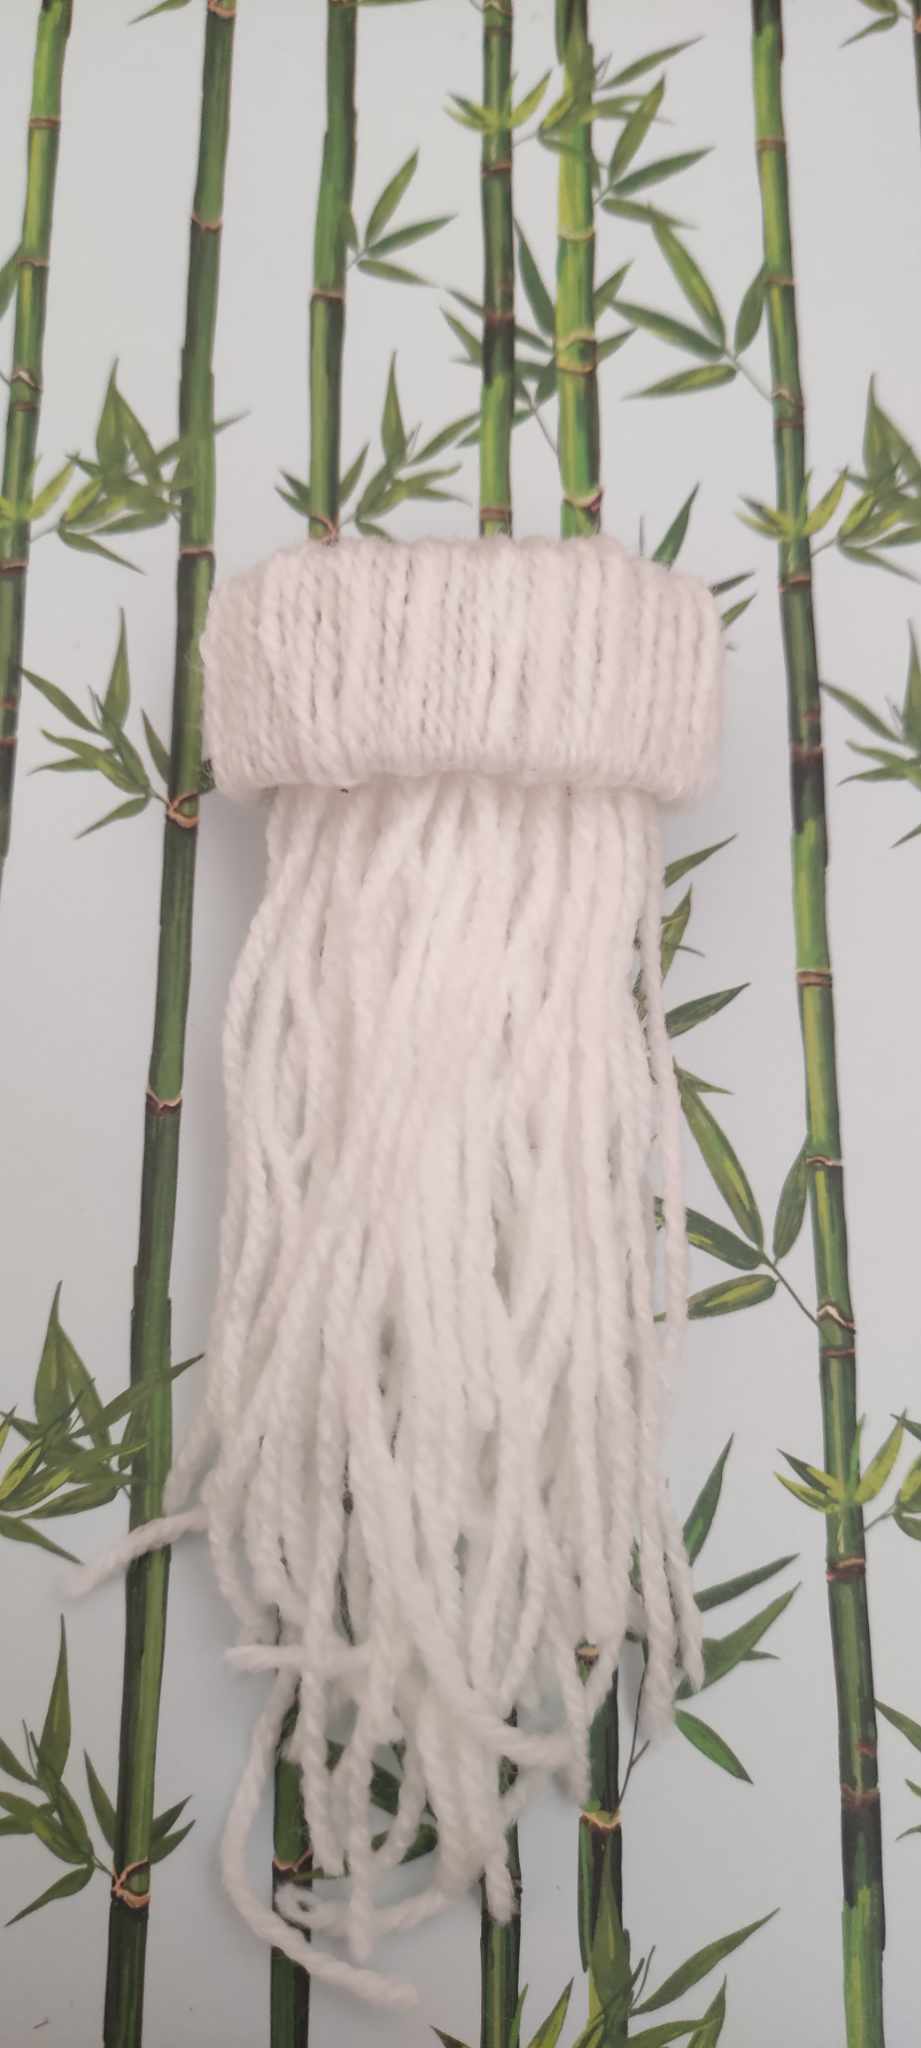
Shaping the Yarn Hat for the Creme Egg Cover
Step 4: Shaping the Hat
- Gather all the yarn strands at the top and tie them tightly with another 12-inch strand of yarn.
- This creates the top of the hat, forming a rounded, beanie-like shape.
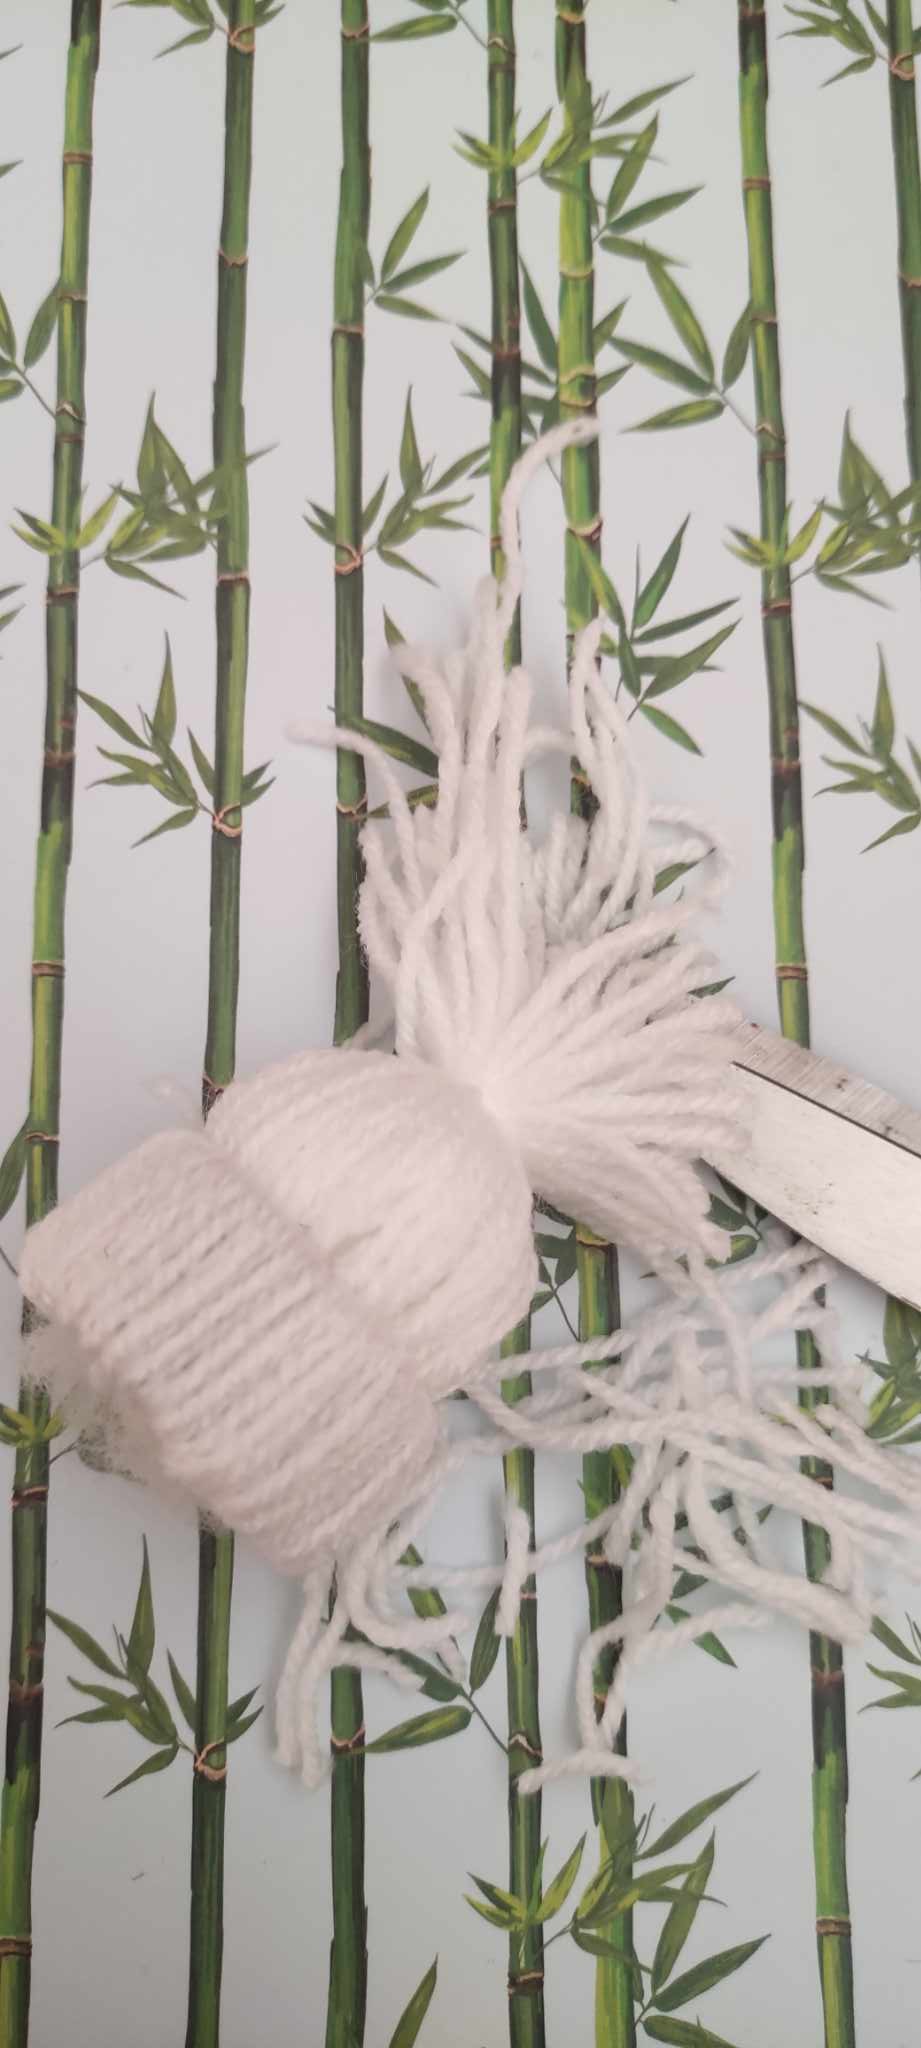
Step 5: Stuffing with Poly-Fill
- Insert a small amount of poly-fill inside the hat to give it volume and shape.
Step 6: Crafting the Pom-Pom Top
- Using scissors, carefully trim the excess yarn at the top to create a fluffy pom-pom.
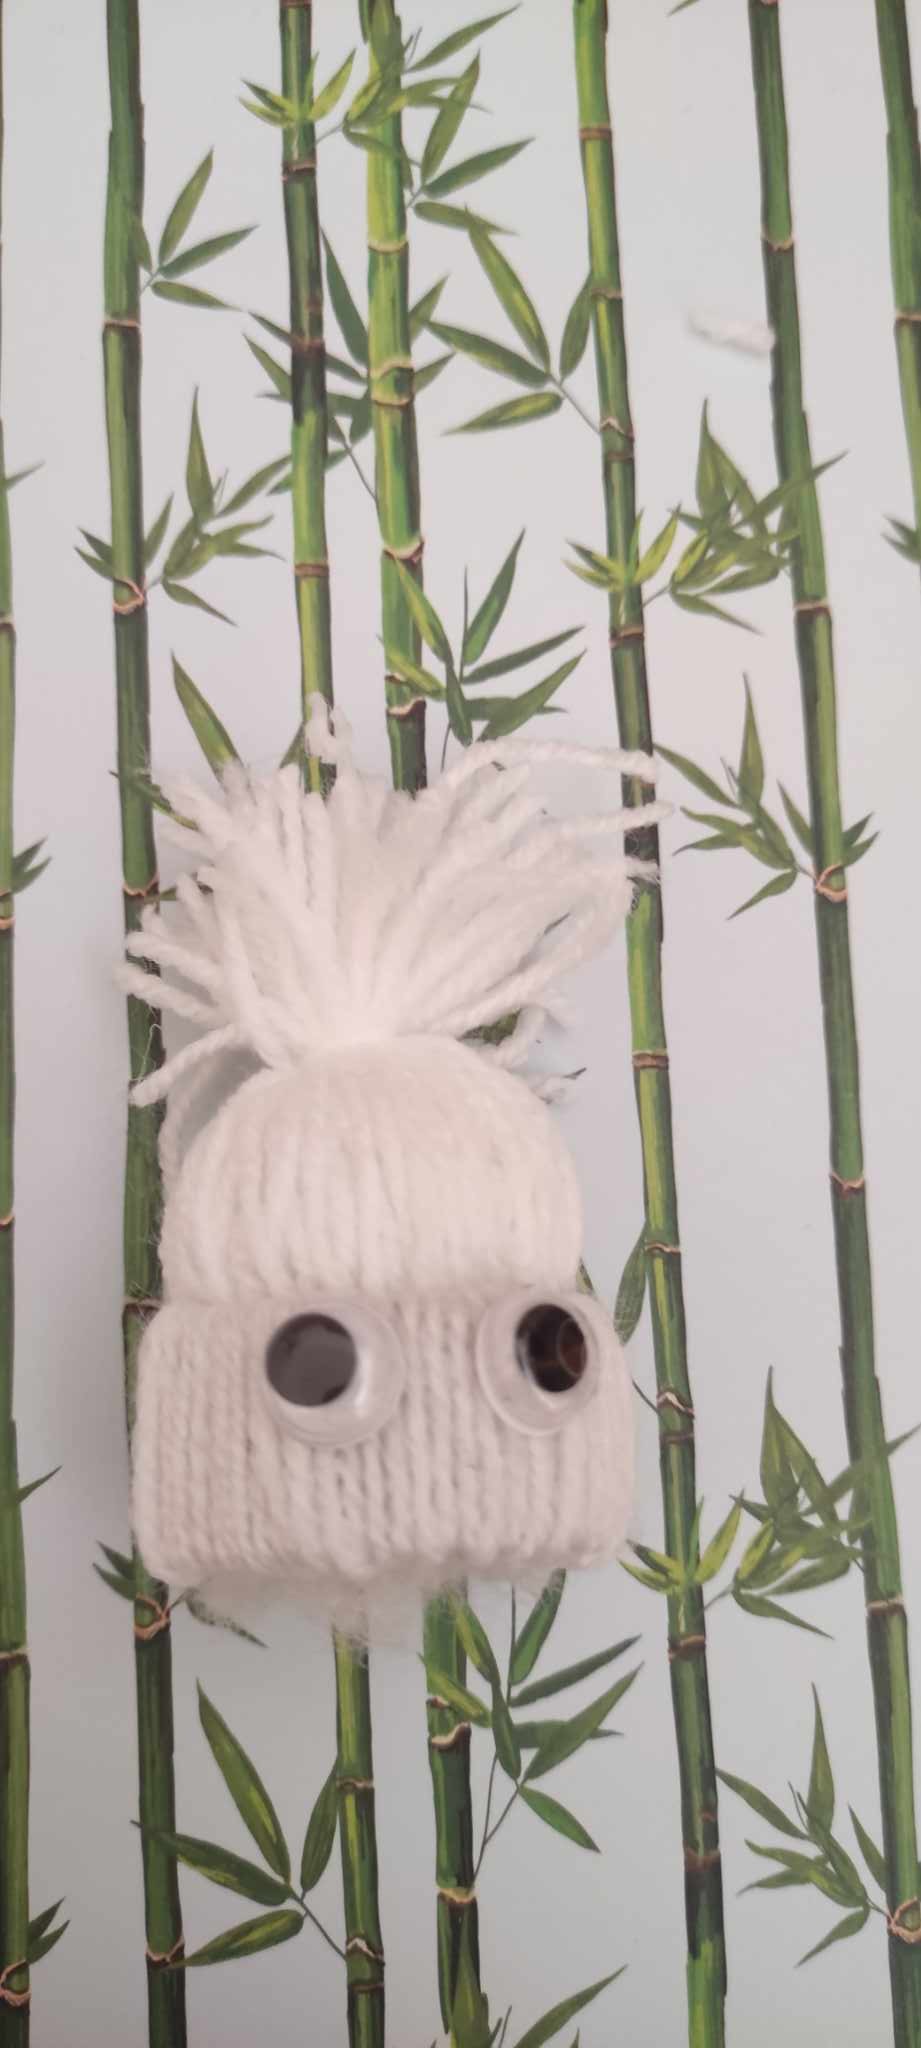
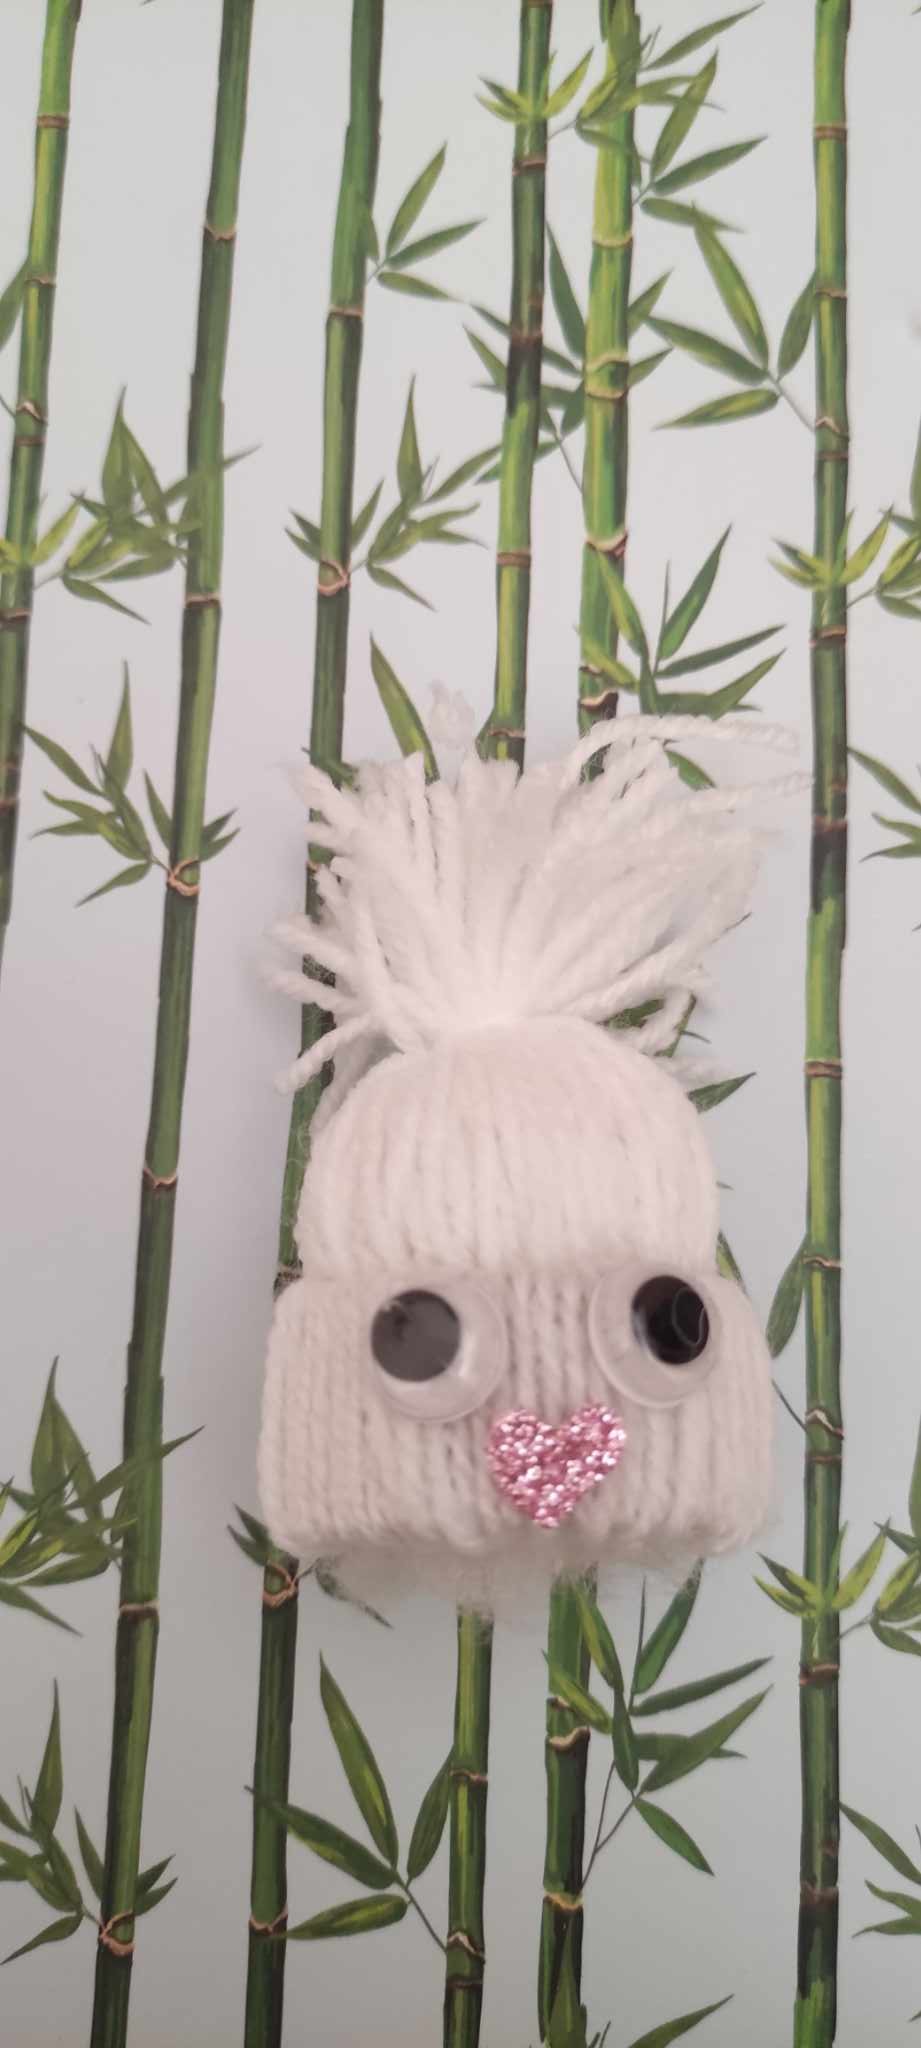
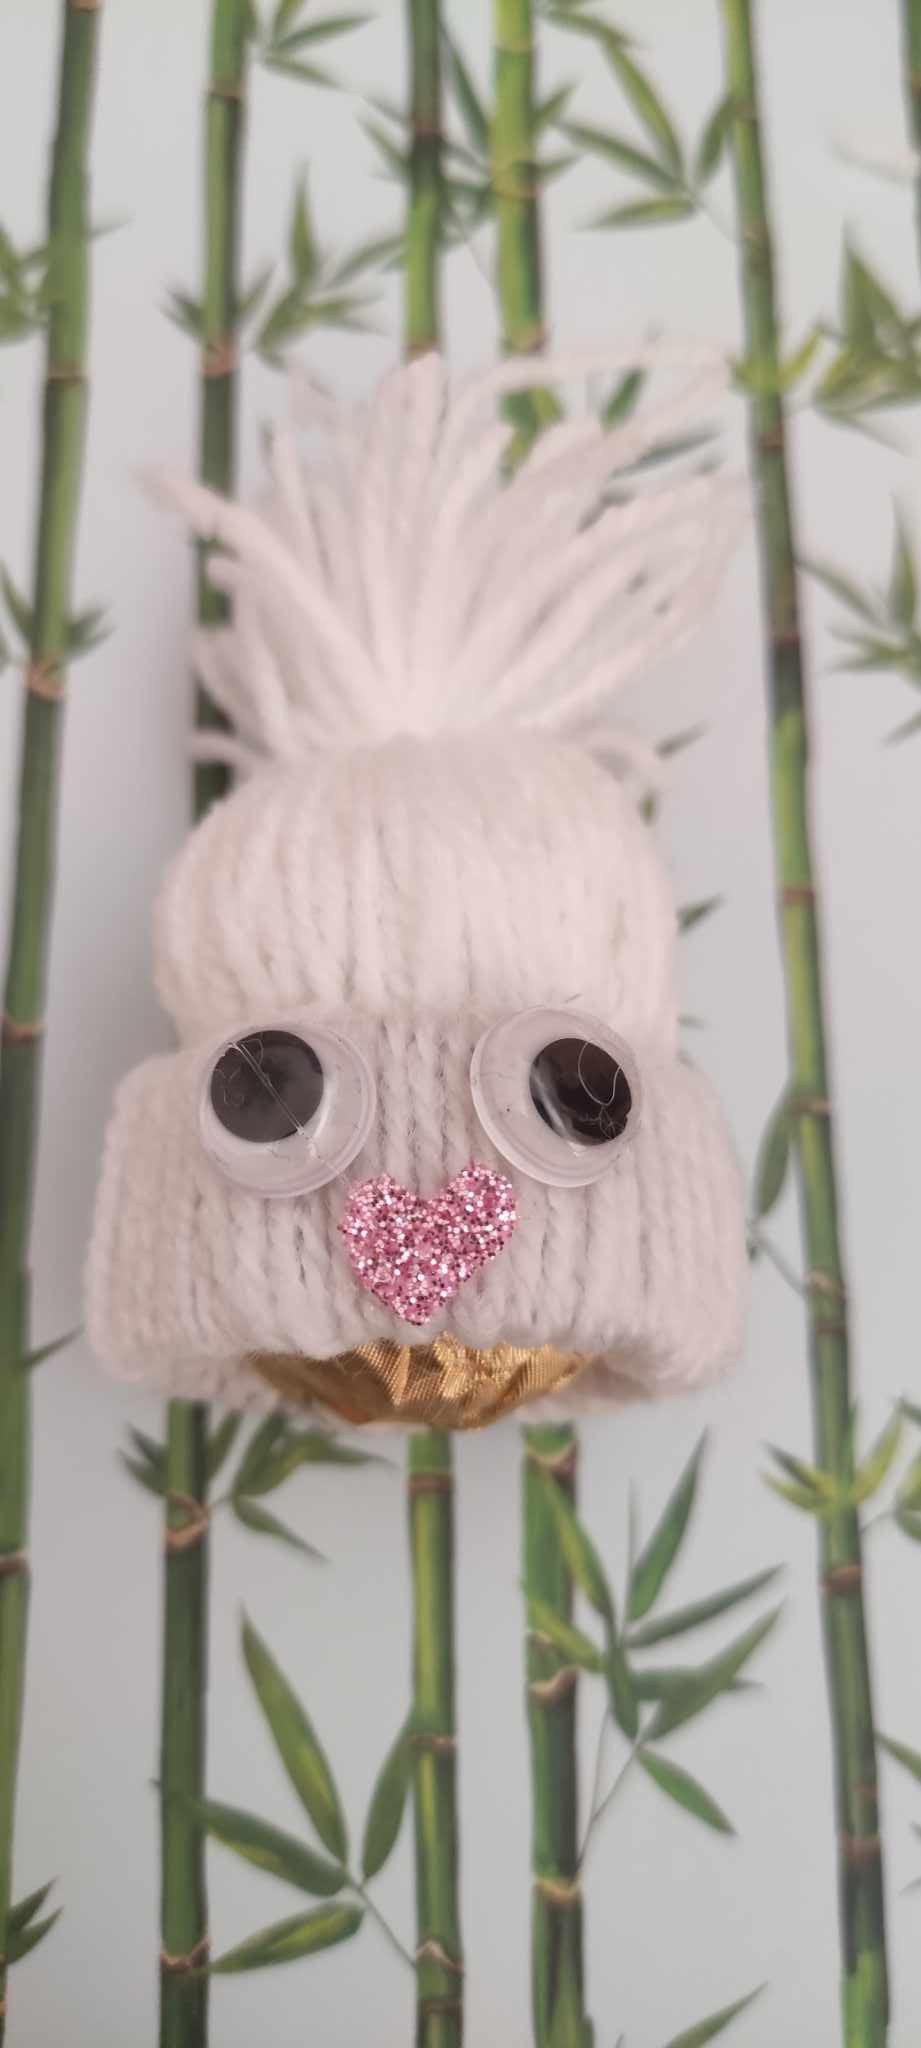
Adding Cute Features for Chicks & Bunnies
Step 7: Adding Googly Eyes
- Peel off the backing from self-adhesive googly eyes or use glue to attach them to the front of the hat.
Step 8: Cutting Felt Embellishments
- For chicks: Cut out a tiny triangle for the beak.
- For bunnies: Cut out two felt ears in different colors and a small mouth/nose shape.
Step 9: Adhering the Felt Features
- Use glue to attach the felt details:
- Chick: Glue the beak just below the eyes.
- Bunny: Attach the ears to the top and the nose/mouth below the eyes.
Final Step: Preparing for the Chocolate Egg!
Step 10: Inserting the Creme Egg
- Remove a bit of poly-fill from the bottom of the hat to make space for the Creme Egg.
- Slide the chocolate egg inside, ensuring it sits snugly but does not lose the hat shape.
Creative Ideas for Your Yarn Creme Egg Covers
- Make them in different colors for a vibrant Easter display.
- Attach a ribbon to the top so they can hang as Easter ornaments.
- Use different expressions by adjusting felt features for a fun variety.
- Personalize them by embroidering initials or small designs onto the hat.
Soft acrylic or cotton yarn in pastel shades works best for a smooth, festive look. Make sure to tie the top tightly and glue the yarn strands inside for extra durability.
They are durable and can be reused each Easter—just replace the chocolate egg. Learn how to make adorable yarn Creme Egg covers for Easter! This step-by-step guide includes chick and bunny designs, perfect for festive decorations and gifts.
CHECK MORE CROCHET PATTERNS