Crochet Granny Tissue Box Tutorial: Easy DIY
Welcome to our Crochet Granny Tissue Box Tutorial! This project is a fun way to make your home look better. It's easy to do and adds a special touch to any room. We'll show you how to do it, step by step, so you can do it too.
Adding granny square crochet designs to your home decor is a fun way to bring nostalgia and charm into any room. A crochet granny tissue box turns a simple tissue box into a vibrant piece of decor. It's both creative and practical.
A crochet granny tissue box has a cover made of granny squares, a pattern loved by many. Each square is crocheted and then stitched together to fit a standard tissue box. This design lets you play with colors and patterns, making it perfect for any home.
Crochet Granny Tissue Box Tutorial

Materials Needed for Your Crochet Project
Starting a new crochet project is both thrilling and a bit scary. To make your Crochet Granny Tissue Box Tutorial a success, you need to have all the right materials. Let's look at what you'll need.
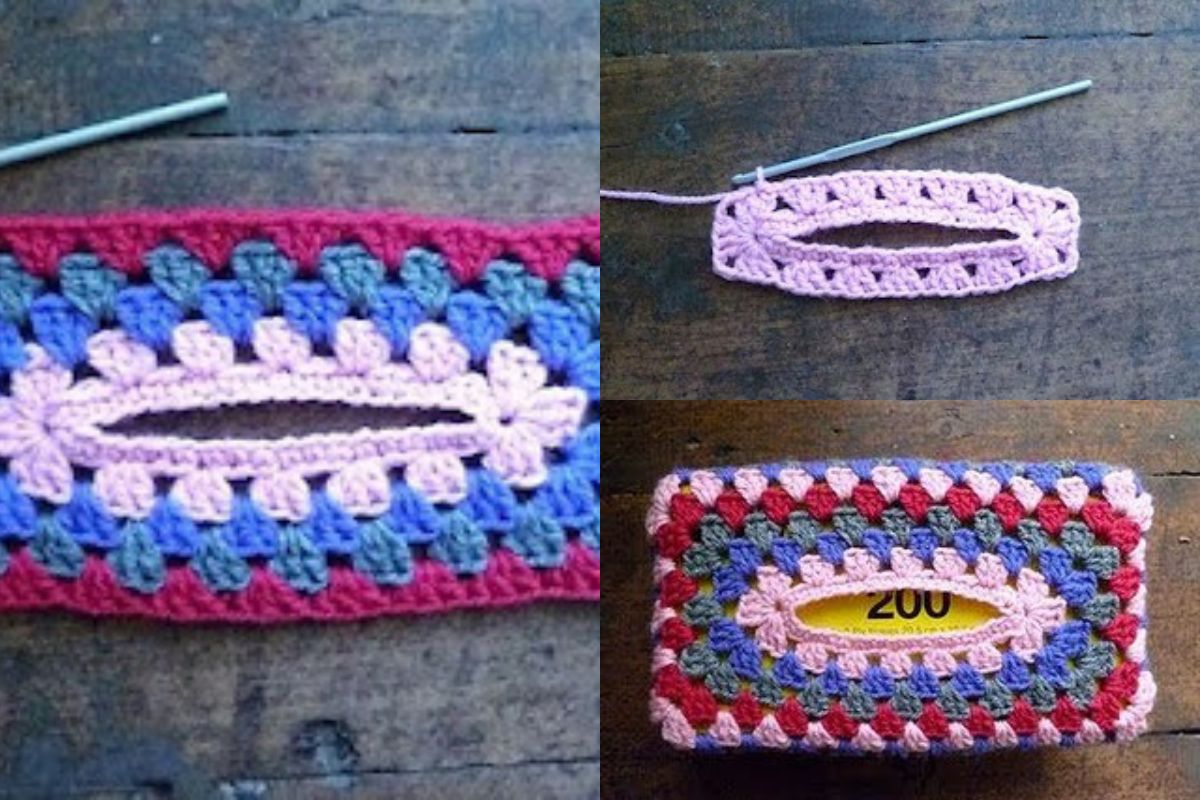
Check FREE Pattern and give lots of support to the artisan
Yarn and Hook Selection
Choosing the right yarn and hook is key for a great look and durability. For this project, a medium-weight yarn is best. Brands like Red Heart and Lion Brand have many colors to choose from.
A size H (5.0 mm) crochet hook works well with medium-weight yarn. This combo helps you get stitches that are just right, making your granny square look neat.
Additional Tools and Supplies
You'll also need some extra tools to make crocheting easier. Make sure you have sharp scissors for cutting yarn. Stitch markers are also helpful, especially for complex patterns, to keep track of your work.
A darning needle is important for weaving in ends. This makes your Crochet Granny Tissue Box look finished. If you want to add something special, consider using decorative buttons or beads.
Step-by-Step Crochet Granny Tissue Box Tutorial
We'll guide you through each step of making a crochet tissue box. This will make your project fun and easy. You'll learn how to make granny squares and put them together into a cover.
Creating Granny Squares
First, pick your yarn and hook size. If you're new, watch crochet tutorial videos to learn the basics. Start with a magic ring and crochet chains and double crochets to make a square. Keep making squares until you have enough for your tissue box.
Assembling the Tissue Box Cover
When your granny squares are done, it's time to put them together. Line up the squares to fit your tissue box and join them with a crochet hook. Follow a guide to make sure the edges are neat and the cover fits well.
Adding Finishing Touches
The last step is to add the final touches to your cover. Use single crochets to create edges and give it a clean look. Watch crochet tutorial videos for ideas to make your project unique. Adding buttons or special stitches can make it even better.
Conclusion
In wrapping up our Crochet Granny Tissue Box tutorial, we hope you now feel ready to start this fun DIY project. You've learned what a crochet granny tissue box is and the benefits of making your own decor. This guide shows you how to make your own decorative tissue box cover.
The step-by-step guide teaches you how to make granny squares and put your tissue box cover together. It also shows how to add the final touches. This project is easy and fun, and it improves your crafting skills. It also makes your home cozier and more personal.
We encourage you to start crocheting today and enjoy the feeling of making something beautiful. Share photos of your finished work on social media to inspire others and connect with fellow crafters. Happy crocheting!
CHECK MORE CROCHET PATTERNS