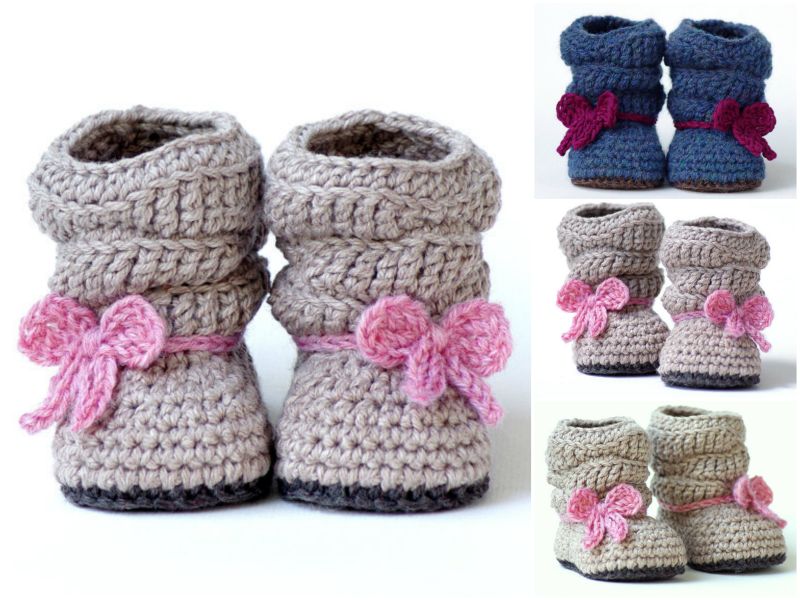
DIY Pretty Crochet Mia Slouch Boots

Crochet Mia Slouch Boots are the perfect combination of style and comfort, providing a handmade, cozy feel with a trendy slouchy look. These boots are great for adding a touch of charm to your fall and winter outfits while keeping your feet snug.
The Mia Slouch Boots pattern is simple to follow and can be customized in size, color, and fit, making it suitable for all skill levels.What a cute and stylish way to keep baby’s feet snug and warm!
These little boots have a great snug, stay-on fit.
DIY Pretty Crochet Mia Slouch Boots
Design features a knit-look ribbed cuff to create a great slouchy look.
Great for the coming season for the whole family and gift delivery.
Sorry there are only paid pattern available on Etsy, but it worth the pay for crochet lovers like us.

Baby Slouch Boot – Mia Boot
Materials Needed for Crochet Mia Slouch Boots
Before you get started, gather the following materials:
- Yarn: Worsted-weight yarn is ideal for this project, providing warmth and durability. Choose wool or acrylic for extra coziness.
- Crochet hook: Use a hook that matches your yarn weight, typically 5mm or 6mm.
- Sole inserts (optional): These give extra structure and support to the boots.
- Scissors: For trimming yarn ends.
- Darning needle: For sewing pieces together and weaving in yarn ends.
- Stitch markers (optional): To keep track of rounds or pattern sections.
Step-by-Step Pattern for Crochet Mia Slouch Boots
The Mia Slouch Boots consist of three main parts: the sole, body, and cuff. This pattern is for creating mid-calf-length boots, but you can adjust the height based on your preference.
Abbreviations
- ch – Chain
- sc – Single Crochet
- hdc – Half Double Crochet
- dc – Double Crochet
- sl st – Slip Stitch
- st(s) – Stitch(es)
Step 1: Crochet the Sole
The sole forms the foundation of your boots, providing shape and structure. For a more durable sole, you can use double strands or add a felt insole.
- Foundation Chain: Ch 12.
- Row 1: Hdc in the second ch from the hook and in each ch across. Ch 2, turn.
- Row 2-4: Hdc in each stitch across, increasing one stitch at each end for a rounded toe and heel. Continue until the sole reaches your foot length.
- Finish Sole: Fasten off and leave a long tail for sewing. Make a second sole for the other boot.
Step 2: Create the Body of the Boot
The boot body is worked in the round, giving it a slouchy, comfortable shape.
- Attach Yarn: Attach yarn to the back of the sole.
- Round 1: Sc in each stitch around the sole to form the base of the boot body. Join with a sl st to the first sc.
- Rounds 2-10: Work hdc in each st around for about 10 rounds to create the boot height.
- Increase for Slouch: For a slouchy look, work 2 hdc in every third stitch for the next 2 rounds.
- Continue Working Even: Hdc in each stitch for 4 more rounds, or until the boot reaches mid-calf length.
Tip: You can add more rounds for a taller boot or fewer rounds for an ankle-length version.
Step 3: Add the Cuff
The cuff gives the boots a finished, snug fit around the top.
- Round 1: Ch 1, sc in each st around the top edge.
- Round 2: Sc, ch 1, skip next st, sc in the next st to create a ribbed texture. Repeat around.
- Round 3-5: Repeat Round 2 until the cuff reaches the desired height.
- Finish: Fasten off and weave in the ends.
Creating your own Crochet Mia Slouch Boots is a rewarding and stylish project that’s perfect for cozy days. With simple stitches and easy customizations, you can craft a pair of boots that suit your style and keep your feet warm. Enjoy the process of making these beautiful slouch boots, and don’t be afraid to add your own creative touches.
Happy crocheting!
CHECK MORE CROCHET PATTERNS