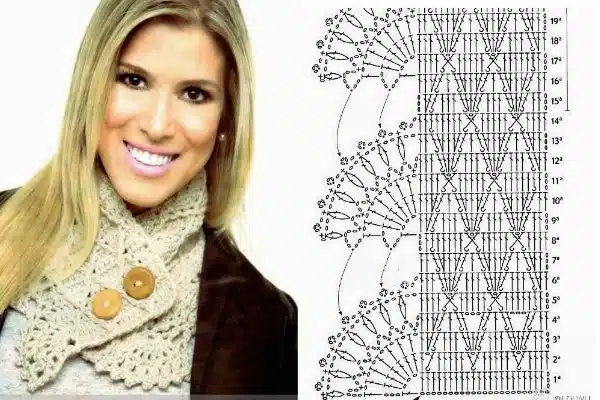
Crochet Neck Warmer with Graphics: A Stylish and Cozy Winter Accessory
The crochet neck warmer is one of the best accessories to have on hand during cold weather. Not only does it keep you warm, but it also adds a stylish touch to your outfit.
A well-made neck warmer can quickly elevate your winter wardrobe, providing comfort and flair at the same time. But what if you could take this accessory to the next level by incorporating beautiful graphic designs into your crochet work?
In this article, we’ll walk you through how to create a crochet neck warmer with graphics. We’ll explore the necessary materials, step-by-step instructions, and how to add graphics to make your neck warmer stand out.
Whether you're an experienced crocheter or just starting, this guide will give you everything you need to make a unique and cozy neck warmer.
Materials You Will Need
Before starting your crochet neck warmer project, it's important to gather the right materials. Here’s what you’ll need:
Essential Materials:
- Yarn: Choose a soft, thick yarn for warmth and comfort. Wool or acrylic yarn works great for neck warmers. You may want to choose two or more colors for the base and graphic designs.
- Crochet Hook: Depending on your yarn, choose an appropriate size hook (usually a 5.5mm to 7mm hook works well for thicker yarn).
- Scissors: For cutting the yarn at the end.
- Yarn Needle: To weave in the ends and assemble the design.
- Stitch Markers: Optional but useful for keeping track of your rounds or stitches.
- Pattern: We’ll provide a simple graphic pattern that you can follow to add beautiful designs to your neck warmer.
Via: www.pnpg.net
Step-by-Step Instructions for Making a Crochet Neck Warmer with Graphics
Now that you have all your materials ready, let’s get started with the step-by-step process. Follow these instructions carefully, and soon you’ll have a cozy and stylish neck warmer to wear or gift!
Step 1: Create the Base of the Neck Warmer
- Start with a foundation chain: To make the base of the neck warmer, begin by chaining the desired length around your neck. For example, chain about 60-70 stitches for a snug fit. Make sure to adjust this length depending on how tightly or loosely you want your neck warmer.
- Join in a round: After you’ve created the foundation chain, join the last stitch to the first stitch using a slip stitch. This will form a circular base for your neck warmer.
- Work in rounds: Now, work in double crochet (DC) or half double crochet (HDC) stitches in a continuous round. This creates a smooth and flexible piece. Keep crocheting until your piece reaches the desired width for the neck warmer. Typically, a width of 6-8 inches works well for a cozy fit.
- Finish off the base: Once the body of your neck warmer is the right size, finish the round and leave a long tail of yarn for sewing the ends together later.
Step 2: Add the Graphic Design
This is the most exciting part! Now that you’ve completed the base of your neck warmer, it’s time to add the graphic design.
- Choose Your Graphic Design: Select a graphic design that speaks to your style. You can create geometric shapes, stripes, or even floral patterns. If you’re new to crochet graphics, simple shapes like squares, triangles, or circles are a great starting point.
- Crochet the Graphic Design:
- Use colorwork techniques such as intarsia or tapestry crochet to add the graphic elements to your neck warmer.
- For example, if you're creating a flower design, you can switch to a different color when crocheting the petals, working into the stitches of the base.
- Follow your pattern to create the graphic designs, ensuring that each stitch is neat and consistent.
- Work in rows or rounds: Depending on the design, you can work in rows (for linear designs) or continue working in rounds (for circular designs). If you’re adding multiple graphics, space them out evenly along the neck warmer to create a balanced look.
- Finish the design: Once the graphic design is complete, ensure all yarn ends are secured with a yarn needle. Weave in any loose ends to keep the piece neat and tidy.
Step 3: Assemble and Finish
- Join the ends: Fold the neck warmer into a tube shape and stitch the ends together with a whip stitch or slip stitch. You can also add a small button or clasp if you want a more adjustable fit.
- Add finishing touches: For a polished look, you can add a simple border around the top and bottom edges of the neck warmer using single crochet or half double crochet stitches.
- Blocking: If necessary, block your neck warmer by gently steaming or wetting it and laying it flat to dry. This will help even out the stitches and give your piece a professional finish.
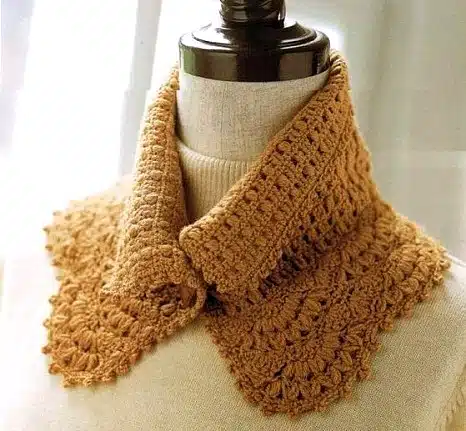
Neck Warmer with Graphics
- Color Choices: When choosing yarn colors for the graphics, consider using contrasting colors to make the design pop. You can also use gradient or ombre yarn for a more subtle design.
- Graphing Your Design: If you're not sure how to add your graphic, sketch it out on a piece of paper or use a graph to guide your work. There are many online tools available to help you design your own crochet patterns.
- Gauge: Always check your gauge before starting, especially if you are using a graphic pattern. You want to ensure the design will fit seamlessly into your neck warmer.
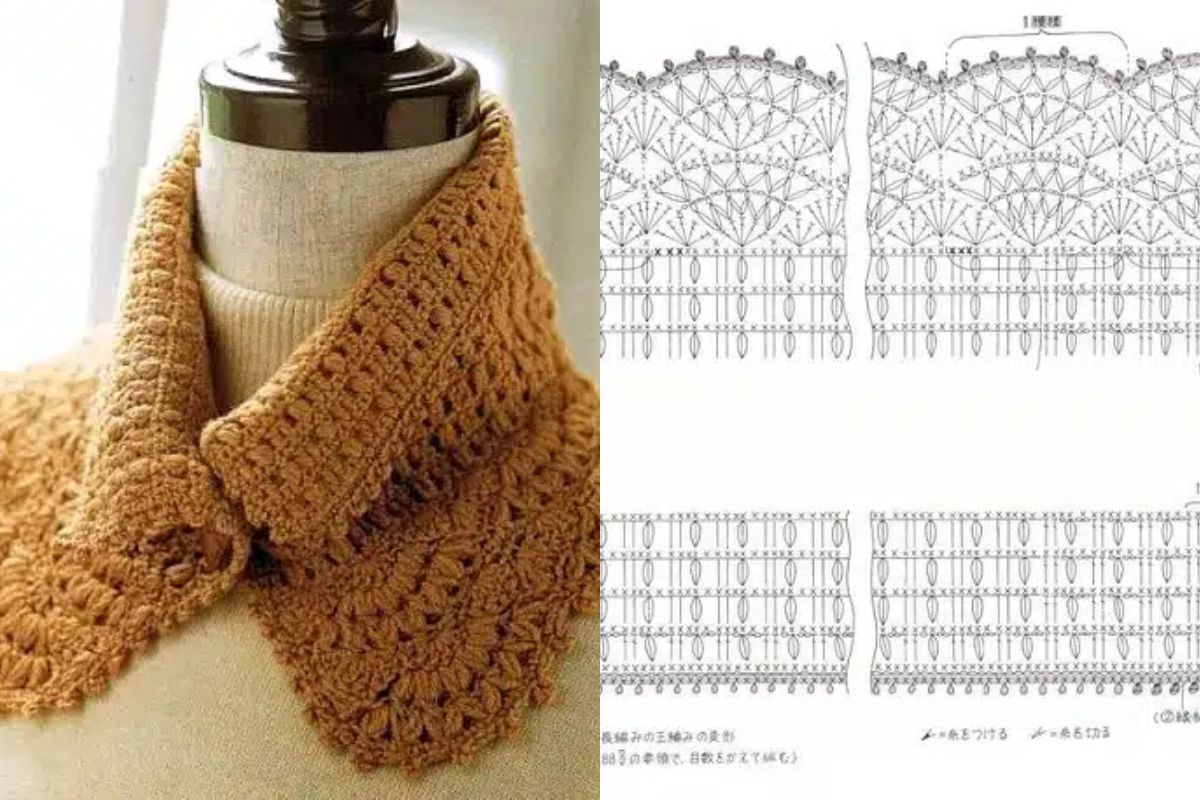
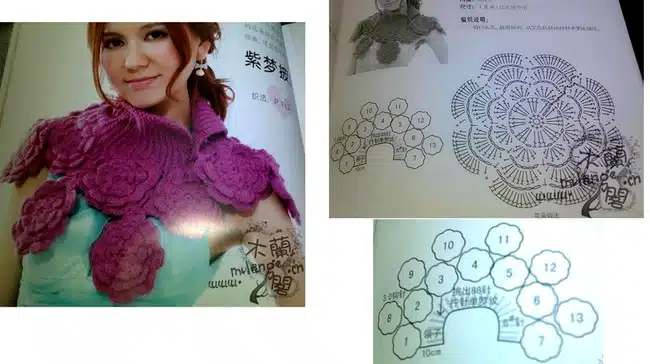
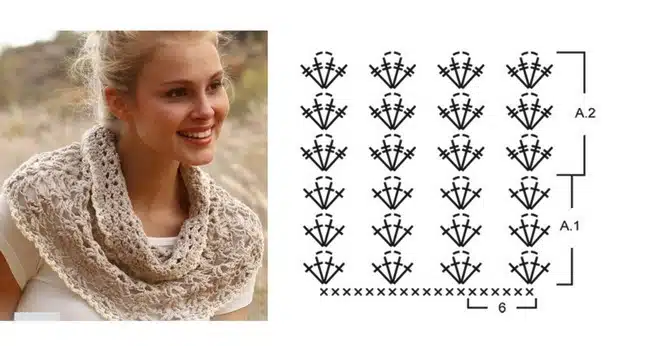
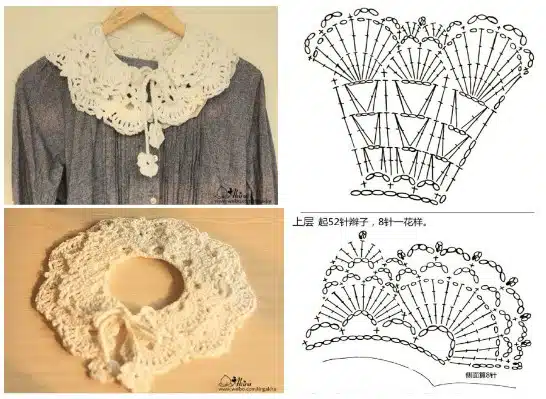
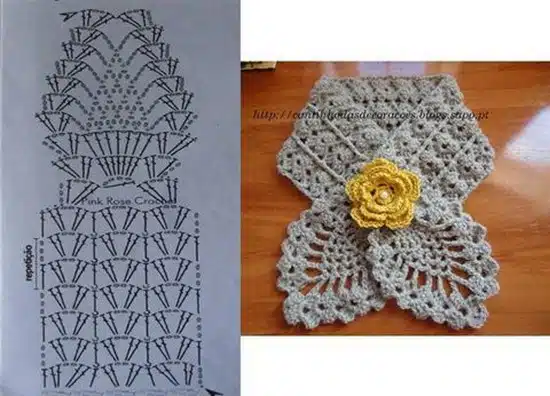
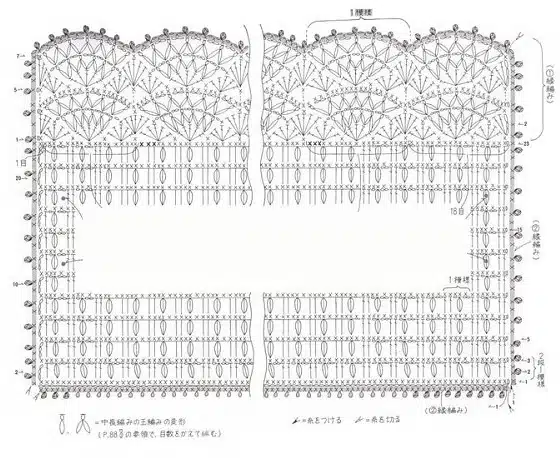
Learn how to create a cozy and stylish crochet neck warmer with unique graphic designs. Follow our detailed guide, featuring tips, techniques, and easy-to-follow diagrams
CHECK MORE CROCHET PATTERNS