Easy Crochet Pumpkin Tutorial: A Simple Fall Project for Beginners


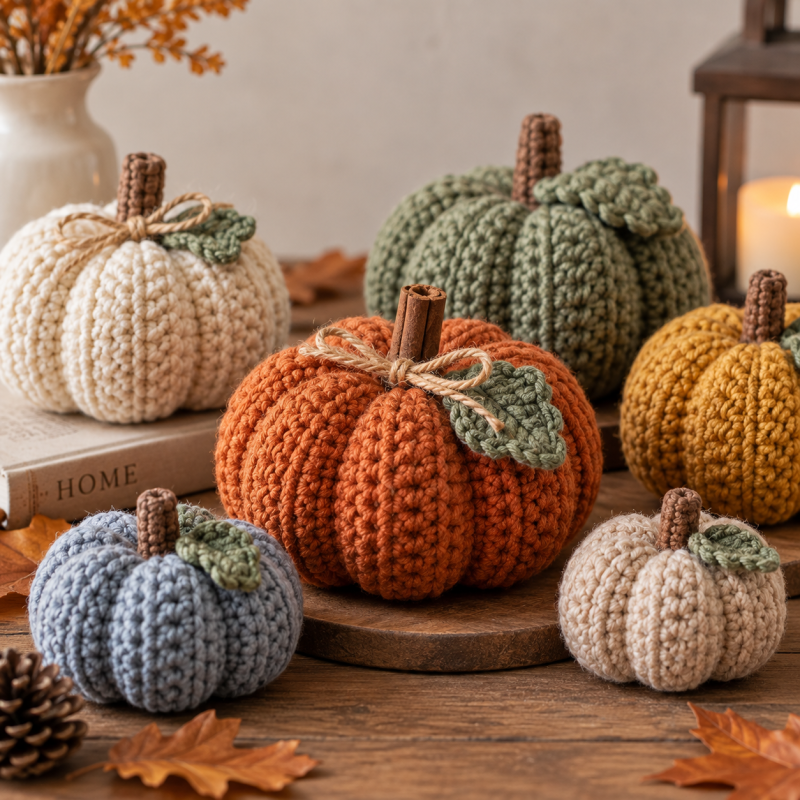
Crochet pumpkins are one of those projects that look far more complicated than they really are. A little yarn, a basic rectangle, some stuffing, and a few carefully placed stitches can become a soft, beautifully shaped pumpkin that works equally well on a fall table, a shelf, or tucked into a seasonal basket.
The best part? You do not need an advanced crochet pattern.
This easy crochet pumpkin tutorial is built around simple stitches and straightforward construction, making it suitable for beginners while still giving experienced crocheters plenty of room to experiment with yarn, texture, size, and color.
Instead of crocheting a complicated three-dimensional shape from the beginning, we will make a rectangle, join the ends, gather the top and bottom, stuff it, and finally sculpt the characteristic pumpkin sections.

- Easy Crochet Pumpkin Tutorial
- Materials You Will Need
- Choosing the Best Yarn for Crochet Pumpkins
- Abbreviations
- Step 1: Make the Foundation Chain
- Step 2: Crochet the First Row
- Step 3: Create the Ribbed Texture
- Step 4: Join the Rectangle
- Step 5: Close the Bottom
- Step 6: Add the Stuffing
- Step 7: Close the Top
- Create a Slightly Flattened Shape
- Natural twig
- Cinnamon stick
- Wine cork
- Crochet stem
Easy Crochet Pumpkin Tutorial
Materials You Will Need
For this beginner-friendly crochet pumpkin, gather the following:
- Medium-weight or chunky yarn
- Crochet hook suitable for your yarn
- Yarn needle
- Scissors
- Polyester stuffing
- Strong matching yarn for shaping
- Cinnamon stick, twig, cork, or crocheted stem
- Optional ribbon, raffia, leaves, or twine
The exact hook size depends on the yarn you choose.
For decorative stuffed projects, using a hook slightly smaller than you would normally choose for the yarn can be useful because it creates a tighter fabric and helps prevent the stuffing from showing through.
Choosing the Best Yarn for Crochet Pumpkins
Almost any yarn can work, but texture dramatically changes the final appearance.
Smooth acrylic yarn
This is inexpensive, easy to work with, and perfect for beginners.
It gives you clear stitch definition and produces a neat pumpkin.
Cotton yarn
Cotton creates a firmer fabric and a more structured finished piece.
It is an excellent choice for modern crochet fall decorations.
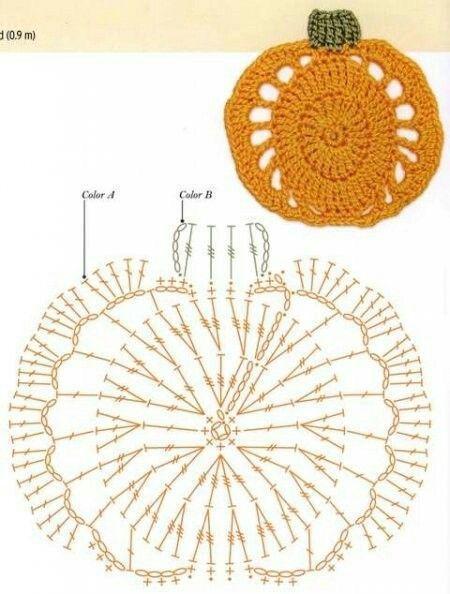
Via: crochet_flowers
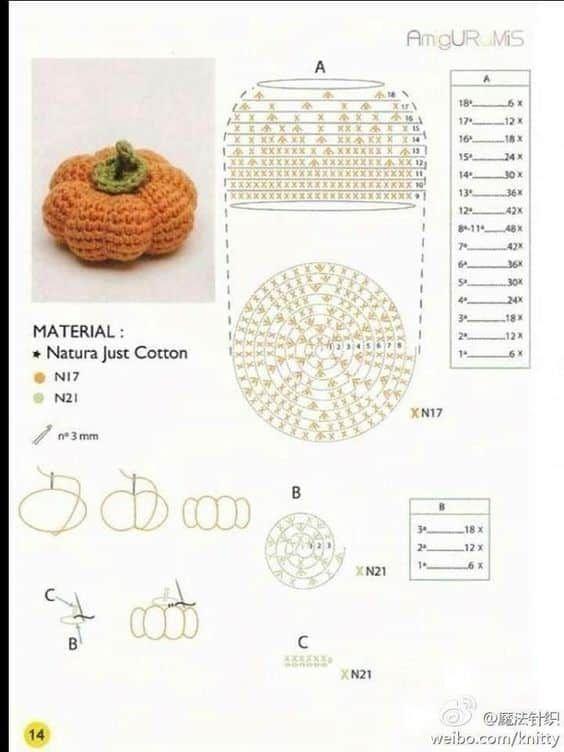
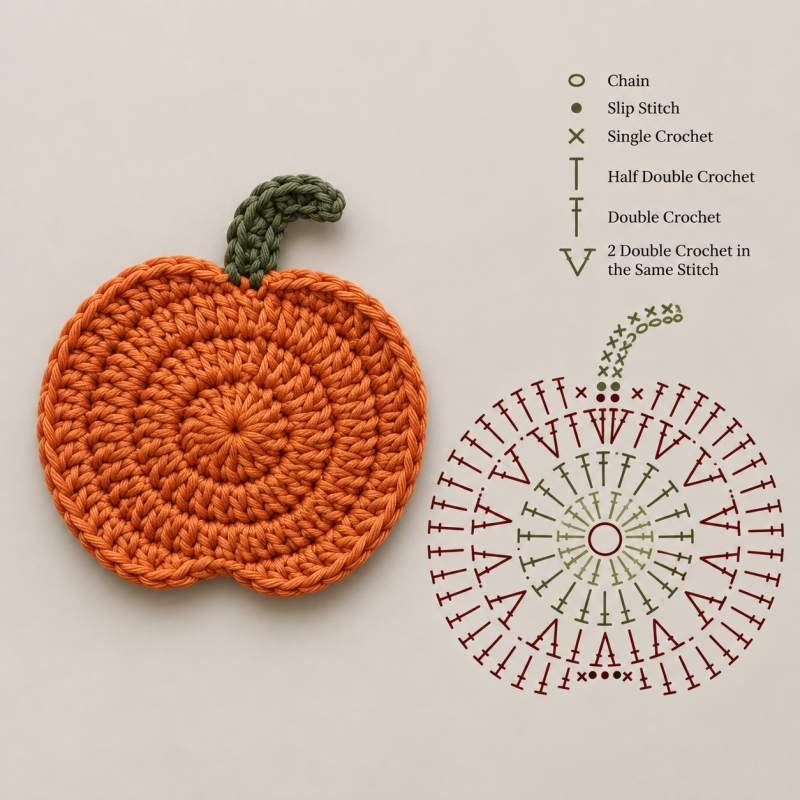
Chunky yarn
Want a pumpkin you can finish quickly?
Use chunky or bulky yarn.
The larger stitches create a soft, cozy appearance and make it possible to complete a small pumpkin surprisingly quickly.
Velvet or chenille yarn
These yarns create plush, luxurious pumpkins.
However, beginners may find them slightly more difficult because individual stitches can be harder to see.
Easy Crochet Pumpkin Pattern
The basic concept is simple:
Crochet a rectangle, turn it into a tube, close both ends, stuff it, and sculpt the shape.
That is really all there is to it.
Abbreviations
This tutorial uses US crochet terminology.
- ch — chain
- sc — single crochet
- sl st — slip stitch
- BLO — back loop only
- st/sts — stitch/stitches
You can also substitute half double crochet if you prefer a slightly softer and taller stitch.
Step 1: Make the Foundation Chain
Chain enough stitches to determine the height of your pumpkin.
For a small pumpkin, try:
Chain 16–20 stitches.
For a medium pumpkin:
Chain 25–30 stitches.
For a large pumpkin, simply increase the number.
Remember that the length of your starting chain determines approximately how tall the finished pumpkin will be.
Step 2: Crochet the First Row
Starting in the second chain from your hook:
Single crochet across the row.
Chain 1 and turn.
At this point you have a completely ordinary crochet rectangle beginning to form.
Step 3: Create the Ribbed Texture
Now work each row using single crochet in the back loop only.
Continue:
- Chain 1.
- Turn.
- Single crochet in the back loop of every stitch.
- Repeat.
Working into the back loop creates raised ridges across the fabric.
These ridges are particularly useful for pumpkins because they naturally suggest the grooves seen on real pumpkins.
Continue until your rectangle is approximately twice as wide as it is tall.
Do not worry about exact measurements.
Wrap the rectangle loosely into a tube occasionally while you crochet. When the proportions look right, you can stop.
Step 4: Join the Rectangle
Fold the rectangle so that the first and last rows meet.
Using your crochet hook, join the two edges with slip stitches.
Alternatively, you can sew them together using a yarn needle.
You should now have a crocheted tube.
Turn the piece so that the seam sits on the inside if you want a cleaner finish.
Step 5: Close the Bottom
Thread a long piece of yarn onto your yarn needle.
Run the yarn through the stitches around one open end of the tube.
Pull firmly.
The opening will begin to close like a drawstring bag.
Continue pulling until the center is almost completely closed, then sew across the opening several times to secure it.
Tie firmly.
This will become the bottom of the pumpkin.
Step 6: Add the Stuffing
Turn the pumpkin so that the closed section sits underneath.
Begin adding polyester stuffing.
Do this gradually.
Push filling toward the edges rather than placing one large ball directly into the center.
The goal is to create a rounded but slightly flattened form.
Do not overstuff
This is probably the most important detail in the entire project.
A pumpkin packed too tightly will become difficult to sculpt.
You need enough flexibility to compress the center and create deep sections.
Step 7: Close the Top
Thread another long piece of yarn.
Run it around the remaining opening just as you did with the bottom.
Before closing completely, add or remove stuffing until you are happy with the shape.
Pull the yarn tightly and secure the opening.
You now have what may look like a soft crocheted ball.
The next step transforms it into a pumpkin.
How to Shape a Crochet Pumpkin
Use a long yarn needle threaded with strong yarn.
Insert the needle through the center of the bottom and bring it out through the center of the top.
Pull gently.
Then take the yarn around the outside of the pumpkin and pass through the center again.
Pull until a groove begins to form.
Repeat this process around the pumpkin.
Usually six to eight sections create a convincing shape.
Space them evenly, but do not become obsessed with perfect symmetry.
Real pumpkins are rarely perfectly symmetrical.
Once you are satisfied, secure the yarn firmly underneath.
Create a Slightly Flattened Shape
For a more realistic appearance, push the top and bottom gently toward one another while tightening the shaping yarn.
This produces the classic squat pumpkin silhouette.
For tall decorative pumpkins, use less compression.
This simple adjustment allows you to create several different shapes from exactly the same crochet construction.
Add the Pumpkin Stem
The stem gives the project its personality.
You have several options.
Natural twig
A short dried twig produces a beautiful rustic result.
Insert it into the center opening and secure it carefully.
Cinnamon stick
This is especially attractive for fall decorating and adds subtle seasonal character.
Wine cork
Cut a cork to size and wrap it in twine if you want something more decorative.
Crochet stem
For a completely handmade pumpkin, crochet a small tube using brown or green yarn.
Stuff it lightly and sew it into place.
Easy Ways to Decorate Your Crochet Pumpkin
The simplest pumpkin may actually be the prettiest, but small details can change its style completely.
Try adding:
- A small crocheted leaf
- Raffia
- Jute cord
- Velvet ribbon
- Wooden beads
- A fabric leaf
- A tiny tag
- Curled yarn vines
For a rustic farmhouse look, combine cream yarn with a natural twig and jute.
For something more elegant, make the pumpkin in velvet yarn and add a satin ribbon.
How to Make Different Pumpkin Sizes
You do not need separate patterns.
Simply change the dimensions of your original rectangle.
Mini pumpkin
Use thin or medium yarn and create a small rectangle.
These are perfect for place settings, bowls, wreaths, and garlands.
Medium pumpkin
This is the most versatile size for shelves and table decorations.
Large pumpkin
Use chunky yarn and a large hook.
Large crochet pumpkins look particularly attractive beside baskets, on benches, or as part of a fireplace display.
Crochet Pumpkin Decorating Ideas
Once you have made one, you will probably want several.
Fortunately, crochet pumpkins are extremely versatile fall decorations.
Place three pumpkins of different sizes on a wooden tray with candles and dried leaves.
Fill a rustic bowl with mini pumpkins.
Arrange cream and sage pumpkins on a mantel for a softer, neutral interpretation of autumn.
You can even use tiny pumpkins as handmade table decorations.
Add a small name card and each pumpkin becomes both a place setting decoration and a gift for your guests.
Final Thoughts
An easy crochet pumpkin is a surprisingly useful project.
It is simple enough for a beginner, quick enough for weekend crafting, and flexible enough to become anything from a tiny autumn ornament to a large statement decoration.
More importantly, the basic pattern is endlessly adaptable.
Change the yarn and the pumpkin changes completely. Alter the size, add deeper sections, try a wooden stem, mix neutral colors, or crochet an entire basket of miniature versions.
There is no complicated shaping formula to memorize.
You start with a rectangle.
A few stitches later, that rectangle becomes something completely different: a soft, textured handmade pumpkin ready for fall decorating.e.

CHECK MORE CROCHET PATTERNS