Crochet Poinsettia Flower

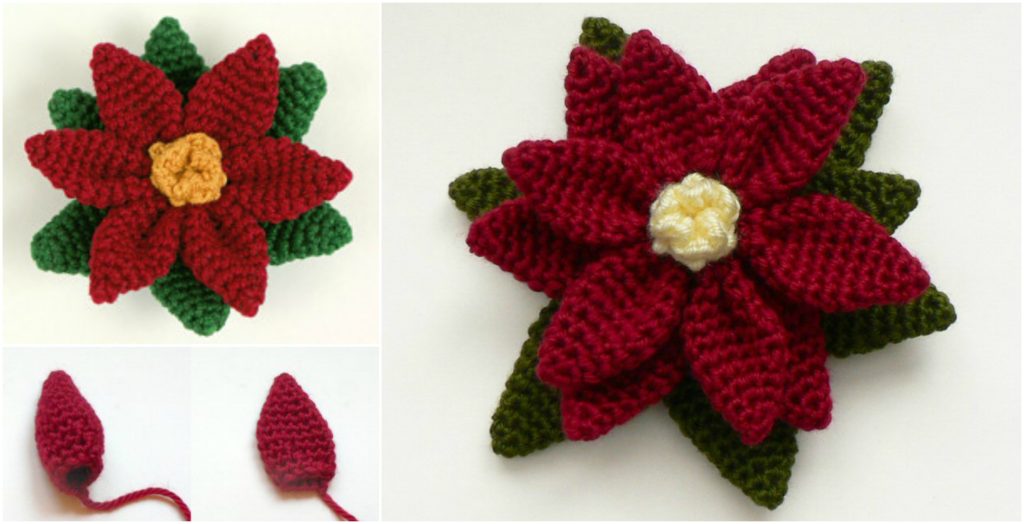
Today we want to show you an article about crocheting this beautiful poinsettia flower that is presented on the photos.
As many of the visitors and viewers of this project say this is the most beautiful poinsettia that I have ever seen.
Also: Festive Crochet Christmas Cutlery Holders for Your Holiday Table
Crochet Poinsettia Flower
The crochet poinsettia flower is a beautiful and festive design perfect for holiday decorations. Known for its vibrant red petals and rich green leaves, the poinsettia brings warmth and cheer to any winter decor.
Whether used as a table centerpiece, an ornament, or a gift topper, this crochet flower can add a handmade touch to your holiday celebrations.
My advise will be to crochet as many poinsettia flowers as possible and to achieve this goal here in this article you are given an opportunity to learn how to crochet it own your own. so that means that there is some kind of instructions attached to the article.

> CHECK HERE THE PATTERN < <
Step 1: Crochet the Flower Center
- Start with Yellow Yarn: Begin with a magic circle or foundation chain of four stitches.
- Round 1: Work six single crochets (sc) into the magic circle or ring and join with a slip stitch to close the round.
- Fasten Off: Cut the yarn, leaving a small tail.
Center Tip: You can make the center more realistic by using small popcorn stitches for added texture.
Step 2: Crochet the Red Petals
- Attach Red Yarn: Join red yarn to any stitch in the flower center.
- Petal Formation:
- Round 1: Chain five stitches, then work one double crochet (dc) into the second chain from the hook, one half-double crochet (hdc) into the next stitch, and finish with a single crochet (sc).
- Slip Stitch: Slip stitch back into the flower center to anchor the petal.
- Repeat: Repeat this petal pattern around the center to create six petals.
- Fasten Off: Cut the yarn and weave in ends.
Petal Tip: Use two shades of red for a more lifelike look, with a darker red as the base and a lighter red on top.
Step 3: Add Green Leaves
- Attach Green Yarn: Join green yarn to the back of the flower center.
- Leaf Formation:
- Round 1: Chain six stitches, work one dc into the second chain from the hook, one half-double crochet (hdc) into the next, followed by two single crochets (sc).
- Slip Stitch: Slip stitch into the flower center to complete the leaf.
- Repeat: Make six leaves around the back of the flower.
- Optional: Add a second layer of leaves by making another round with larger leaves to add fullness.
Leaf Tip: Block or lightly starch the leaves to help them hold their shape and add structure to the flower.
Why Crochet a Poinsettia Flower?
The crochet poinsettia is a versatile and decorative project, ideal for the winter season. Here’s why it’s worth adding to your crochet list:
- Holiday Vibes: The poinsettia’s bright red and green colors capture the holiday spirit.
- Customizable Size: Make your poinsettia as small or large as you want, perfect for various uses.
- Great for Gifting: Handmade poinsettias make thoughtful, memorable gifts.
- Reusable Decor: Unlike real flowers, crochet poinsettias can be stored and reused every season.
Create a beautiful crochet poinsettia flower with this easy guide! Discover patterns, holiday decor ideas, and step-by-step instructions to add handmade charm to your festive decor.
Crochet lovers gave only good feedback to the creator of the tutorial and that means that this instructions are perfect, if you follow them from start to end you will not have any problems or misunderstandings. Enjoy the article and gave a good day. Good luck
CHECK MORE CROCHET PATTERNS