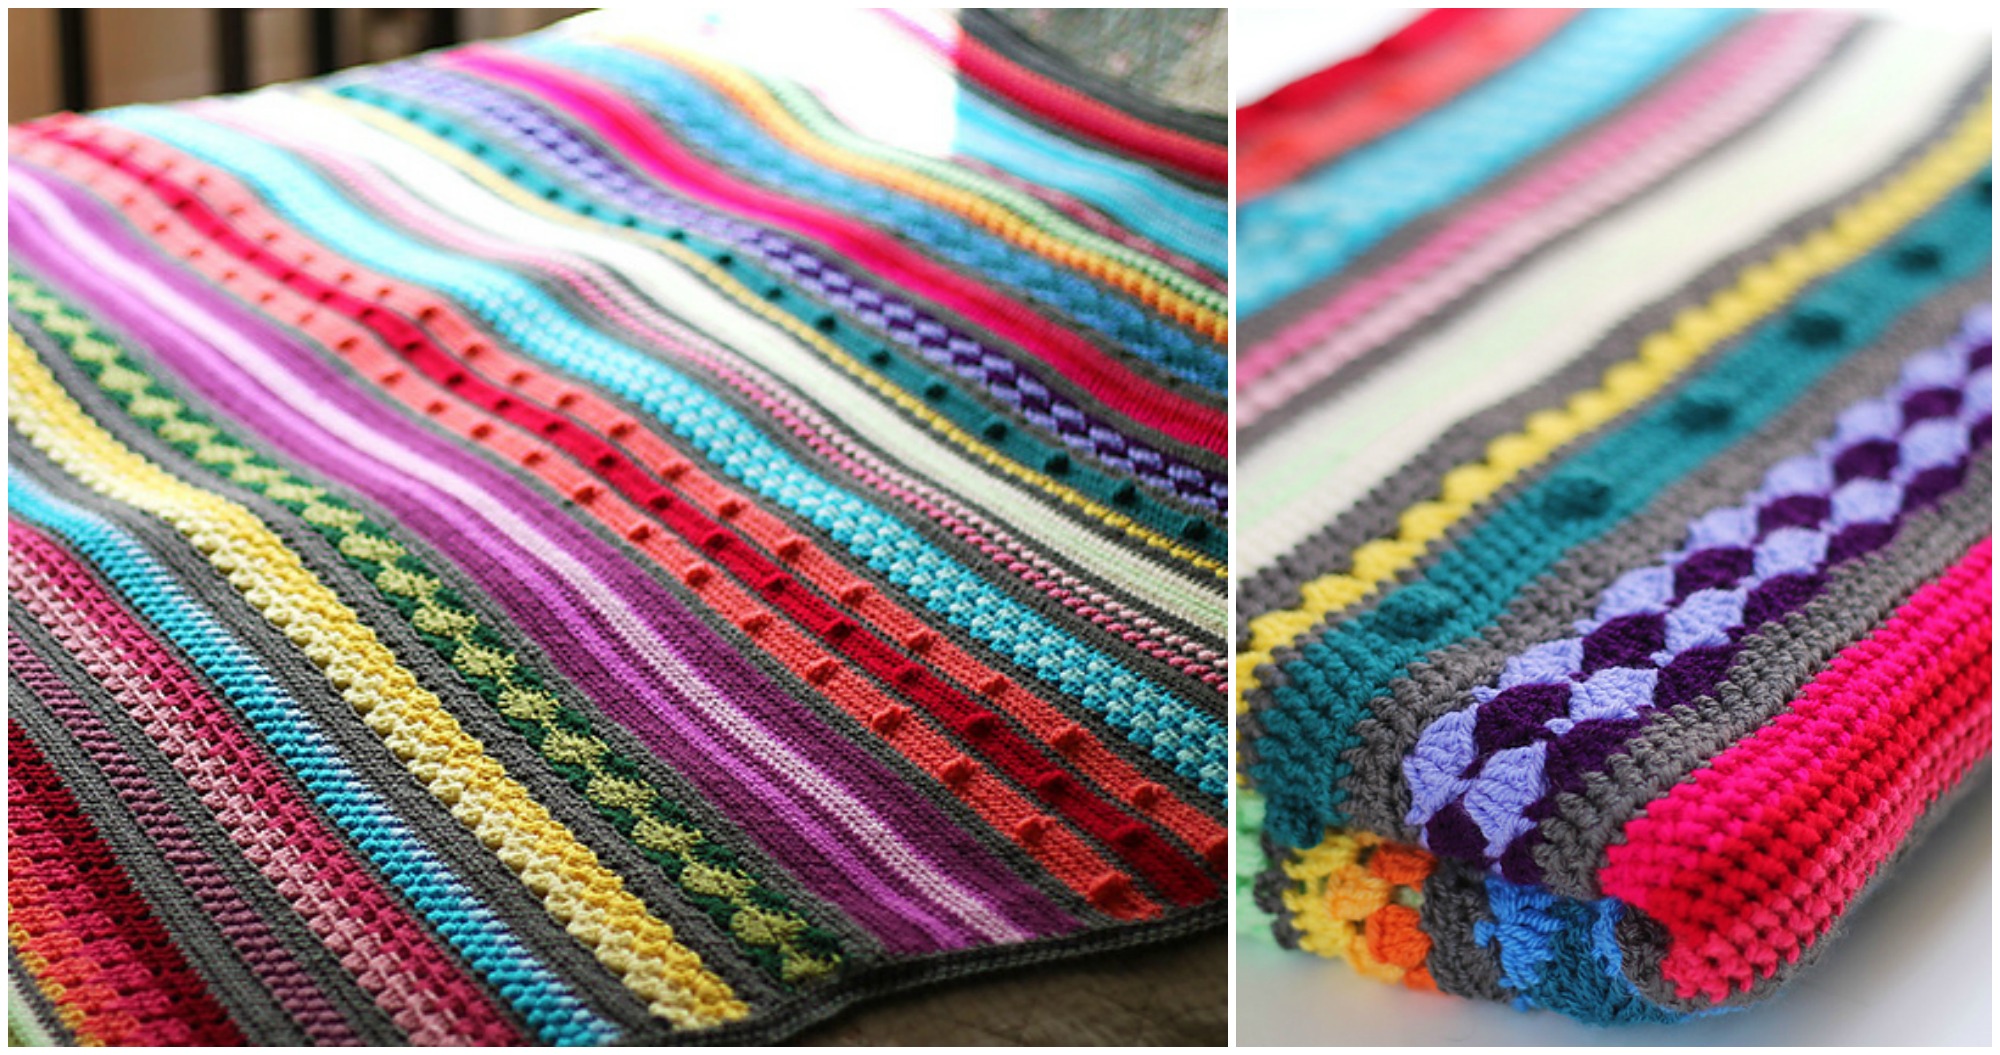
Crochet Rainbow Sampler Blanket

A crochet rainbow sampler blanket is the perfect project to add vibrant colors and playful patterns to your home. This blanket combines a variety of stitches and colors, making it ideal for showcasing different crochet techniques while creating a cozy, eye-catching piece.
Whether you're looking to brighten up your living room or add a pop of color to a bedroom, this project is both visually stunning and enjoyable to make.
In this guide, we’ll walk you through the essentials of creating a crochet rainbow sampler blanket, discuss the best materials, and offer tips on how to customize your blanket for a truly unique creation.
Crochet Rainbow Sampler Blanket
Blanket is what we need when we going home after tough and cold work day and rest in comfortable, warm and beautiful blanket.
You can see on these pictures in this blanket is many different stitches and all of them are pretty.

If you have some experience in crocheting for you it will be easy to crochet Rainbow Sampler Blanket.
>> CHECK HERE THE PATTERN < <
Easy To crochet we have said. Easy, because we have for you free pattern by Kirsten Ballering. Thanks to auhtor for original design and FREE pattern for all. Good luck.
The beauty of a crochet rainbow sampler blanket lies in its versatility and creativity. Unlike traditional blankets that follow a single pattern, a sampler blanket incorporates multiple stitch designs, allowing you to practice various techniques and create interesting textures.
This project is particularly suited for those who love variety and want to try out different crochet stitches in one colorful masterpiece.
Choosing Colors for Your Rainbow Blanket
Color selection is one of the most exciting parts of making a rainbow sampler blanket! Choose colors that suit your style or theme:
- Classic Rainbow: Red, orange, yellow, green, blue, indigo, and violet for a true rainbow look.
- Pastel Rainbow: Soft pastels that add a light and airy feel to the blanket.
- Bold and Bright: Use neon or bold primary colors for a statement piece.
- Muted Tones: Earthy or muted tones for a more subtle and sophisticated rainbow.
Step-by-Step Guide to Crochet a Rainbow Sampler Blanket
Step 1: Plan Your Blanket Size and Pattern
- Decide on Dimensions: Measure your intended area (e.g., sofa, bed) to determine the length and width of the blanket.
- Choose Patterns: Select a variety of stitch patterns. Common choices include:
- Granny Square Stitch
- Ripple Stitch
- Shell Stitch
- Puff Stitch
- Cable Stitch
Step 2: Create Each Color Section
Each section of the sampler blanket will feature a different color and stitch pattern, giving it a unique texture and feel.
- Start with Your First Color: Choose your first color, then crochet the first section in your chosen stitch pattern.
- Continue with Additional Sections: Switch colors for each section, maintaining consistency in the length or number of rows.
- Experiment with New Stitches: Try new patterns for each color. For instance, use a double crochet in one section and a treble crochet in the next.
Step 3: Joining Sections Together
- Join As You Go: Crochet the sections together as you complete each one, or crochet them separately and seam them afterward.
- Slip Stitch or Whip Stitch: Use slip stitches to join sections for a smooth, seamless appearance. Alternatively, use whip stitching if you want the join to be more decorative.
Step 4: Add a Border
Adding a border around your rainbow sampler blanket gives it a finished, cohesive look.
- Simple Single Crochet Border: This creates a clean edge without detracting from the colorful design.
- Picot or Shell Border: For a more decorative finish, try adding a shell stitch or picot border.
- Color Transition Border: Work the border in stripes, alternating the colors used in the blanket.
Step 5: Final Touches
- Weave in Loose Ends: Use your tapestry needle to weave in any loose ends for a polished look.
- Block Your Blanket: Blocking helps smooth and set the stitches, ensuring each section lies flat.
CHECK MORE CROCHET PATTERNS