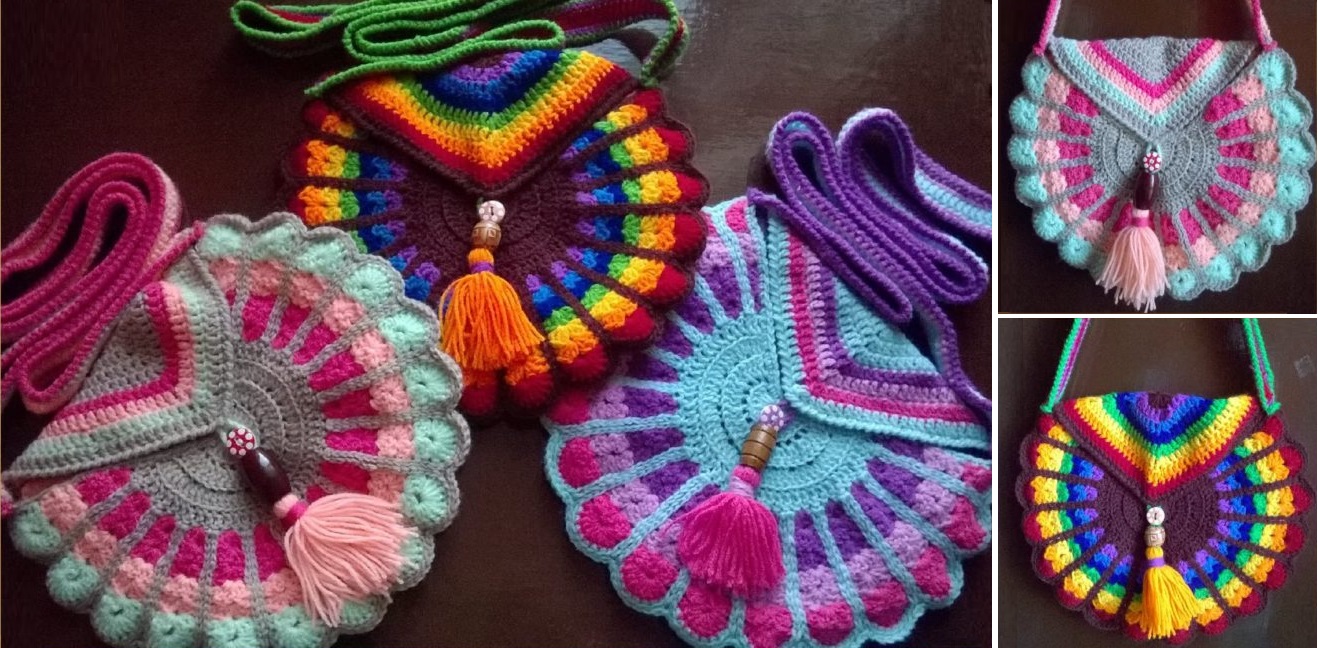
Crochet Peacock Bag

Peacock Bag Tutorial

Today we are going to introduce rather interesting pattern to our beloved and forever returning readers. The project that we are going to discuss today is a peacock bag.

A lot of peacock projects are available for the crochet audience online and various different designs can be easily found if interested, both on our blog and elsewhere.

However it is still a problem to find a peacock inspired project that is worth the time and effort one should give away in order to complete the artwork.

This peacock bag is clearly one of those items and we, for instance, are not going to hesitate a second before putting our hooks and yarn into the work.

Table
  1. Crochet Peacock Bag
  2. Step-by-Step Instructions for Making the Crochet Peacock Bag
    1. Step 1: Creating the Base
    2. Step 2: Creating the Peacock Design
    3. Step 3: Finishing the Bag
    4. Step 4: Optional Lining and Closure
  3. Creative Ways to Use Your Crochet Peacock Bag
    1. 1. Everyday Use
    2. 2. Special Events
    3. 3. Travel Companion
    4. 4. Gift Giving

Crochet Peacock Bag

Peacock Bag Tutorial

> CHECK HERE THE PATTERN < <

Step-by-Step Instructions for Making the Crochet Peacock Bag

Step 1: Creating the Base

  1. Foundation Chain:
    • Start by chaining a length that suits the base size of your bag. A common starting chain for a medium bag is around 30-40 stitches.
    Example:
    Ch 35.
    
  2. First Row:
    • Work a row of single crochet in each chain.
    Row 1: Sc in each ch across. (35 sc)
    
  3. Building Up the Sides:
    • Continue to work in rows of single crochet until the bag reaches the desired height (approximately 10-12 inches).

Step 2: Creating the Peacock Design

  1. Changing Colors:
    • Once the base is complete, switch to the main colors for your peacock design. For example, use a bright blue to create the body.
  2. Forming the Body:
    • Use double crochet stitches to create the shape of the peacock body on one side of the bag.
    Example:
    Row 1: Ch 3 (counts as first dc), 4 dc in the next st, 2 dc in the next st, *5 dc in the next st for feathers; repeat around.*
    
  3. Adding Detail:
    • Use a contrasting color to add the details of the peacock's feathers. You can do this with shell stitches to create a layered effect.

Step 3: Finishing the Bag

  1. Top Edging:
    • Once the peacock design is complete, work a round of single crochet around the top edge of the bag to give it a finished look.
    Example:
    Round 1: Sc in each st around.
    
  2. Creating Straps:
    • For the straps, chain a length suitable for your desired strap size (around 50-60 chains for a comfortable length), then work back in single crochet.
  3. Attaching the Straps:
    • Sew the straps securely to the sides of the bag using a yarn needle.

Step 4: Optional Lining and Closure

  1. Adding a Lining:
    • Cut fabric to fit the inside of the bag and sew it in place for added durability and structure.
  2. Adding a Closure:
    • If desired, attach a magnetic snap closure to secure the bag.

Creative Ways to Use Your Crochet Peacock Bag

1. Everyday Use

  • Perfect for daily errands or casual outings, the peacock bag can hold all your essentials while adding a pop of color to your outfit.

2. Special Events

  • Use your crochet bag for weddings, parties, or other special occasions to complement your outfit and showcase your crochet skills.

3. Travel Companion

  • The lightweight and unique design of the peacock bag make it an excellent travel accessory for holding personal items on the go.

4. Gift Giving

  • Gift your handmade peacock bag to a friend or loved one as a thoughtful and personalized present.

We have found a complete pattern for this project and some video explanations for further creative additions to make.

Adjust the number of chains and the height of the body in your pattern to create bags in various sizes.

Feel free to add beads, tassels, or other embellishments to personalize your bag further.

Discover how to create a stunning crochet peacock bag with our detailed guide. Explore patterns, styling tips, and care instructions for this eye-catching accessory!

How useful was this post?

Click on a star to rate it!

Average rating 4.6 / 5. Vote count: 13

No votes so far! Be the first to rate this post.

CHECK MORE CROCHET PATTERNS