How to Crochet Sunmote Doily
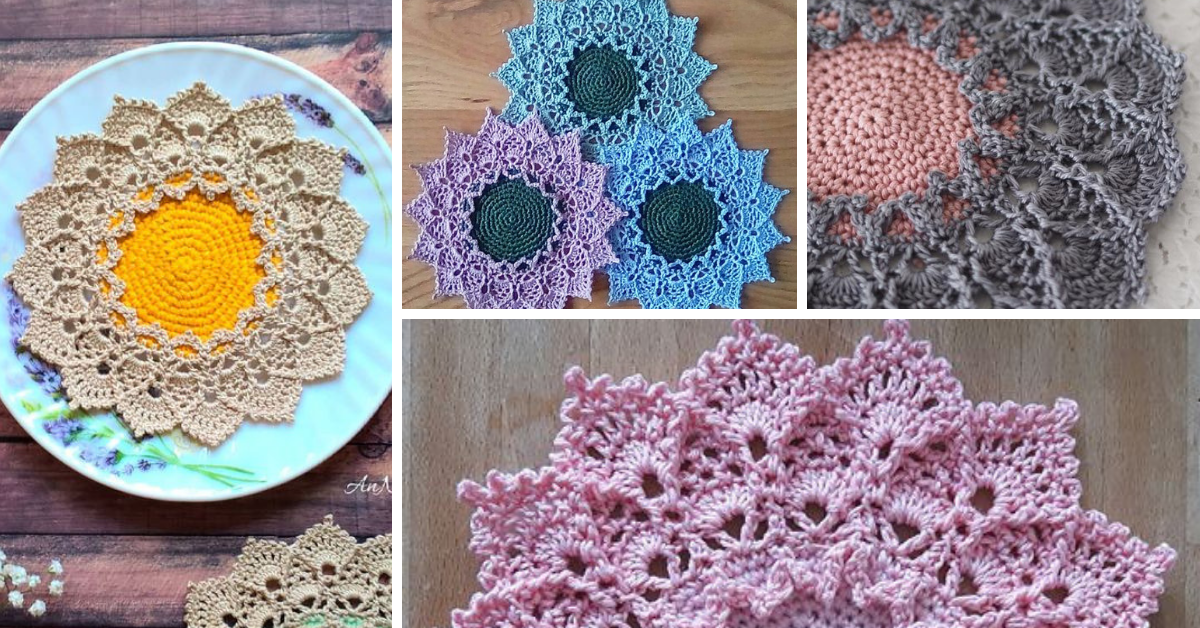
Doilies are delicate and tasteful. They are wonderful for adding a vintage touch to your home decor.
You can place them under a potted plant or a vase for a lovely table accent that will give your room a whole new look.
This Sunmote Doily Free Crochet Pattern is easy to crochet. It is great for beginners because it works up quickly and doesn’t require much yarn. It also makes a wonderful gift for anyone on your list.
Crochet Sunmote Doily Pattern
>> CHECK HERE THE PATTERN < <
If you want to give your doilies a more modern look, you can use brightly colored yarn or multi-colored yarn to create a look that’s fun and funky.
Happy crocheting.
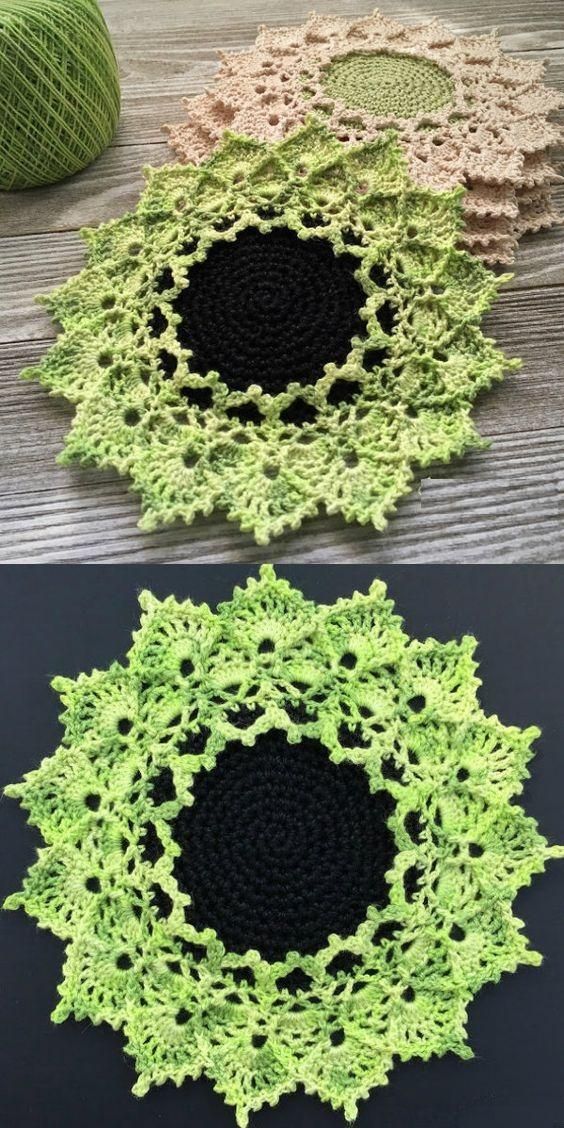
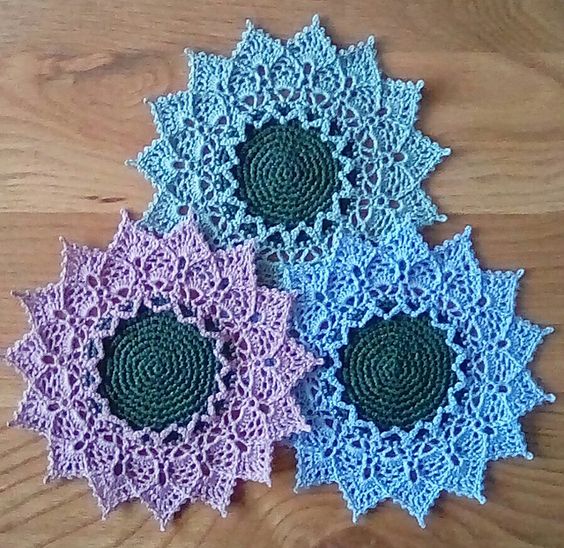
Crochet Sunmote Doily Ideas

Via Pinterest
Via Pinterest
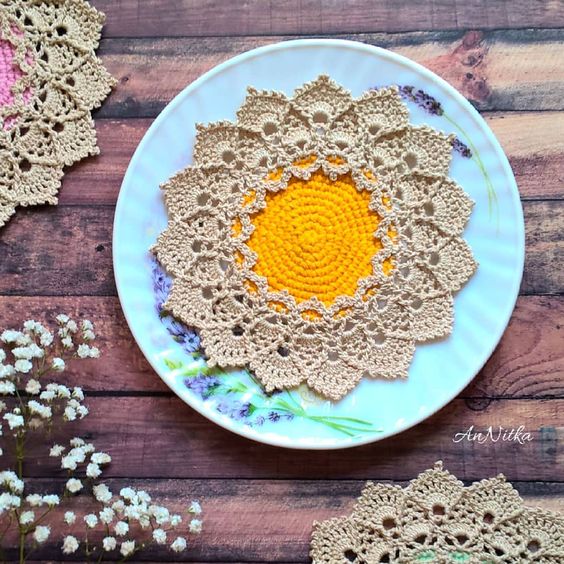
Via: an_nitka_
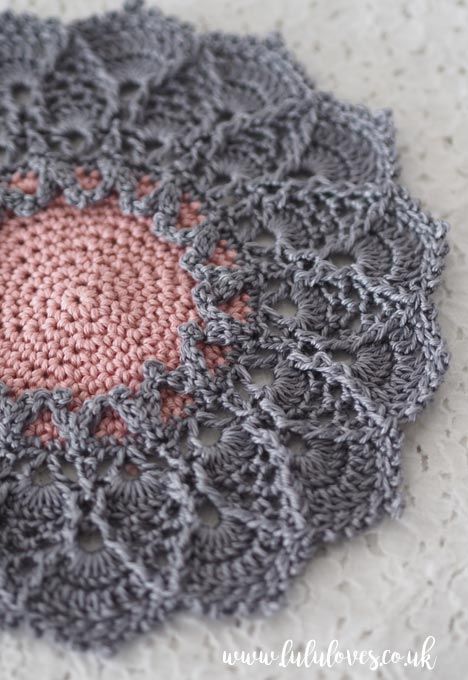
Via: www.lululoves.co.uk
Step-by-Step Guide to Crochet the Sunmote Doily
Step 1: Make the Foundation Ring
Start with a magic ring or a small chain loop to begin the foundation. A magic ring is great because it allows you to pull it tight later, preventing any gaps.
- Make a Magic Ring: Wrap your yarn around your fingers to form a loop. Insert the hook through the loop, yarn over, and pull through. You now have your magic ring.
- Alternatively, you can create a chain of 4 and join with a slip stitch to form a circle.
Step 2: Work the First Round
The first round usually starts with a set of double crochet (dc) stitches to form the base of your doily.
- In the ring, crochet 12 double crochets (dc). Join the round with a slip stitch in the top of the first double crochet.
- Pull the magic ring tightly to close up the center.
Step 3: Begin the Lace Pattern
In the second round, you will begin to form the delicate lacework of the Sunmote Doily.
- Round 2: Chain 3 (this counts as your first double crochet), and in the same stitch, work 2 double crochets. This will create the first "corner" of your doily.
- Chain 1, skip 2 stitches, and repeat the process of making 3 double crochets in the next stitch. This is the beginning of the lace pattern that will create the scalloped edges of the doily.
- Repeat this process around the round, ensuring that you leave a gap between each set of 3 double crochets by chaining 1 between the clusters.
- Join with a slip stitch to the top of the starting chain.
Step 4: Continue with Additional Rounds
The next rounds will continue building on the lace pattern, adding more texture and complexity.
- Round 3: Start with chain 3, then 2 double crochets in the same space. Chain 1, and in the next space, work 3 double crochets. Chain 1 between each set of double crochet clusters.
- Repeat the process, working in the spaces between the clusters from the previous row. This round will increase the size of the doily and create the circular lace effect.
- Continue to repeat these rounds, increasing the stitch count and the number of double crochet clusters.
Step 5: Final Rounds and Border
Once the main body of the doily is complete, you can work a final border to finish the design.
- Final Round: In the final round, add a picot stitch border or any decorative stitch like shell stitches or clusters to give the doily a delicate, finished look.
- To create picot stitches, chain 3, and then slip stitch back into the first chain. This will create a small, pointy decorative stitch on the edge.
- After finishing the final round, cut the yarn and weave in any loose ends with the tapestry needle.
Step 6: Block the Doily
Blocking the Sunmote Doily helps to open up the lacework and gives it a professional finish.
- Lay the doily flat on a surface and use pins to stretch it into the desired shape.
- Spray with water or use a damp cloth to lightly wet the doily.
- Let it dry completely before removing the pins, leaving your doily crisp and perfectly shaped.
Creative Ideas for Personalizing Your Sunmote Doily
- Color Variations: Experiment with different yarn colors, such as using pastels for a soft and delicate look, or go for bold, contrasting colors for a more modern feel.
- Use Thread: For a truly delicate effect, use cotton thread instead of yarn for an even finer, lace-like finish.
- Embellishments: You can add beads, sequins, or pearls to the center of the flowers or along the edges for extra texture and sparkle.
- Use as Home Décor: Besides using it as a table centerpiece, this doily can also be framed as a wall hanging or used as a decorative piece on a shelf.
CHECK MORE CROCHET PATTERNS