Beautiful Crochet Spiral Square - Get Inspired
Are you a crochet enthusiast seeking a new project that will both challenge your skills and result in a stunning piece of art? Look no further!
The Beautiful Crochet Spiral Square is the perfect endeavor to unleash your creativity and explore the mesmerizing world of crochet.
In this article, we'll dive into the details of this captivating pattern, offering inspiration, tips, and answers to your burning questions.
Beautiful Crochet Spiral Square - Get Inspired
Materials You'll Need:
- Yarn: Choose your favorite colors to make this square truly unique.
- Crochet Hook: Pick an appropriate hook size for your yarn.
- Scissors: For trimming yarn.
- Tapestry Needle: To weave in ends.
- Stitch Marker: Helpful for keeping track of your rounds.
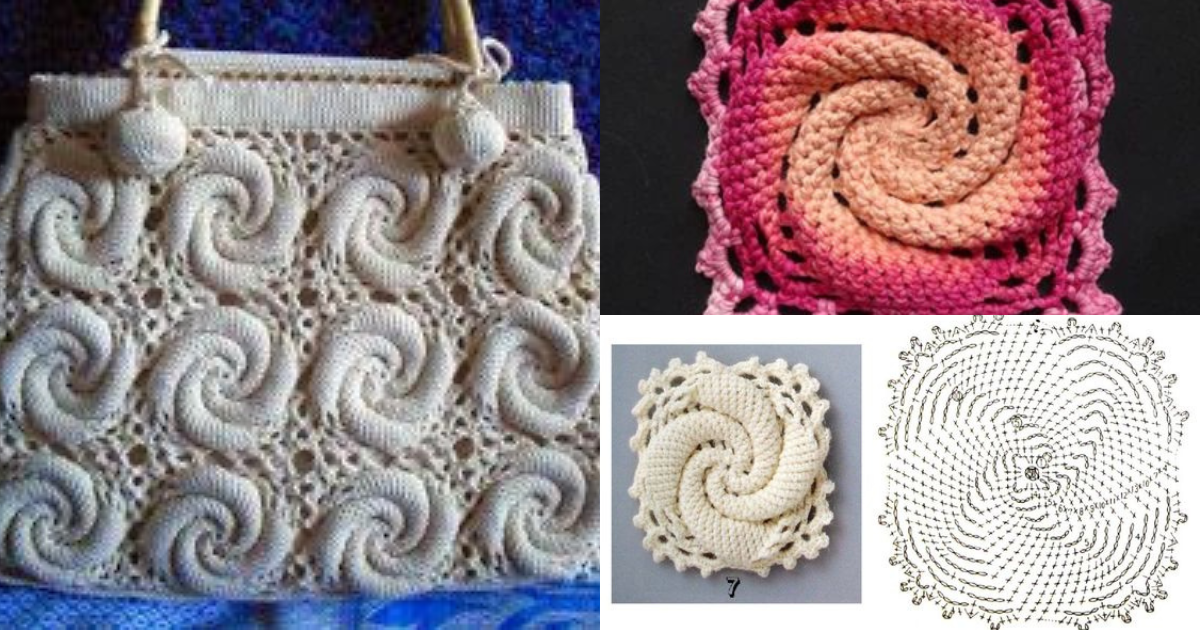
The Intricate Spiral Pattern
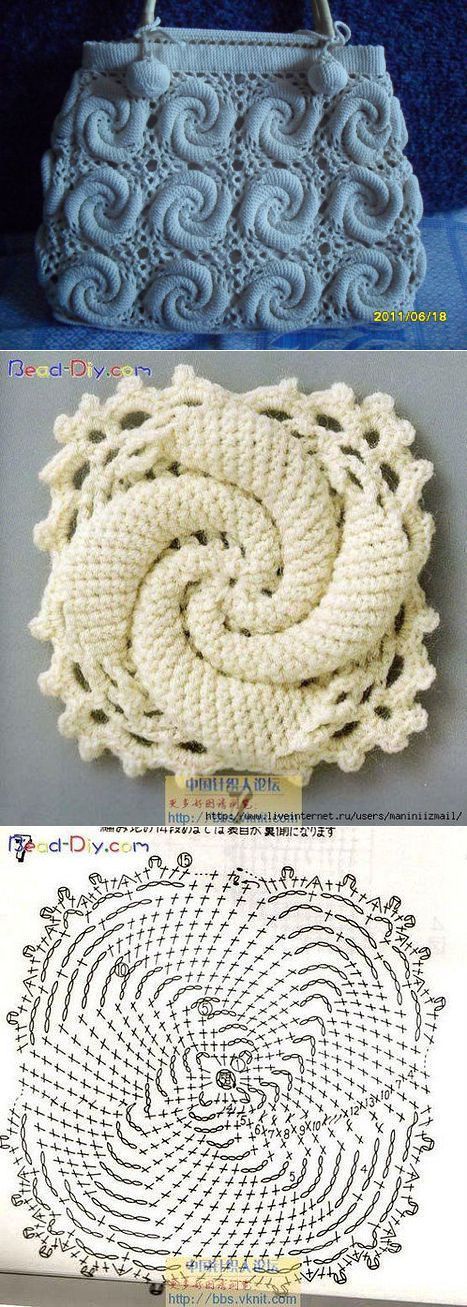
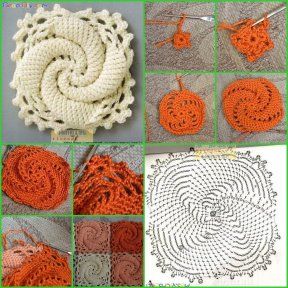
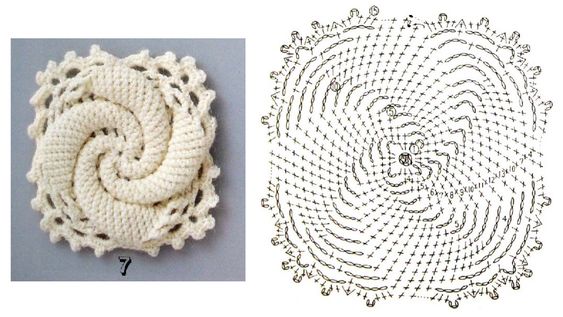
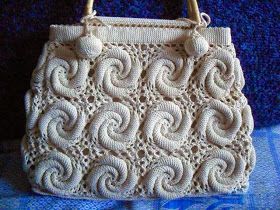
The Crochet Spiral Square is an intricate design that combines different stitches and techniques to create a visually stunning square with a spiral motif at its center. The unique interplay of colors and textures makes this pattern a true work of art.
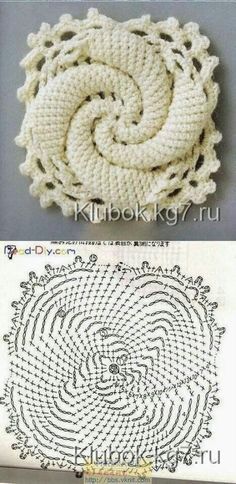
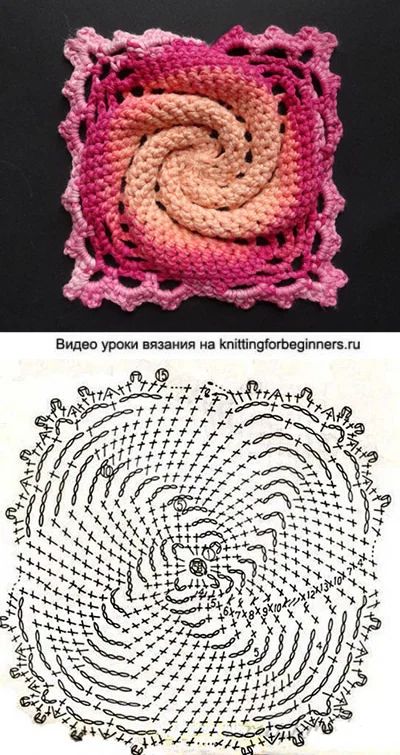
Step-by-Step Guide
- Start with a Magic Ring: Begin your square with a magic ring, which allows for a seamless and neat center.
- Work the Spiral: Follow the pattern instructions to create the spiral motif at the center of your square. This is where your creativity can shine as you choose your colors and experiment with different stitches.
- Expand the Square: Continue working in the round, adding stitches to expand the square. Use stitch markers to keep track of your rounds.
- Final Touches: Finish your square by weaving in ends and blocking it to ensure it lays flat and showcases the spiral pattern beautifully.

Now that you're equipped with the inspiration and knowledge needed to embark on your crochet adventure, grab your materials, choose your colors, and let your creativity spiral into a beautiful masterpiece! Happy crocheting!
CHECK MORE CROCHET PATTERNS