DIY Bee Crochet Keychain: Easy Guide
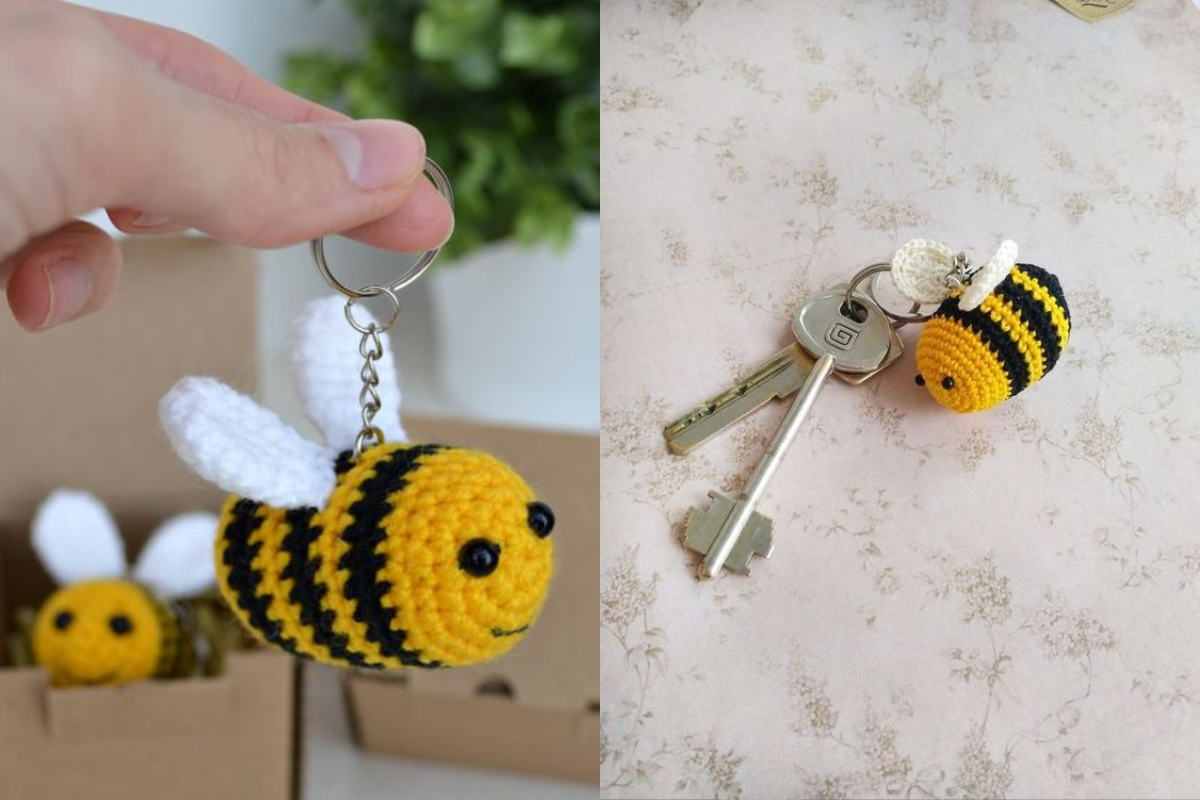
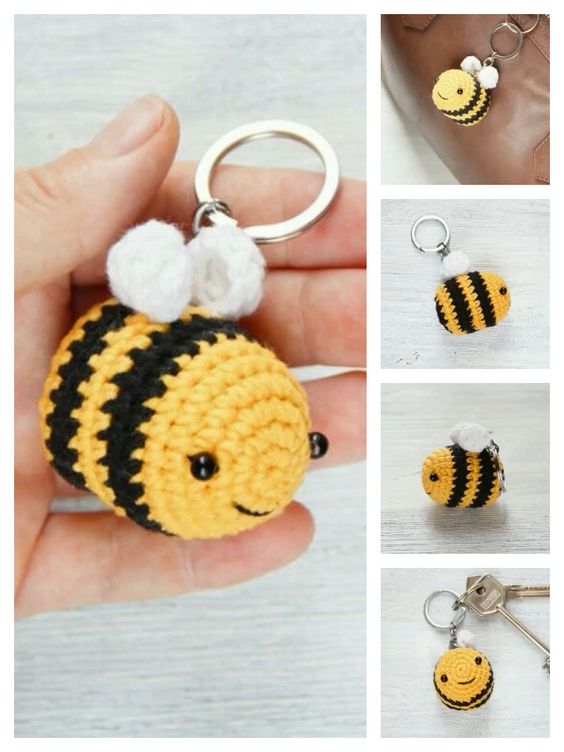
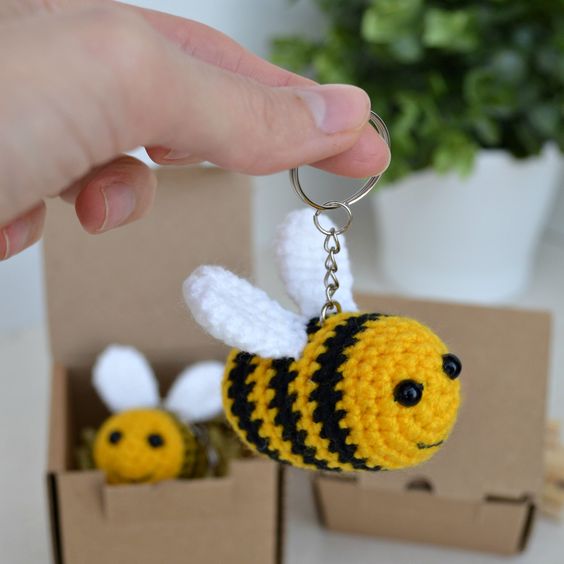
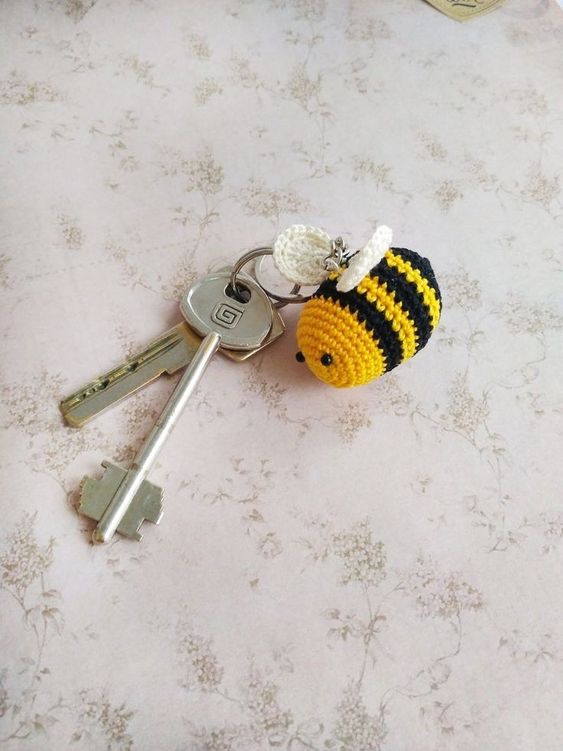
Welcome to my easy guide on how to create a charming bee crochet keychain.
Whether you're a seasoned crocheter or just starting out, this step-by-step tutorial will help you bring this adorable accessory to life.
Follow along and master the art of crochet while making a bee keychain that's perfect for gifting or adding to your own collection.
Key Takeaways:
- Create a cute bee crochet keychain with this easy guide.
- Follow the step-by-step instructions to master the art of crochet.
- This adorable accessory makes for a perfect gift or personal keepsake.
- Enjoy the process and have fun while creating your bee keychain.
- Stay tuned for the materials needed and detailed crochet instructions in the upcoming sections.
Materials Needed for Bee Crochet Keychain
Before we can dive into the crochet process, it's important to gather all the necessary materials for creating your own adorable bee crochet keychain. Having everything ready will make the process much smoother and more enjoyable. Here's a list of items you'll need:

- Crochet Hook: Select a crochet hook size that is suitable for your yarn. You can refer to the yarn label for recommended hook sizes.
- Yarn: Choose your favorite colors to bring your bee keychain to life. Opt for a medium weight (worsted) yarn for this project.
- Scissors: A pair of sharp scissors will come in handy for cutting the yarn.
- Tapestry Needle: This needle will be used for weaving in ends and sewing any small parts together.
- Safety Eyes: These will give your bee keychain a cute and expressive look. Ensure you have a pair of safety eyes suitable for small projects.
- Polyester Stuffing: Stuffing will help give your bee keychain a plush and squishy feel. Make sure you have enough for stuffing the entire body.
- Keychain Ring: A keychain ring will allow you to attach your finished bee keychain to your keys, bags, or accessories.
Now that you have all your materials ready, it's time to dive into the exciting process of crocheting your very own bee keychain.
Crochet Instructions for Bee Keychain
Now it's time to start crocheting our bee keychain. I will break down the process into simple and easy-to-follow steps. Whether you're a beginner or experienced crocheter, these instructions will help you create a bee keychain that you'll be proud of.
Gather Your Materials
Before we begin, make sure you have all the necessary materials:
- Yellow and black yarn
- Crochet hook
- Scissors
- Tapestry needle
- Keychain ring
- Stuffing
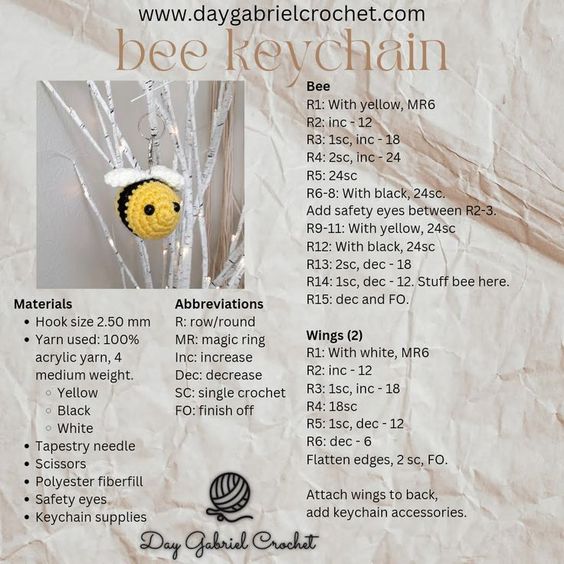
Crochet the Bee Body
1. Start by creating a magic ring with the yellow yarn.
2. Make 6 single crochet stitches into the magic ring. Pull the ring tight to close.
3. Continue working in rounds, making 2 single crochet stitches in each stitch around. Repeat this for a total of 12 stitches.
4. For the next round, make 1 single crochet stitch in the first stitch, then 2 single crochet stitches in the next stitch. Repeat this pattern around, resulting in 18 stitches.
5. Repeat step 4 once more, increasing to 24 stitches.
6. Switch to black yarn. Single crochet in each stitch around for 2 rounds.
7. Stuff the body with the stuffing.
8. Continue crocheting in black yarn, decreasing by making 2 single crochet stitches together in each round until you have 6 stitches left.
9. Fasten off and leaving a long tail. Thread the tail through a tapestry needle, weave through the last 6 stitches, and pull tight to close the opening. Secure and trim the yarn.
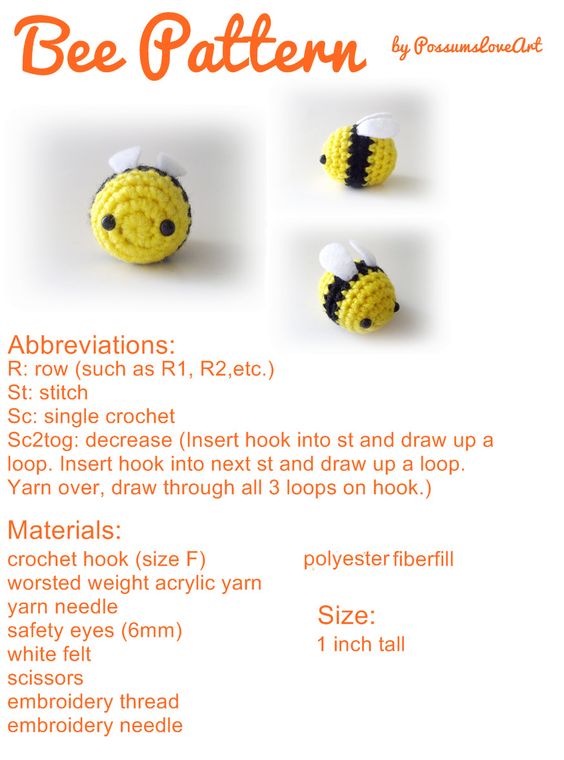
Crochet the Bee Wings
1. With the yellow yarn, create a magic ring.
2. Make 10 double crochet stitches into the magic ring. Pull the ring tight to close.
3. Double crochet 3 times in the first stitch, then 2 double crochet stitches in the next stitch. Repeat this pattern around, resulting in 30 stitches.
4. Fasten off, leaving a long tail for sewing.
Assemble the Bee Keychain
1. Attach the wings to the top of the bee body, positioning them slightly angled upwards.
2. Sew the wings securely to the body, ensuring they are evenly spaced.
3. Attach the keychain ring to the top of the bee's head.
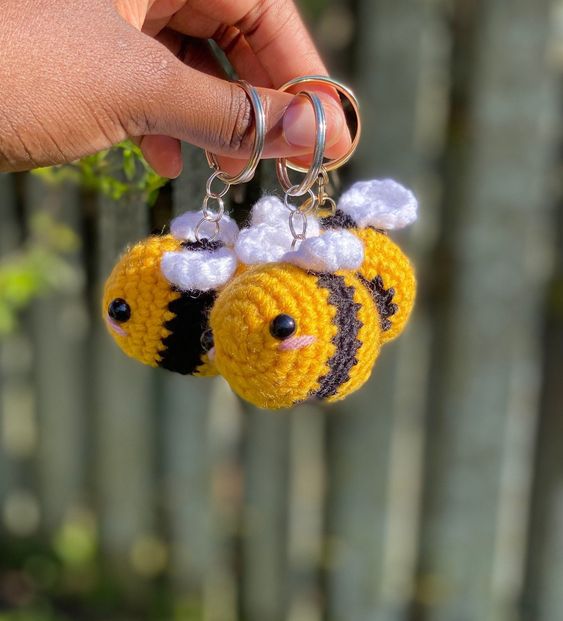
And there you have it! Your adorable bee keychain is ready to use or gift to a friend. Enjoy your new crochet creation!
Conclusion
And there you have it! You've successfully completed your very own bee crochet keychain. Throughout this article, I've provided you with a detailed step-by-step guide to help you create this adorable accessory.
Remember, crafting is all about enjoyment and self-expression, so have fun while you crochet. Whether you choose to gift your bee keychain or keep it for yourself, it's sure to be a unique and special item, reflecting your personal style and creativity.
So grab your crochet hooks and get ready to bring a touch of charm to your accessories. Happy crocheting!
CHECK MORE CROCHET PATTERNS