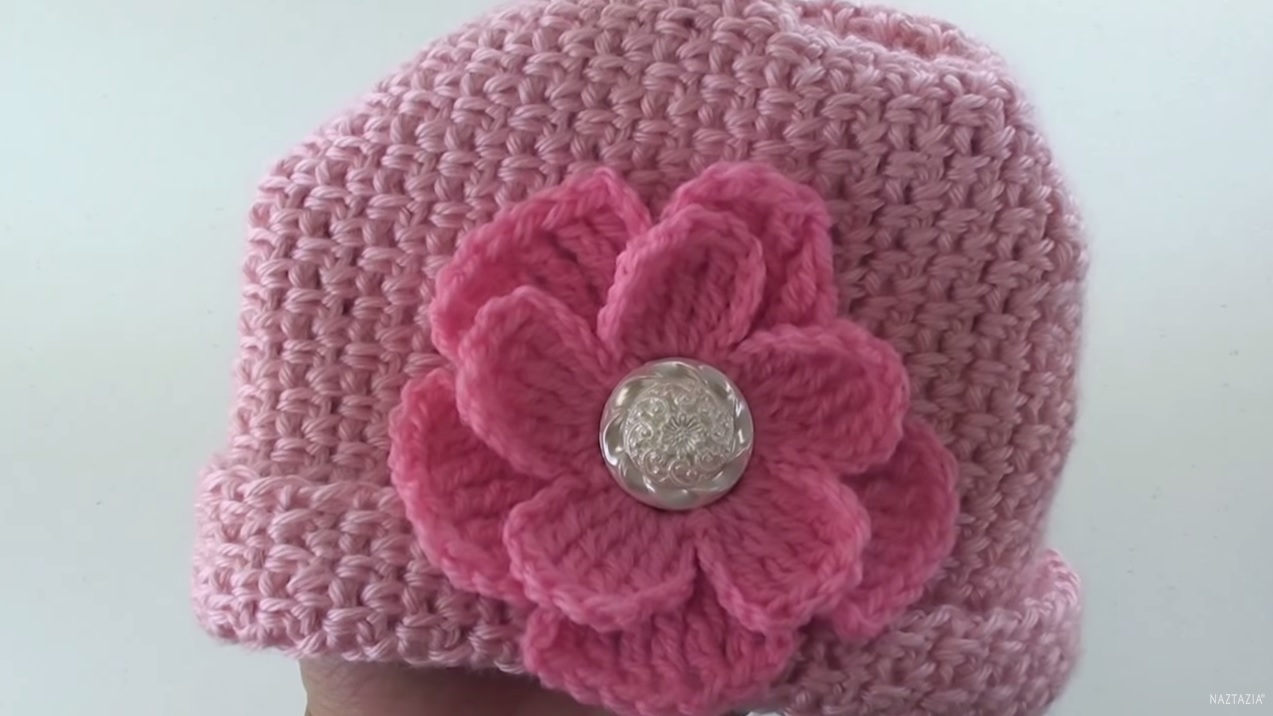
Crochet a Flower for a Hat, Purse, or Shawl: A Versatile DIY Embellishment

Looking to add a splash of creativity and personal flair to your favorite accessories? Crocheting a flower is a quick and simple way to embellish anything from a hat, purse, or shawl. These beautiful, handcrafted blooms can instantly elevate the look of any item, transforming a basic accessory into something truly unique and eye-catching.
Whether you're an experienced crocheter or just picking up your hook, this project is perfect for all skill levels. With our easy-to-follow guide, you'll learn how to crochet your own flower and customize it for different uses.
Let's dive into this fun, colorful, and versatile craft project!
DIY Learn How to Crochet a Flower for a Hat Purse or Shawl Tutorial Flowers

You can also find the official photos for these patterns there, which you can Pin to your Pinterest boards.
Materials Needed to Crochet a Flower
Before getting started, make sure you have these basic materials:
- Yarn: Choose from cotton or acrylic yarn in any color of your choice. For a more delicate flower, use lighter yarn weights like lace or fingering.
- Crochet Hook: A hook size between 2.5mm to 4.0mm works well for this project, depending on the yarn you choose.
- Yarn Needle: For weaving in ends and attaching your flower to the accessory.
- Scissors: To cut your yarn.
Step-by-Step Guide: Crochet a Flower
Here’s a simple pattern to help you crochet a lovely flower that you can add to any accessory. Feel free to get creative with the yarn colors and patterns!
Pattern Instructions
- Magic Ring: Start by creating a magic ring.
- Round 1: Chain 1 and crochet 6 single crochets (SC) into the magic ring. Pull the ring tight and join with a slip stitch in the first SC.
- Round 2: Chain 2, double crochet (DC) in the same stitch, chain 2, slip stitch in the next stitch; repeat around to form 6 petals. Fasten off and weave in the ends.
"For a fuller flower, you can add extra rounds of petals by chaining more stitches and using different crochet stitches like half-double crochet (HDC) or treble crochet (TC)."
Customizing Your Crochet Flower
One of the best parts about crocheting flowers is the freedom to customize. Here’s how you can tweak the pattern to suit your style:
- Use Different Colors: Create a multicolored flower by changing yarn colors in between rounds. This works especially well for flowers with multiple layers of petals.
- Layered Flowers: Crochet two or three flowers of different sizes and stack them for a fuller, more dynamic look. Attach them together with a few stitches in the center.
- Add Beads or Buttons: Sew a bead or small button in the center of your flower for a more decorative finish.
How to Use Crochet Flowers
Once you’ve crocheted your flower, the next step is deciding how to use it. Here are a few ideas for adding your crochet flower to different accessories:
1. Crochet Flower for a Hat
A crochet flower on a hat adds a touch of charm to any headwear. Attach the flower to the side of a beanie or sunhat using a yarn needle. Make sure to secure it well so it stays in place.
2. Crochet Flower for a Purse
Brighten up a plain handbag or tote by adding a crochet flower to it. You can stitch the flower directly onto the bag or, for a more versatile option, attach a safety pin or brooch backing so you can remove and reattach the flower as needed.
3. Crochet Flower for a Shawl
Crochet flowers make for elegant embellishments on shawls and wraps. Attach the flower at one of the corners or along the edges to complement the texture of the fabric. You could also use the flower as a shawl pin by attaching it to a brooch backing.
CHECK MORE CROCHET PATTERNS