Crochet a Keychain for a Photo Holder
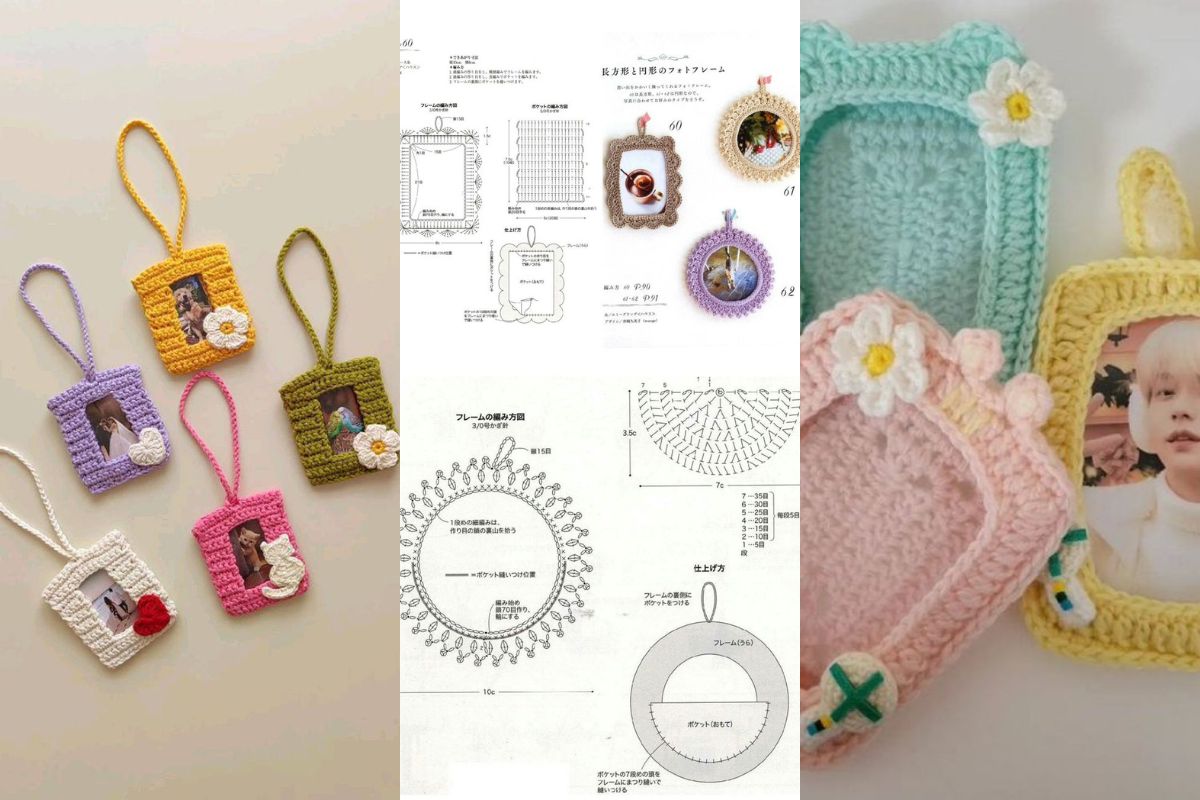
Have you ever wanted to combine your love for crochet with a practical yet decorative item? Look no further! Crochet keychains for photo holders are the perfect DIY project.
These small yet meaningful creations allow you to showcase cherished memories while keeping your keys organized in style.
In this guide, we’ll explore how to craft these delightful items, from materials to step-by-step instructions.
Crochet a Keychain for a Photo Holder
- Portable Memories: Carry your favorite moments wherever you go.
- Personalized Gifts: They make thoughtful and unique presents for friends and family.
- Sustainable Crafting: Utilize leftover yarn for a functional purpose.
- Customizable Designs: Adapt the pattern to suit your style or occasion.
Materials Needed
To get started, gather the following materials:
- Yarn: Choose cotton or acrylic yarn in your preferred color.
- Crochet Hook: Recommended size: 2.5mm to 3.5mm for a compact finish.
- Photo Protectors: Clear, small-sized plastic sleeves or laminate sheets.
- Keychain Ring: Durable metal rings work best.
- Tapestry Needle: For sewing and weaving in ends.
- Scissors: A sharp pair ensures clean cuts.
- Optional Accessories: Beads, ribbons, or charms for decoration.

Step-by-Step Guide: How to Make a Crochet Photo Holder Keychain
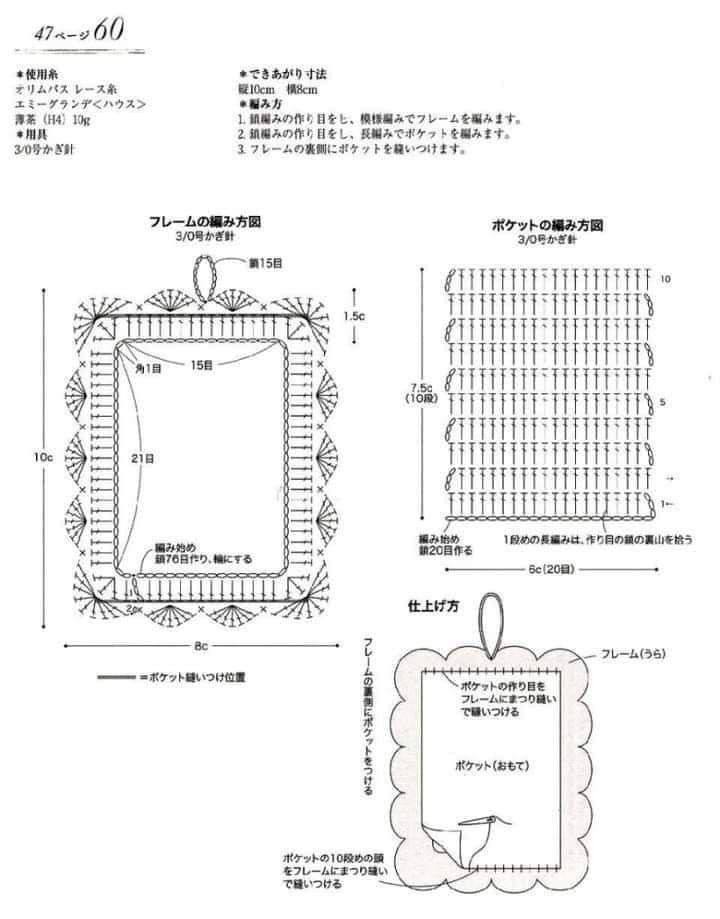
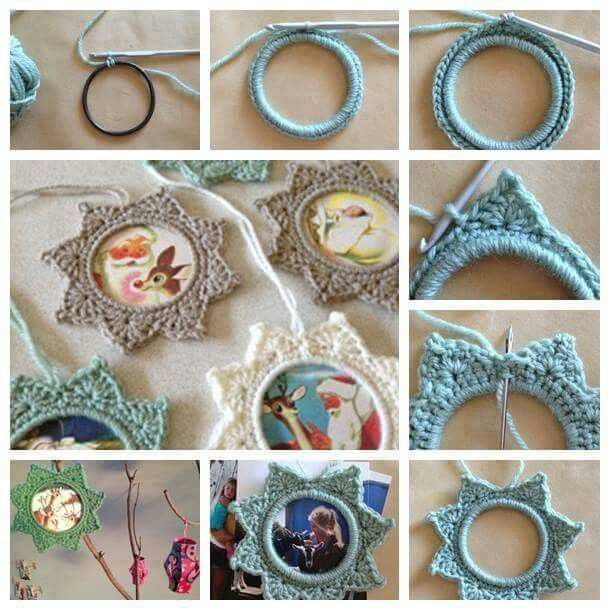
1. Create the Base Circle or Shape
- Start with a magic ring.
- Chain 2 (counts as the first stitch).
- Work 10-12 single crochets into the ring. Close the round with a slip stitch.
- Add subsequent rounds, increasing evenly to achieve the desired size.
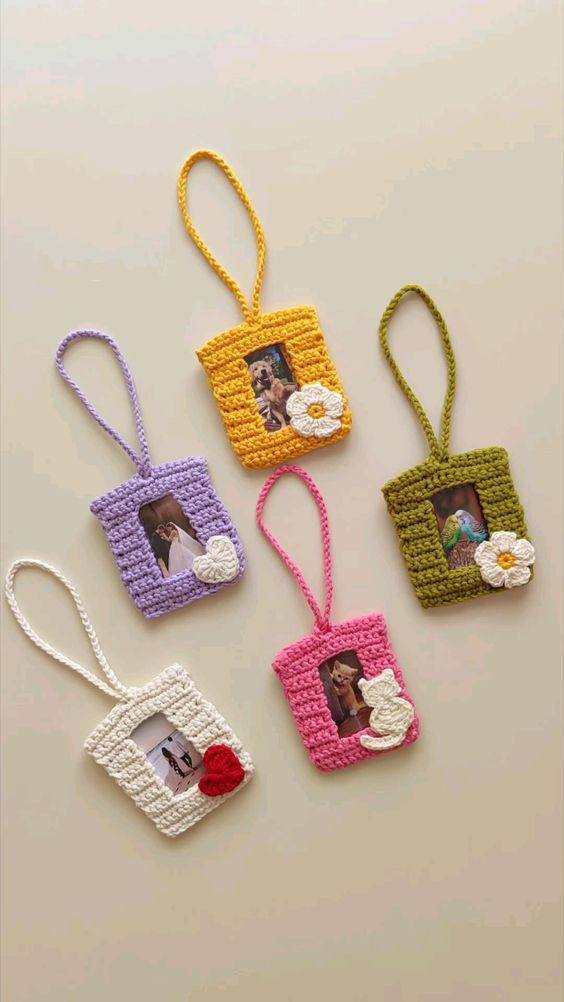
Alternative Shapes:
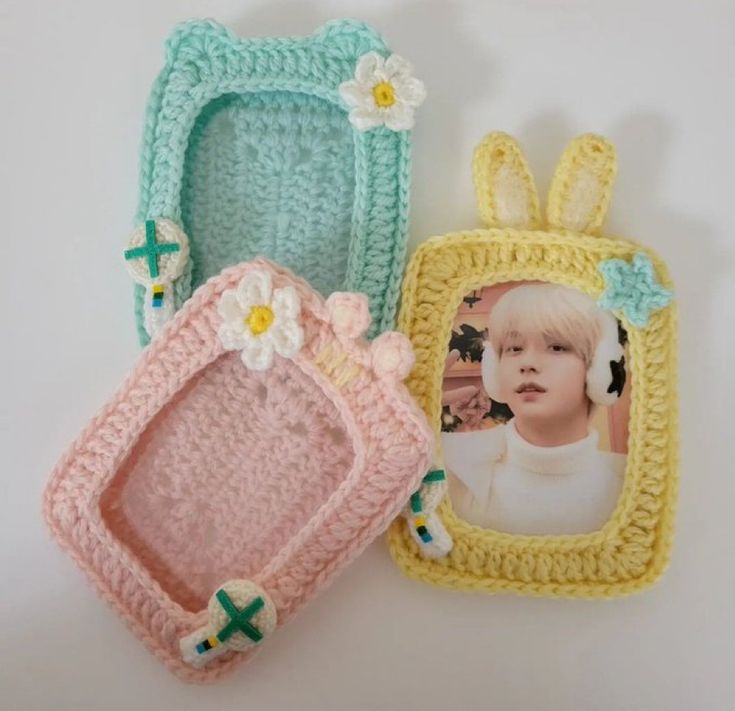
- Square: Perfect for Polaroid-style photos.
- Heart: Add a touch of romance for special occasions.
2. Attach the Photo Sleeve
- Trim the photo sleeve or laminate sheet to fit the crochet base.
- Stitch or glue it securely onto the back of the crocheted frame.
- Leave one side open for sliding in the photo.
3. Add Decorative Edging
- Use a picot edge or scalloped border to enhance the aesthetic appeal.
- Experiment with contrasting colors for a vibrant look.


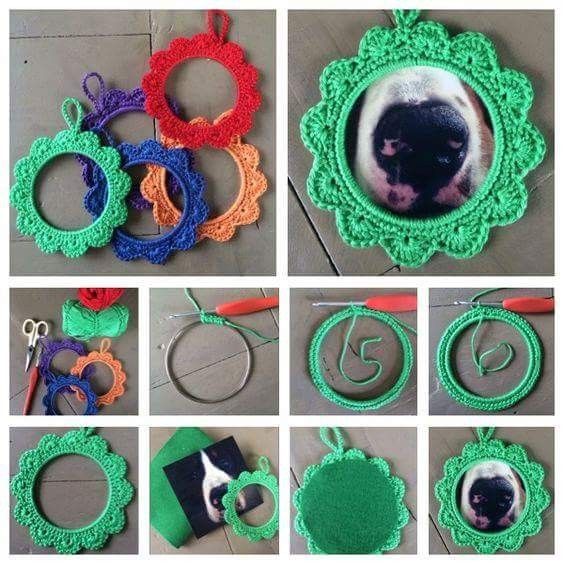
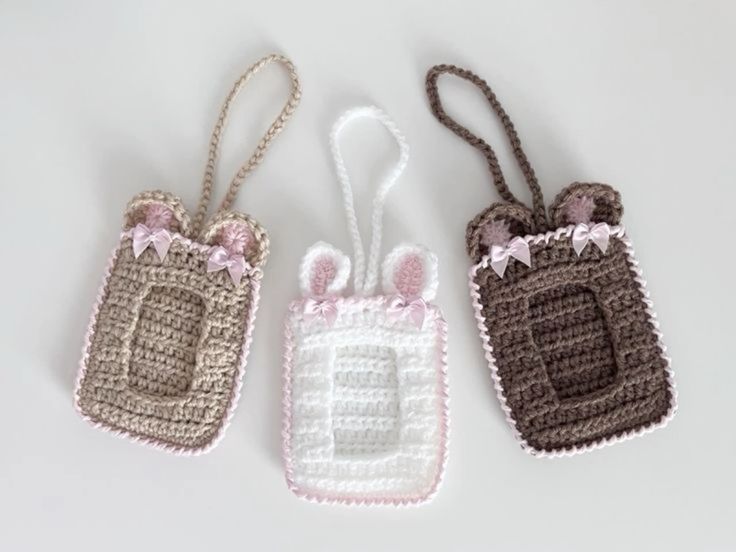


4. Secure the Keychain Ring
- Crochet a small loop at the top of the frame.
- Slip the keychain ring through the loop.
- Reinforce with tight stitching to ensure durability.
5. Personalize Your Keychain
- Add beads or charms to the loop for extra flair.
- Embroider initials or symbols for a unique touch.
- Attach a small tassel for a trendy look.
Creative Ideas for Crochet Keychain Photo Holders
Themes to Explore
- Nature-Inspired:
- Use green or floral tones.
- Add small crocheted leaves or flowers.
- Festive Designs:
- Craft seasonal themes like Christmas trees or Easter eggs.
- Minimalist Style:
- Stick to neutral colors with clean edges.
- Child-Friendly Designs:
- Create animal shapes like bears, cats, or bunnies.
Usage Ideas
- Gifts: Personalized for birthdays or anniversaries.
- Party Favors: Memorable keepsakes for guests.
- Decor: Hang them on bags, purses, or backpacks.
Tips for Success
- Work with Tight Stitches: Ensures the frame holds its shape.
- Choose Durable Yarn: Avoid overly stretchy materials for a firm finish.
- Test the Size: Ensure the photo fits snugly into the holder.
- Practice Patience: Mastering smaller projects requires precision.
Cotton yarn is ideal due to its firmness and durability. Acrylic yarn can also work for a budget-friendly option.
Start with basic shapes like circles or squares before exploring intricate designs. On average, it takes 1-2 hours depending on your skill level and the complexity of the design. Learn how to craft beautiful crochet keychain photo holders with our step-by-step guide. Perfect for personalized gifts and stylish accessories. Discover more now!
CHECK MORE CROCHET PATTERNS