15+ Crochet beanie graphics for inspiration
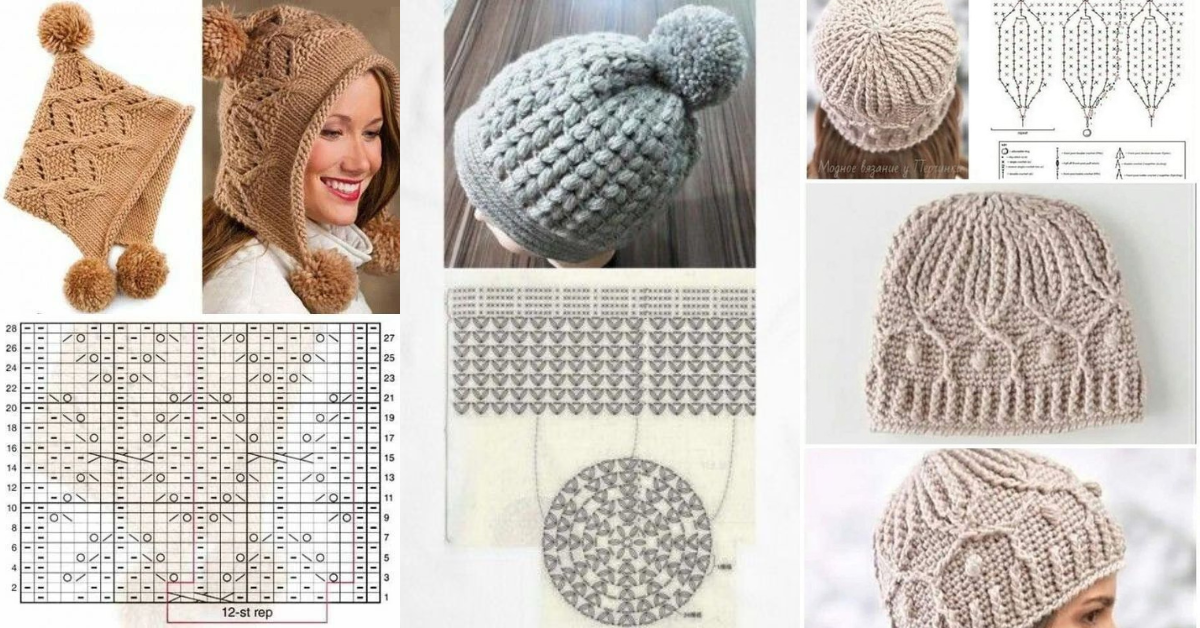
To protect yourself from the cold, or just for fashion, Beanie are an option to wear on colder days.
The crochet hats are a real doom. All grandmothers and aunts like to make hats for their babies, but there are models for all tastes and all styles.
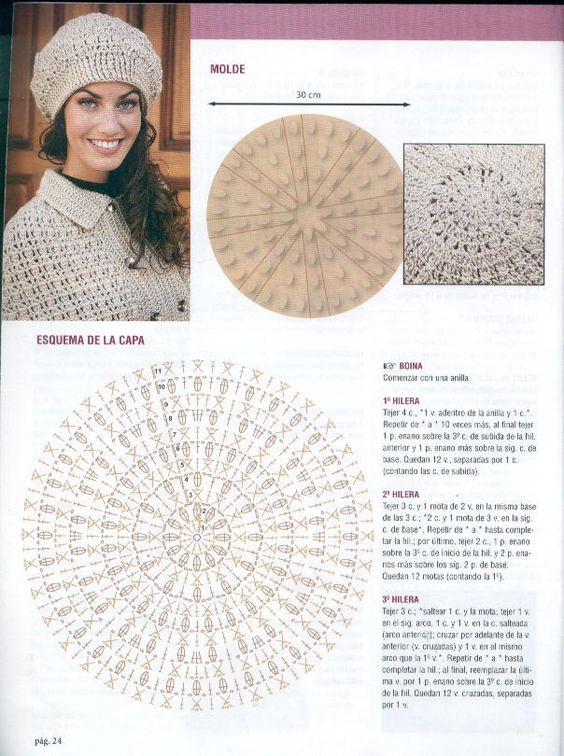
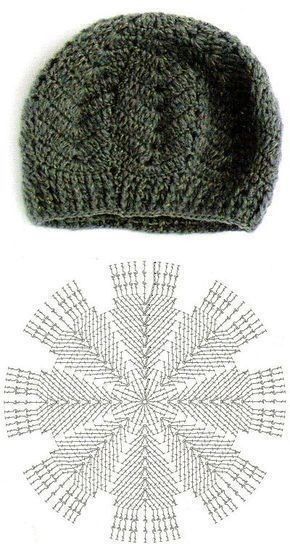
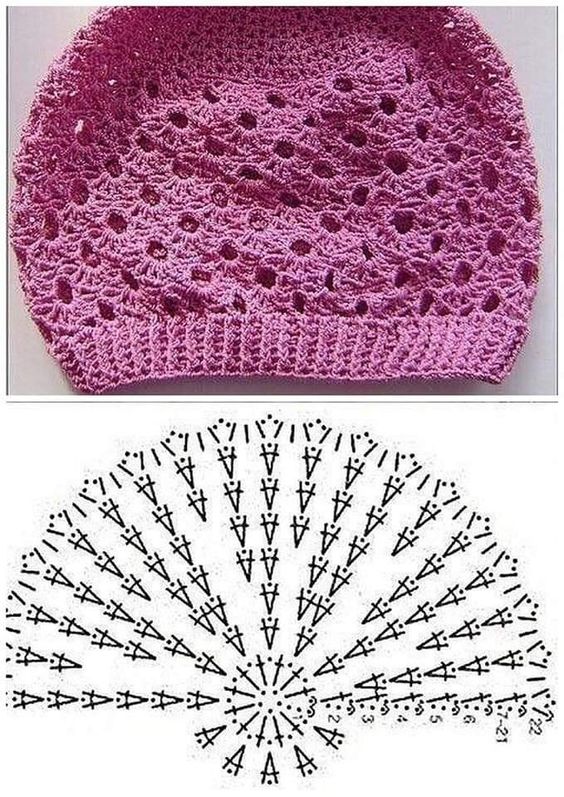
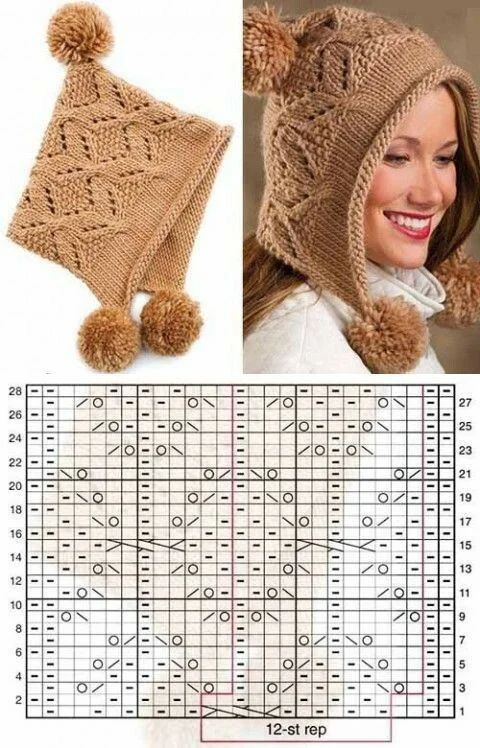
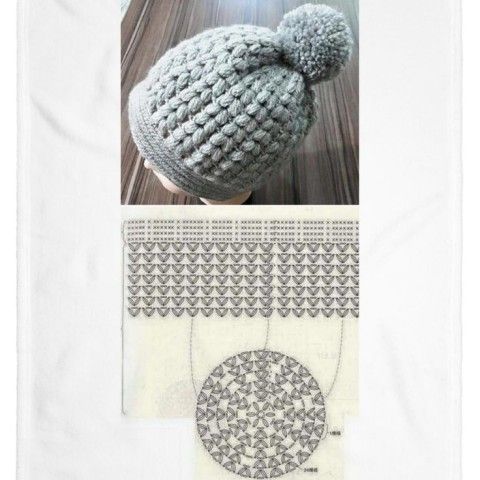
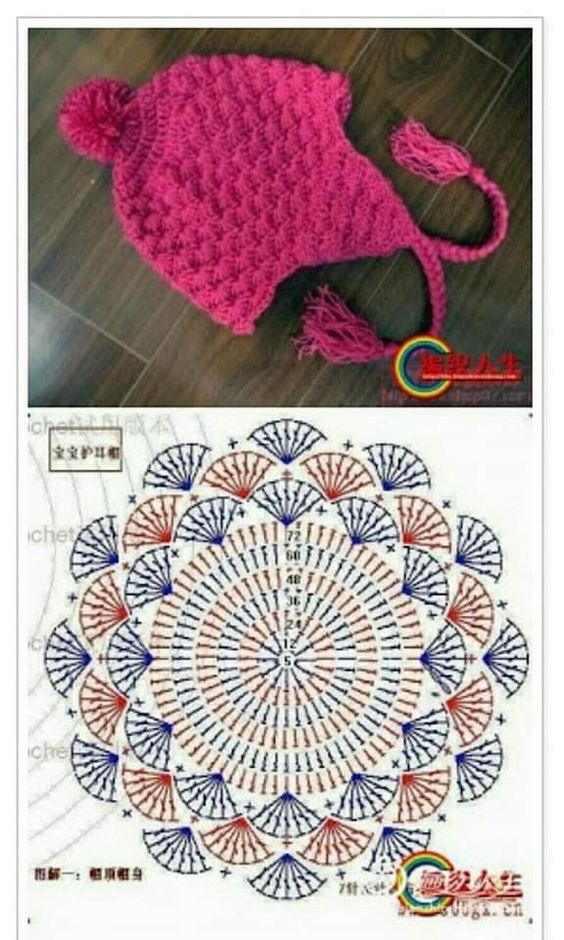
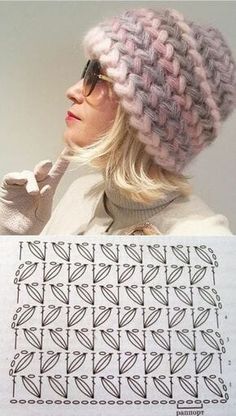
Today we separate some graphics of crochet Beanie models.
Also see: Cupcake Beanie-Tutorial
Crochet beanie graphics for inspiration
Crochet beanies are not just a practical accessory for keeping warm during colder months; they are also a canvas for creativity and personal expression. With a multitude of patterns, colors, and textures to choose from, the possibilities are endless when it comes to crafting unique and stylish beanies. In
These crochet beanie graphics are perfect for wearing but also for giving away. There are models for all tastes and styles and with different degrees of difficulty.

Step-by-Step Instructions for Making a Basic Crochet Beanie
Step 1: Choose Your Pattern and Size
- Select a Pattern:
- Find a crochet pattern that suits your style and skill level. Many free patterns are available online for various styles of beanies.
- Measurements:
- Measure your head circumference to determine the size you need. A typical adult beanie is around 20-22 inches in circumference.
Step 2: Create the Foundation
- Foundation Chain:
- Start with a chain that matches your head measurement plus a few extra stitches for ease (usually about 80-90 chains for adults).
- Join the Chain:
- Be careful not to twist your chain. Join with a slip stitch to form a circle.
Step 3: Start Crocheting the Body of the Beanie
- First Round:
- Ch 1 and work in sc around the chain. This will create a solid foundation for the beanie.
- Subsequent Rounds:
- Continue working in rounds, alternating between sc and dc to create texture and height. Use a stitch marker to keep track of the beginning of each round.
Step 4: Shape the Crown of the Beanie
- Decreasing:
- As you approach the top of the beanie, you’ll need to decrease stitches to create the crown shape. For example:
- Round 1: sc in the first 5 stitches, sc2tog (single crochet two together). Repeat until the end of the round.
- Round 2: sc in the first 4 stitches, sc2tog. Repeat until the end of the round.
- Continue Decreasing:
- Continue this pattern until you reach the desired size for the crown.
Step 5: Finishing Touches
- Final Round:
- Work one last round in sc to tidy up the edge.
- Fasten Off:
- Cut the yarn, leaving a long tail for weaving in. Pull the tail through the last stitch to secure it.
- Weave in Ends:
- Use a yarn needle to weave in any loose ends for a clean finish.
Step 6: Optional Embellishments
- Add a Pom-Pom:
- Create a fluffy pom-pom to attach to the top of your beanie for added flair.
- Decorative Stitching:
- Consider adding embroidery or surface crochet designs to personalize your beanie further.
Via Pinterest
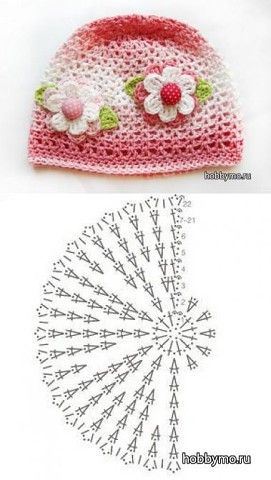
Via:postila.ru
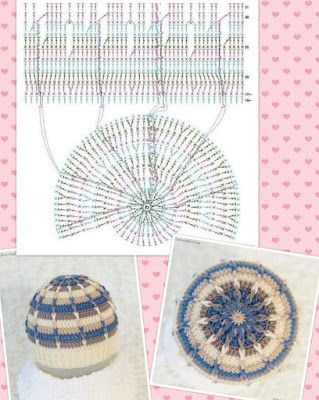
Via: www.kufer.co.uk
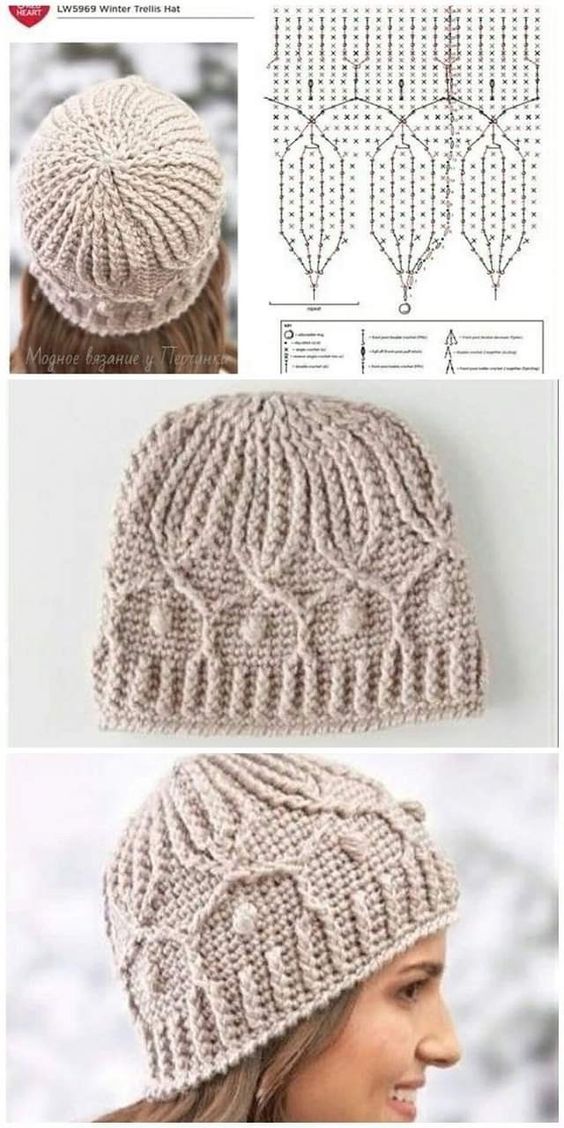
Via Pinterest
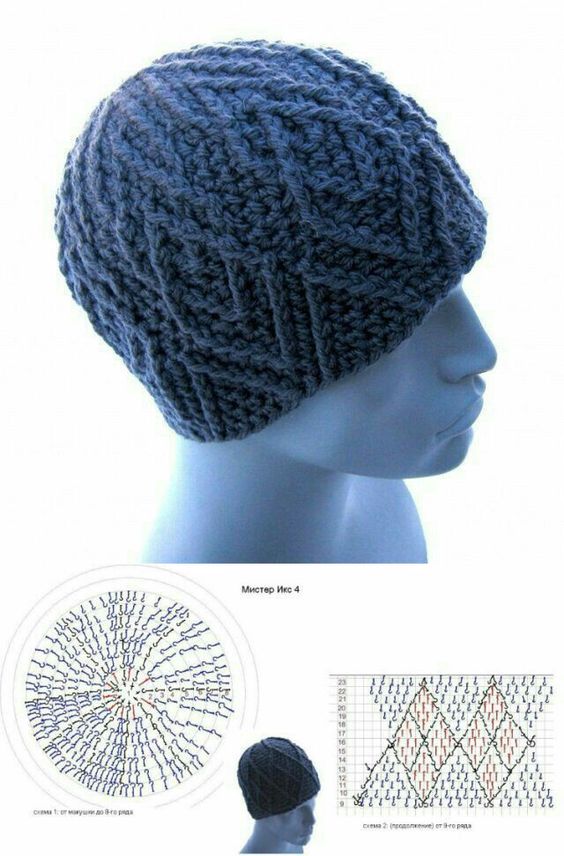
Via:tudoespecial.com
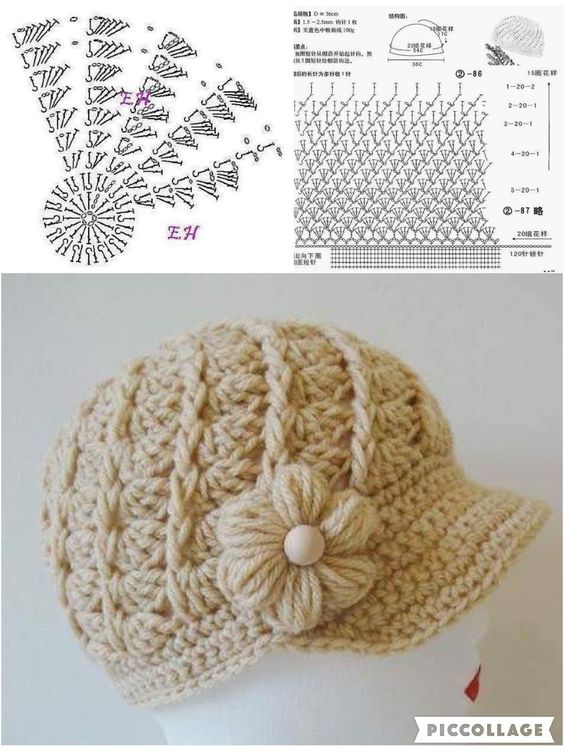
Via ETSY
Creative Variations for Your Crochet Beanie
1. Color Combinations
- Instructions: Experiment with different color combinations for your beanie. Use ombre effects or color blocking to make your beanie stand out.
2. Themed Patterns
- Instructions: Create seasonal or holiday-themed beanies, such as pastels for spring or festive colors for winter.
3. Different Styles
- Instructions: Explore different beanie styles, such as slouchy beanies, fitted beanies, or beanies with brims, to find the look you love.
CHECK MORE CROCHET PATTERNS