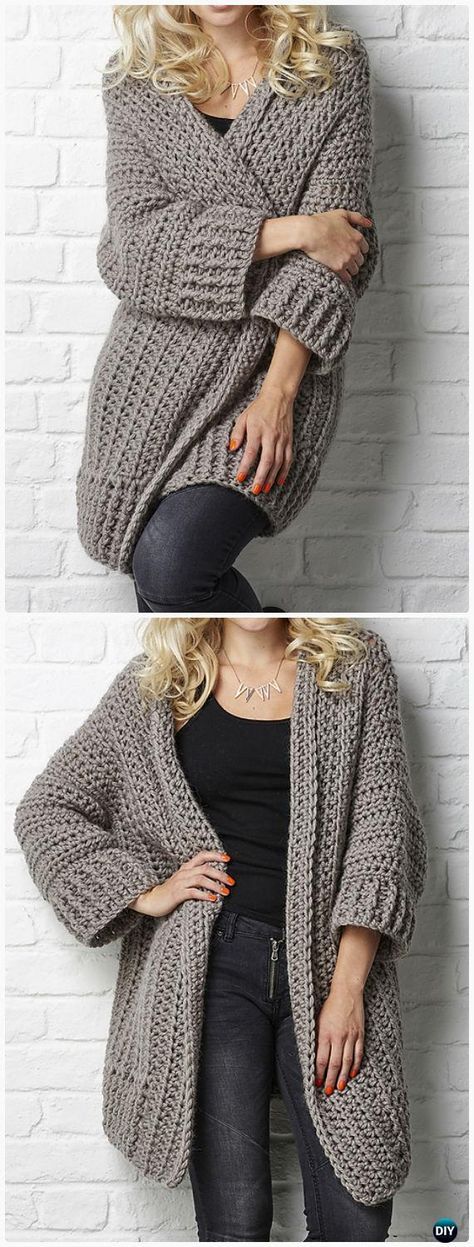
Crochet Big Chill Cardigan | Cozy and Stylish
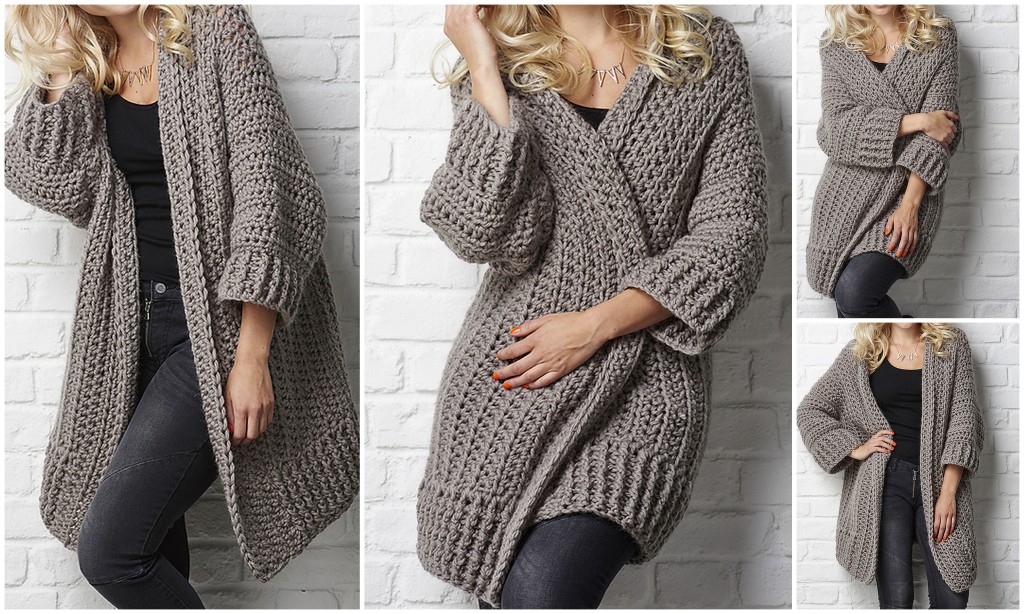
What happens when you mix relaxed, everyday style with dressing gown levels of comfort? A rather marvellous snuggly cardigan, that’s what.
Also: Create the Iconic Harry Styles Cardigan
So Design Birdy presents you today exactly this cardigan crochet pattern.This cardigan looks really beautiful ,it’s perfect for the cold fall days and you can wear it on any style of clothing.
You can choose the different colors by crocheting , or you can make this cardigan colorful too.
Crochet Big Chill Cardigan
>> CHECK HERE THE PAID PATTERN <<
You can dinf the crochet link under the text line,which will make your job more easier , so we hope this post will be inspiring and useful,enjoy!
Materials You'll Need
To create your Crochet Big Chill Cardigan, gather the following materials:
- Yarn: Bulky or super bulky yarn for extra warmth and quick stitching.
- Crochet Hook: Size L (8mm) or larger, depending on your yarn choice.
- Scissors: For trimming yarn.
- Yarn Needle: To weave in the ends and sew pieces together.
- Stitch Markers: Helpful for keeping track of your rows and stitches.
Pro Tip: Choose a yarn that’s soft and durable. Wool blends are excellent for warmth and comfort.
Steps to Crochet the Big Chill Cardigan
1. Create the Back Panel
Start with
a foundation chain that measures the width of your cardigan's back panel. This will be the main piece that determines the overall width of your cardigan.
2. Crochet the Back Panel
- Row 1: Double crochet (dc) in the fourth chain from the hook and in each chain across.
- Row 2: Turn your work, chain 3 (counts as the first dc), and double crochet in each stitch across.
- Repeat Row 2 until your back panel reaches the desired length, typically from your shoulders to your hips or lower, depending on how long you want your cardigan.
3. Create the Front Panels
Make two front panels:
- Foundation Chain: Half the number of stitches used for the back panel plus a few extra for overlap.
- Follow the same pattern as the back panel, but stop when each front panel reaches the same length as the back panel.
4. Crochet the Sleeves
- Foundation Chain: Chain enough to fit around your upper arm comfortably.
- Row 1: Double crochet in the fourth chain from the hook and in each chain across.
- Row 2: Turn your work, chain 3, and double crochet in each stitch across.
- Repeat until your sleeve reaches the desired length. Create a second sleeve following the same steps.
5. Assemble Your Cardigan
- Seaming: Lay the back panel flat, and place the front panels on top, aligning the edges. Sew the shoulder seams first.
- Attach Sleeves: With right sides facing, sew the sleeves to the armholes.
- Side Seams: Sew along the sides and the sleeve seams, starting from the bottom of the cardigan up through the sleeves.
6. Add the Finishing Touches
- Collar and Edging: You can add a border by single crocheting around the edges of the cardigan, including the neckline, front edges, and bottom hem.
- Buttons: If you’d like, add buttons and buttonholes to the front panels for closure.
CHECK MORE CROCHET PATTERNS