Crochet Butterfly Ornaments with Wooden Heads
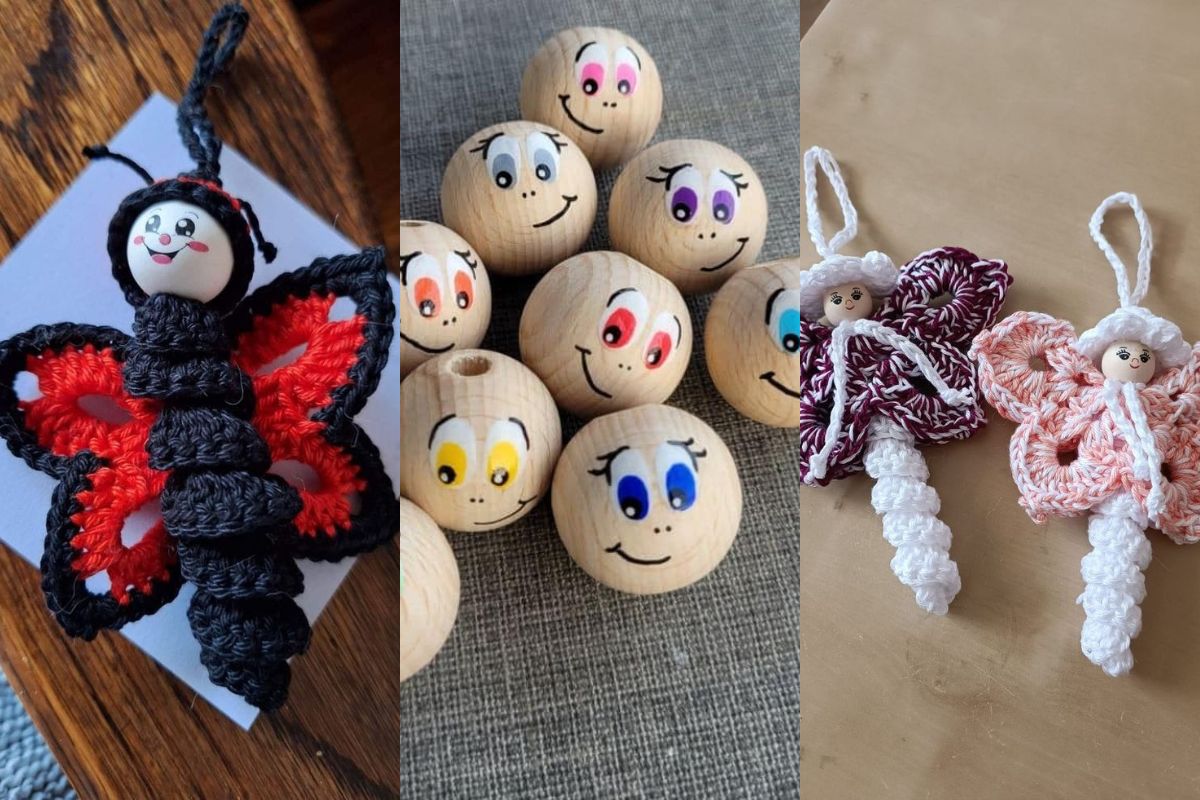
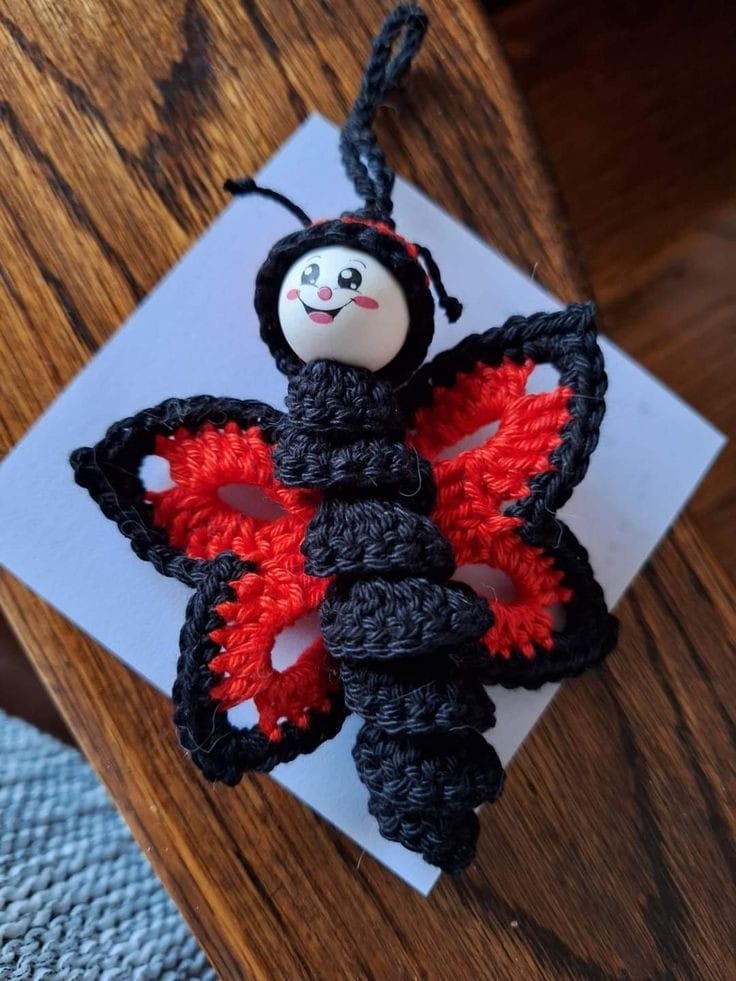
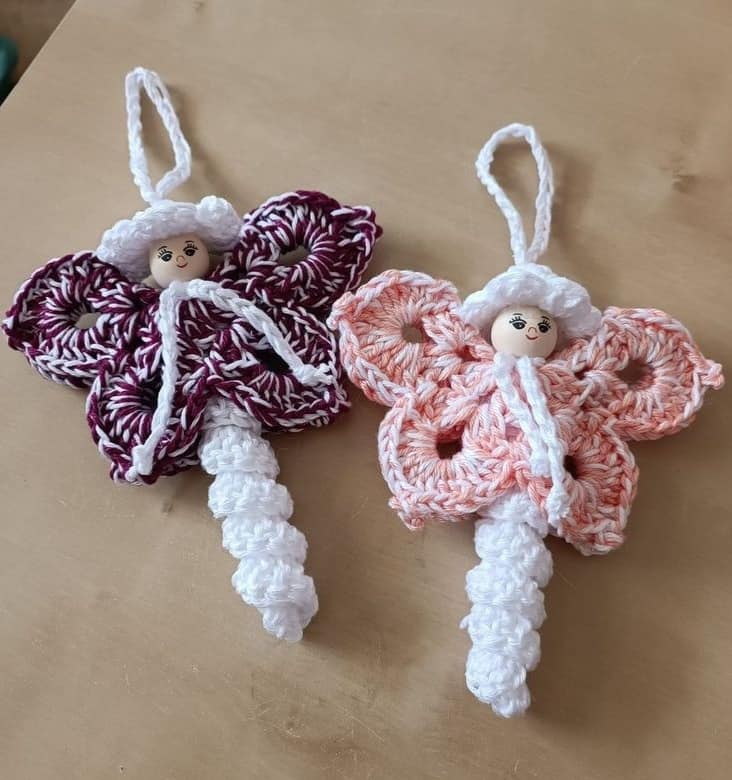
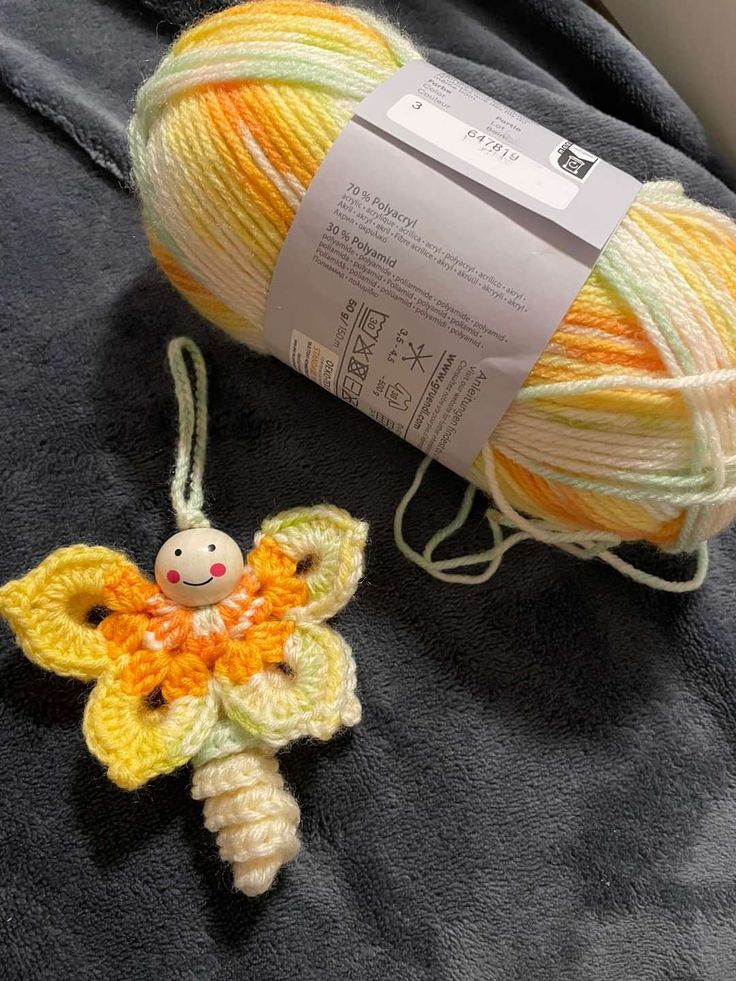
If you're looking to add a whimsical touch to your home or create a unique gift for a loved one, crochet butterfly ornaments with wooden heads offer a perfect blend of nature-inspired beauty and creative craftsmanship.
These charming butterflies combine the delicate art of crochet with the rustic charm of wooden elements, making them a fun and personalized addition to any décor.
Whether you're decorating for the spring season, preparing for a birthday party, or just love the idea of bringing some butterfly magic into your space, these crochet butterfly ornaments will add a touch of color, texture, and vintage appeal.
Step-by-Step Guide to Making Crochet Butterfly Ornaments with Wooden Heads
Step 1: Create the Butterfly Wings
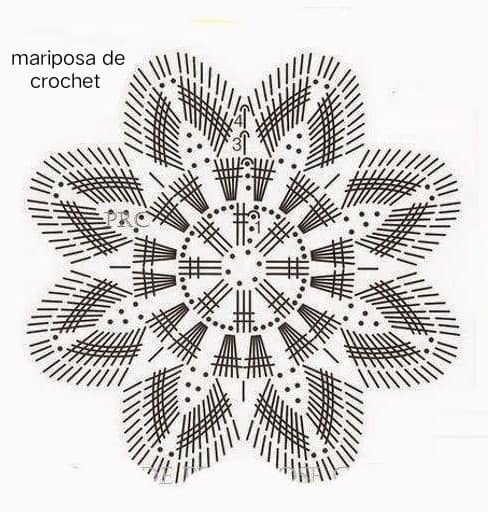
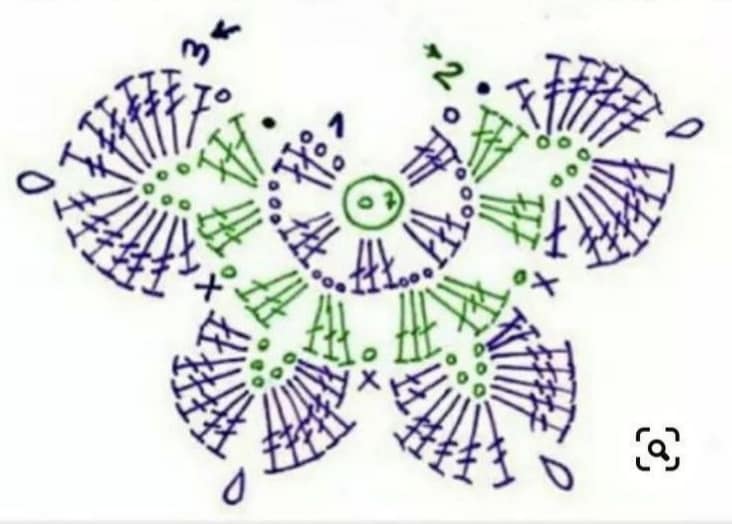
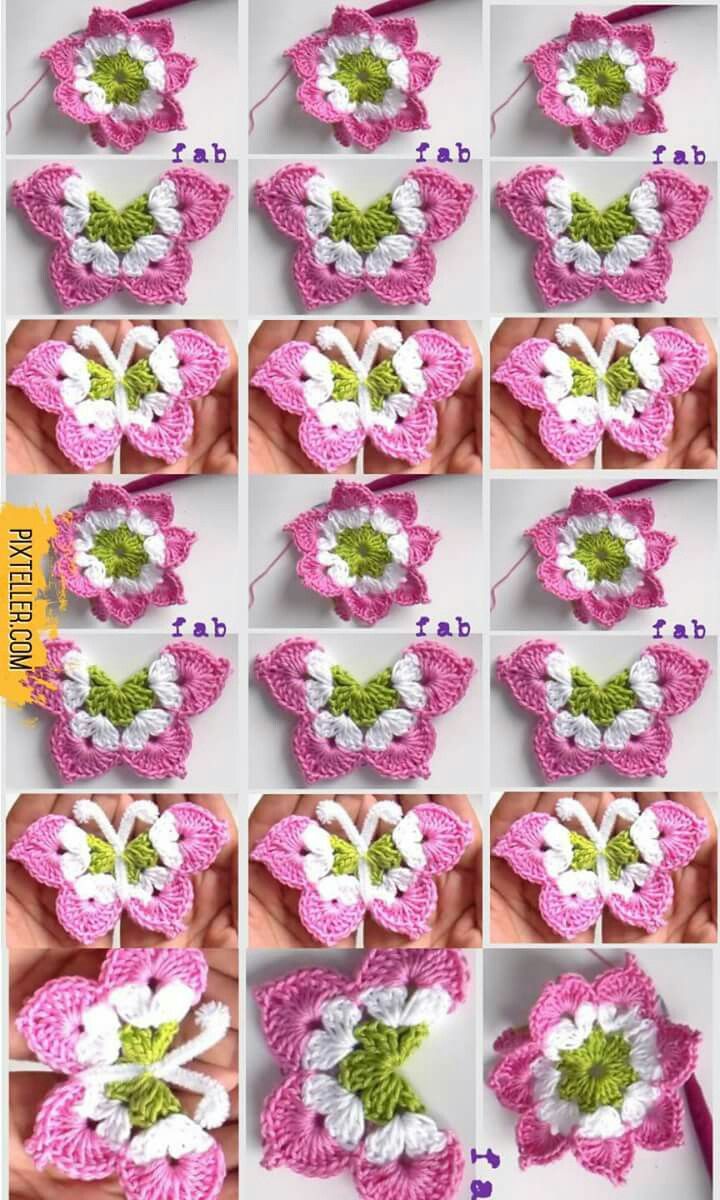
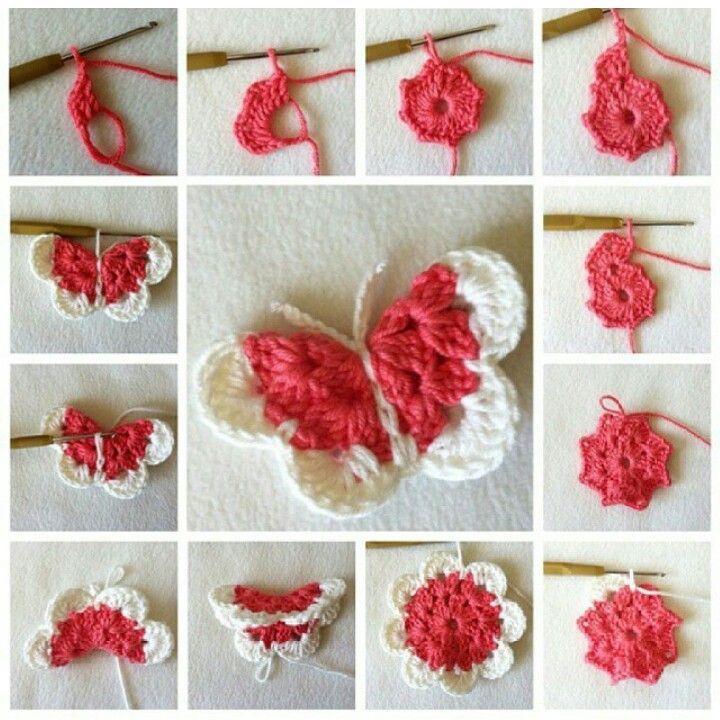
- Start with a Magic Ring: Create a magic ring (adjustable ring) and make 6 single crochet stitches inside it. Pull the ring tight.
- Round 1: Make 2 single crochets in each stitch around (12 stitches in total).
- Round 2: Work 1 single crochet in the first stitch, then 2 single crochets in the next stitch. Repeat this pattern until you have 18 stitches in total.
- Round 3: Now, work 1 single crochet in the first 2 stitches, and then 2 single crochets in the third stitch. Repeat this pattern until you reach the end of the round. This increases the size of your wings slightly.
- Creating the Wing Shape: For the next few rows, crochet in a round to form the outer edges of the wings. You can experiment with different patterns, such as using double crochets for a more open look.
- Finishing the Wings: Once you reach your desired size for the wings, make a few slip stitches to secure the final round, then cut the yarn, leaving a long tail for attaching the wings later.
From pinterest.
Source: marifu6a.com
From Pinterest
From facebook marisolcreativa
From Pinterest
From Pinterest
From Pinterest
From pinterest.
Step 2: Attach the Wings to the Wooden Head
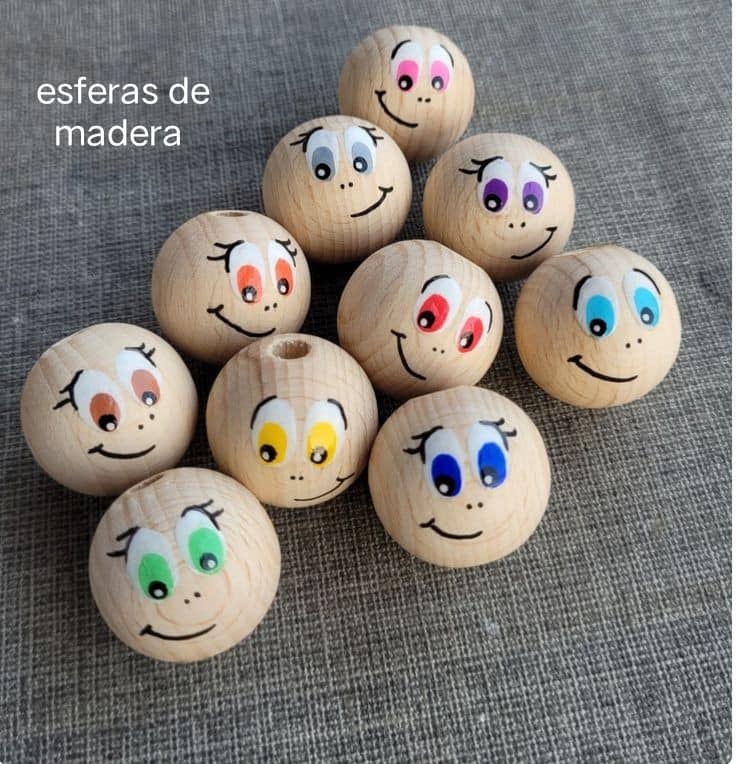
- Prepare the Wooden Head: If your wooden head (bead or ball) has any rough edges, you can gently sand them down to create a smooth finish.
- Attach the Wings: Place the wooden head in the center of the two wings. Use hot glue to attach the wings securely to the top of the wooden head. Allow the glue to dry thoroughly.
- Add Antennae: Take a small piece of wire or thin twine, fold it in half, and twist it to create antennae. Glue these to the top of the wooden head to finish off the butterfly's look.
Step 3: Embellishing the Butterfly
- Decorate the Wings: If desired, add extra embellishments like small beads, buttons, or sequins to give the wings more texture and sparkle. Use a tapestry needle to carefully sew the decorations onto the wings.
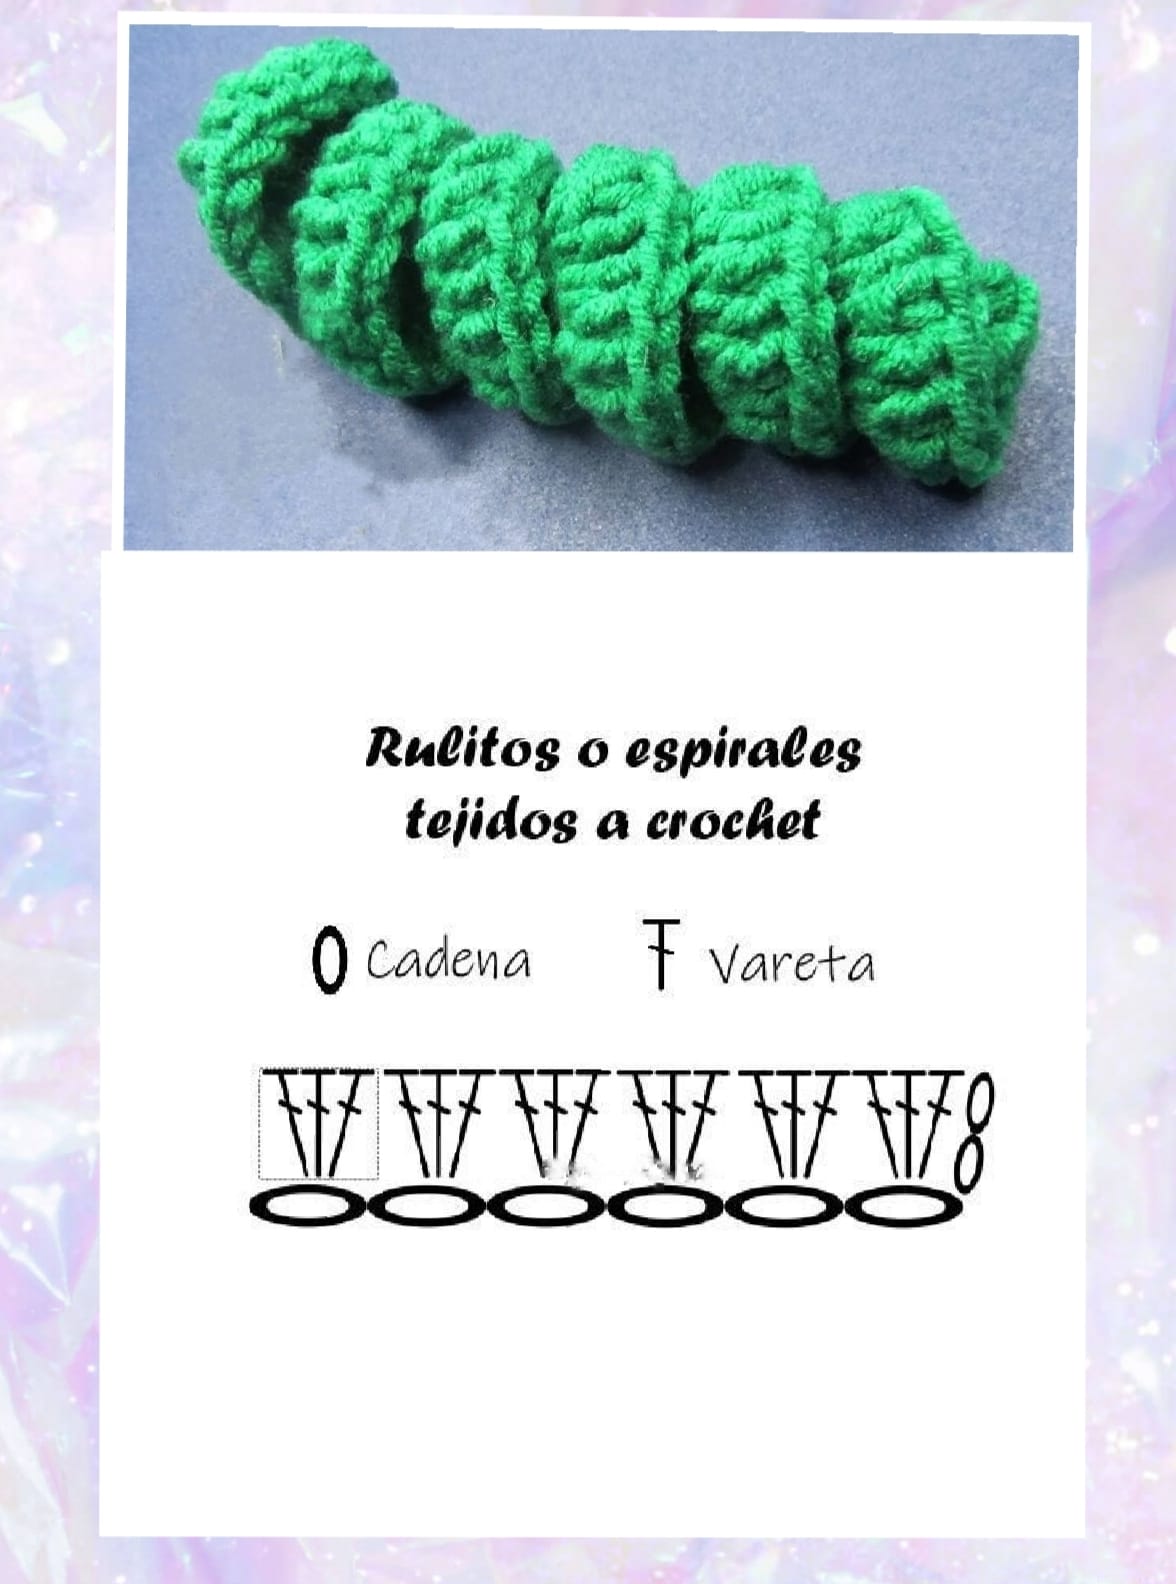
- Add a Butterfly Body: Using a small piece of yarn in a neutral color, crochet a small chain and attach it to the center of the wings to form the butterfly’s body. Alternatively, you can add a button or small beads to create the body.
- Make the Butterfly Stand Out: You can paint the wooden head with acrylic paints for added color or leave it natural for a rustic feel. Use metallic thread or glittery yarn for the wings if you want to give the butterfly an extra shine.
Step 4: Final Touches
- Weave in Loose Ends: Use the tapestry needle to weave in any loose yarn ends to keep your project neat and tidy.
- Attach a Loop for Hanging: If you'd like to hang your crochet butterfly ornament, attach a small loop of yarn or ribbon at the top of the wooden head.
Decorating with Handmade Butterfly Ornaments
Handmade butterfly ornaments bring a special charm to your home decor. They add beauty and a personal touch that store-bought items can't match. These ornaments are perfect for any time of year, from spring to the holidays.
One great thing about crocheted butterfly ornaments is how versatile they are. You can make them in many styles, from simple to complex. For instance, you can add them to magnets, hair clips, or even gift wrap. This adds a fun and unique touch to anything.
These ornaments also make wonderful gifts. They show you care and put thought into the gift. Plus, they can teach kids about textures and spark their creativity. Just be sure to avoid small parts for kids under three.
Adding handmade butterfly ornaments to your home adds a personal and creative touch. They're perfect for anyone, whether you're new to crafting or have lots of experience. These decorations let you express your creativity in every detail.
Conclusion
Starting a crochet butterfly ornament project is fun and relaxing. It combines creativity with the joy of making something beautiful. We've covered the steps, from making the magic circle to stiffening the final product.
These projects improve your fine motor skills and help you relax. You can try different patterns and techniques to make your butterflies unique. This makes them special and adds a whimsical touch to any room.
These ornaments are great for gifts, learning tools, or as decorative pieces. The happiness of making and sharing them is endless. For more ideas, check out Crochet Christmas Decorations for Your Home.
Sharing your crochet work online can connect you with others. It's important to be patient and keep practicing. This will help you make more detailed and satisfying projects.
Using materials like Juniper beads and Begonia yarn from Jarn art is a good start. A 1.75 mm crochet hook is also essential. These tools will help you create beautiful butterfly decorations.
Every stitch you make is a step towards something special. Let your imagination run wild and enjoy the journey of making butterfly crafts. Each project brings you closer to the beauty of handmade items and the joy of creating.
CHECK MORE CROCHET PATTERNS