Crochet Clovers for St. Patrick's Day: Crafting Luck and Charm
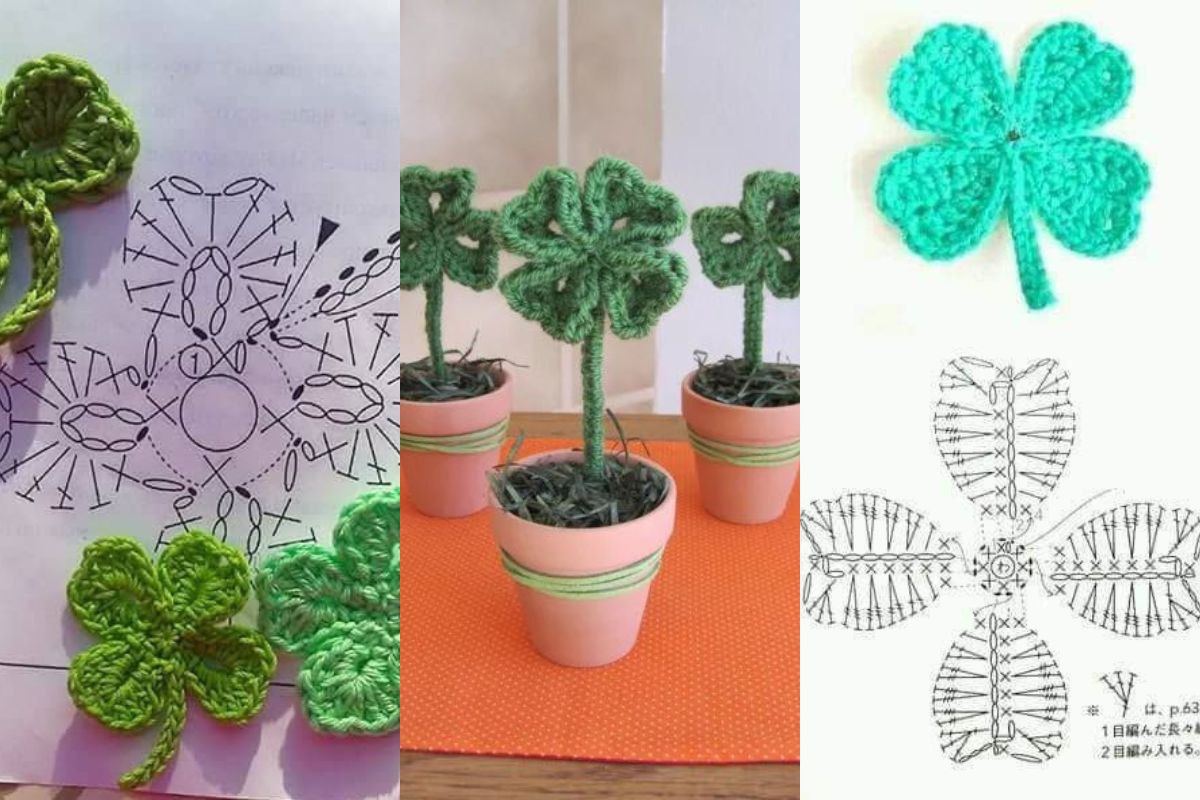
Crochet clovers are a delightful way to celebrate St. Patrick's Day. These tiny, versatile creations are perfect for decorations, accessories, and gifts. Whether you're a crochet beginner or an experienced crafter, making clovers is a fun project to embrace the festive spirit of this lucky holiday.
The clover represents good fortune and prosperity, making it a meaningful addition to any celebration.
In this guide, we’ll explore creative ideas, step-by-step instructions, and tips for using crochet clovers to brighten your celebration.
Crochet Clovers for St. Patrick's Day?
Adding crochet clovers to your holiday decorations is not just about aesthetics; it’s about infusing charm and creativity into your surroundings.
Materials Needed
Before diving into your crochet project, gather these essential materials:
Supplies:
- Green Yarn: Opt for shades like emerald, lime, or olive green to match the St. Patrick's Day theme.
- Crochet Hook: A 3.0 mm to 4.5 mm hook works best for small clover designs.
- Scissors: For trimming excess yarn.
- Tapestry Needle: To weave in loose ends.
- Optional Embellishments: Beads, buttons, or ribbons for added flair.
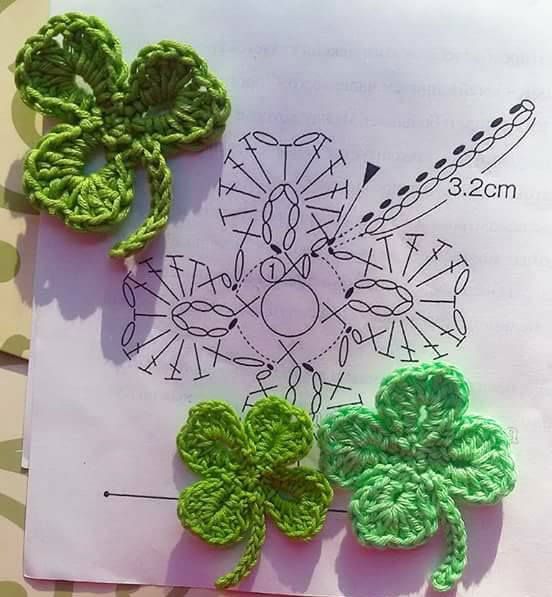
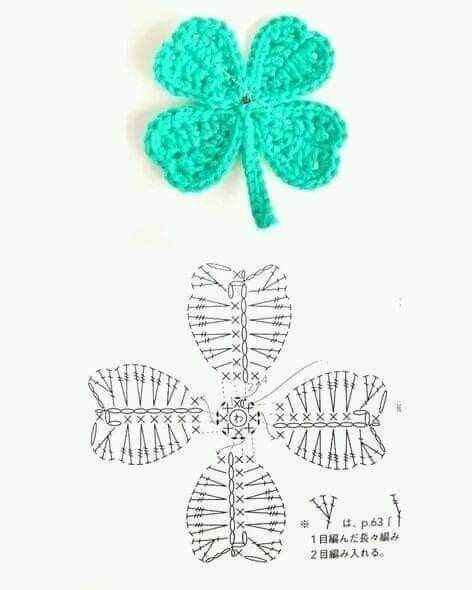
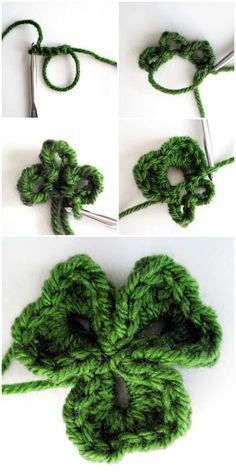
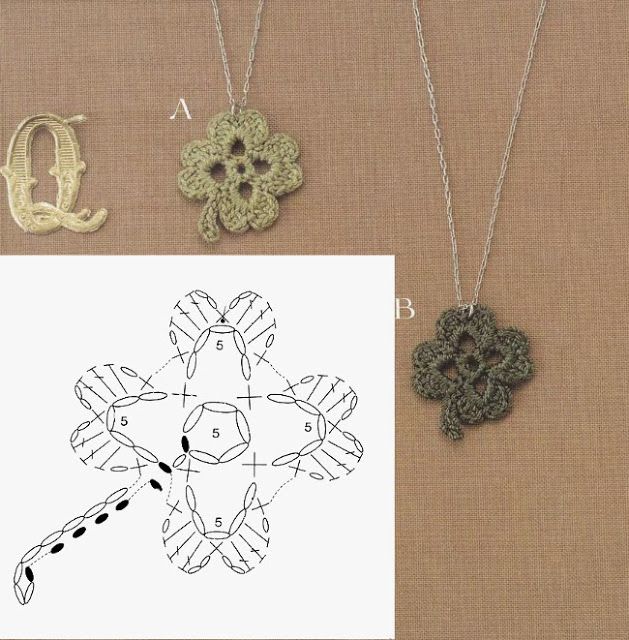
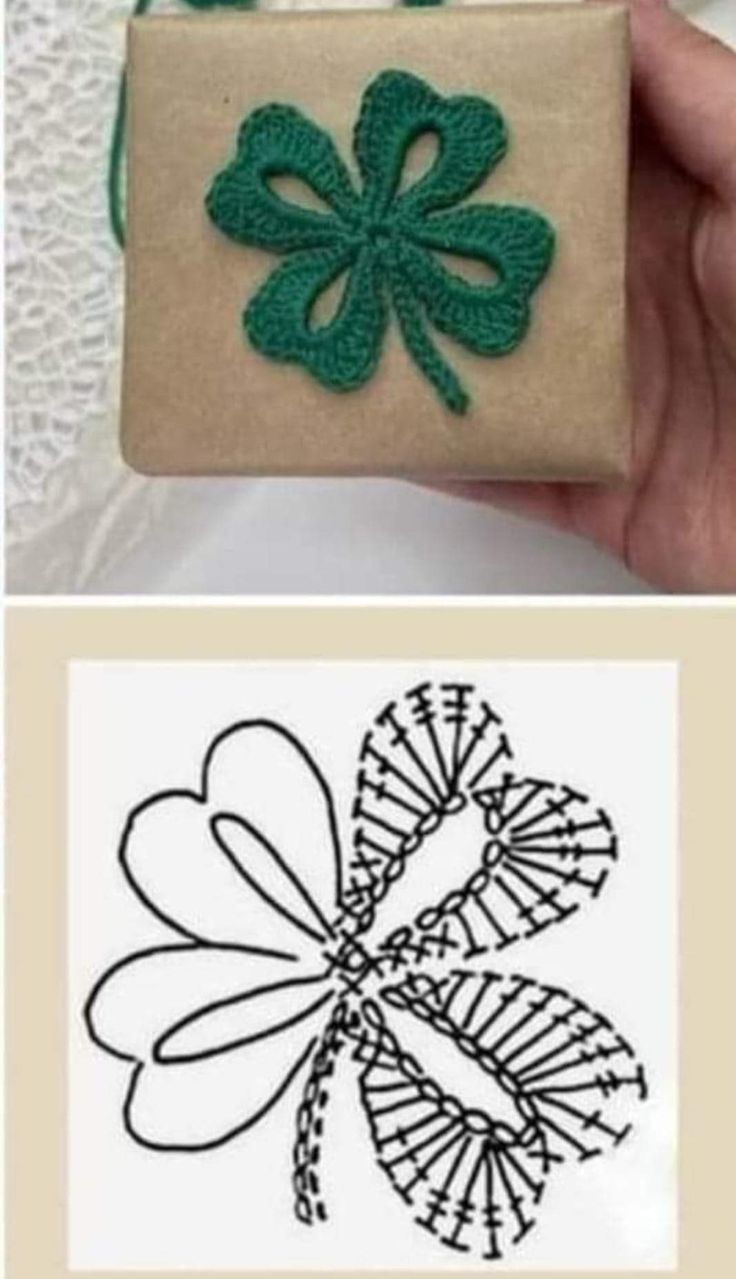
Step-by-Step Guide: How to Crochet a Clover
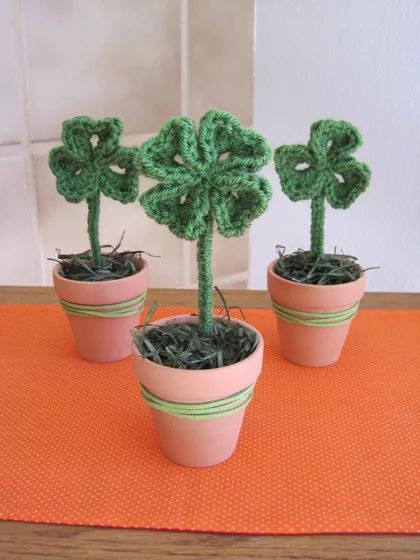
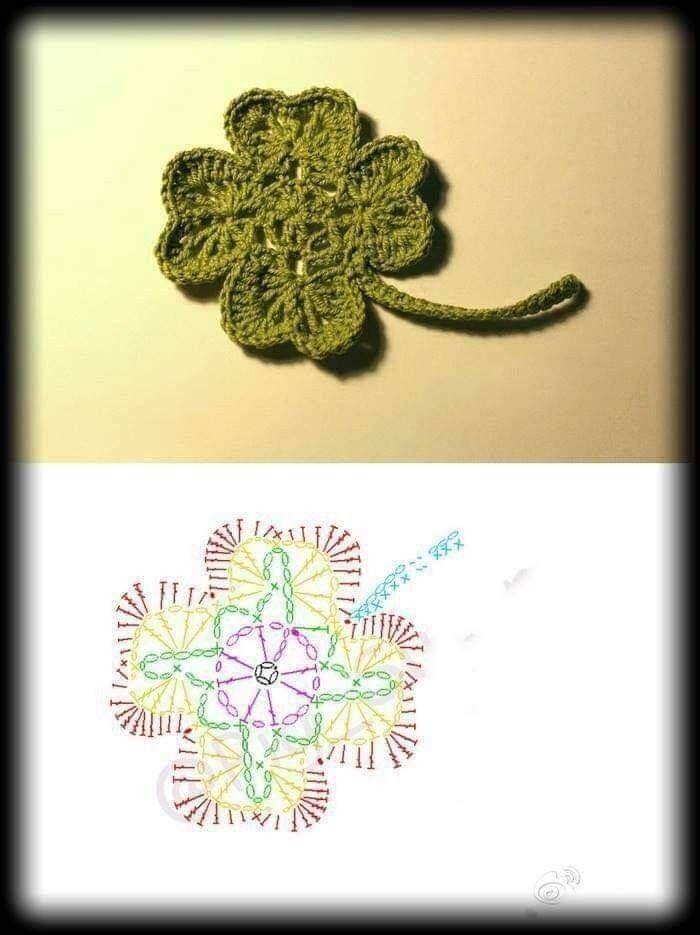
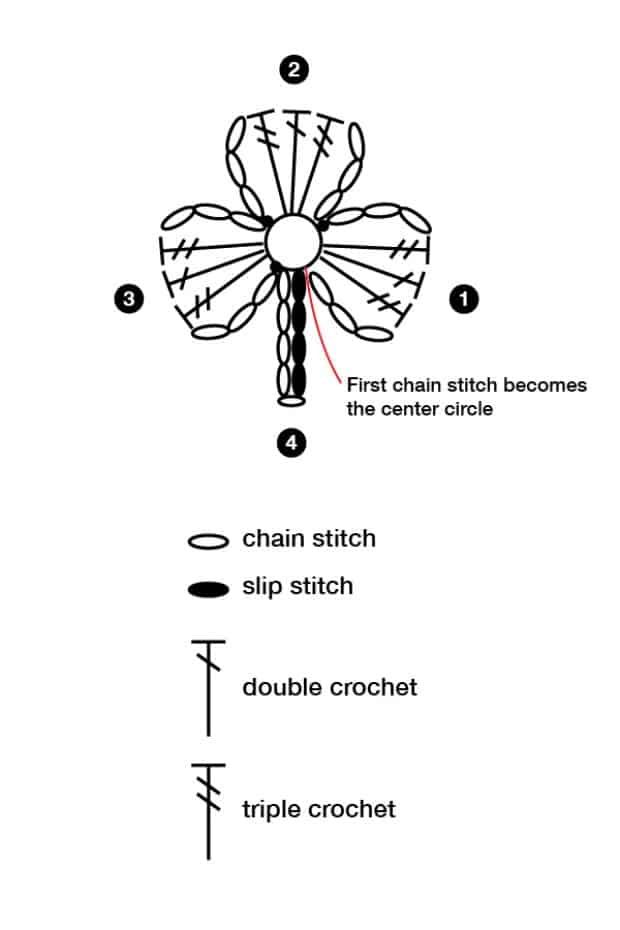
Follow these simple instructions to create a classic three-leaf or lucky four-leaf clover.
Step 1: Create a Magic Ring
- Begin by forming a magic ring (or adjustable loop).
- Secure the loop with a slip stitch.
Pro Tip: The magic ring technique allows you to tighten the center of your clover for a polished look.
Step 2: Crochet the Leaves
- Chain 4 to create the first petal.
- In the magic ring, work:
- 3 double crochets (DC),
- Chain 3,
- Slip stitch to complete the first leaf.
- Repeat the process 3 more times for a total of 4 leaves if you're making a lucky clover, or 2 more times for a three-leaf clover.
Variation: Experiment with different stitch heights (e.g., half-double crochet) to create varied textures.
Step 3: Add the Stem
- Chain 6 to form the stem.
- Work slip stitches back along the chain to give the stem a neat finish.
- Secure with a final slip stitch and fasten off.
Step 4: Finishing Touches
- Use a tapestry needle to weave in any loose ends.
- Block the clover if needed to ensure it lays flat.
Creative Ways to Use Crochet Clovers
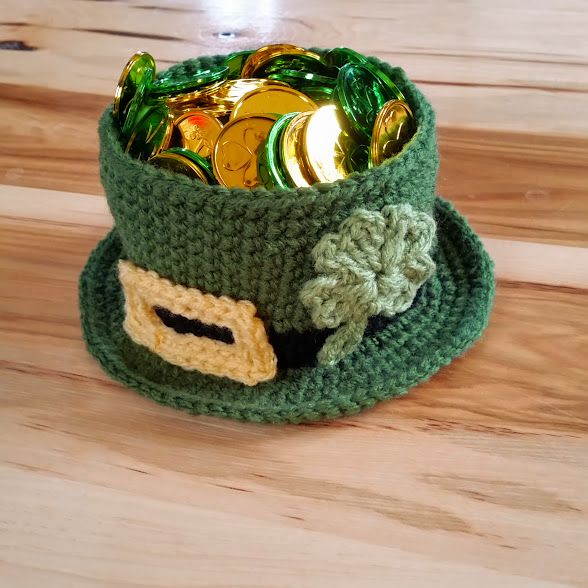
Once you've made your crochet clovers, there are countless ways to incorporate them into your St. Patrick's Day festivities. Here are some inspiring ideas:
1. Clover Garland
String multiple crochet clovers onto a length of twine or ribbon to create a festive garland. Hang it across mantels, doorways, or windows for a cheerful decoration.
2. Brooch or Pin
Attach a safety pin or brooch backing to the reverse side of a clover. Wear it as a lucky accessory or gift it to friends and family.
3. Table Decor
Scatter crochet clovers across your table as a fun and festive centerpiece. Alternatively, attach them to napkin rings or use them as drink markers.
4. Gift Embellishments
Add crochet clovers to wrapped presents or party favors for a personal, handmade touch.
5. Keychains
Transform your clover into a cute keychain by attaching a metal keyring and chain.
Tips for Crocheting the Perfect Clover
- Use a Tight Tension: This ensures your clover retains its shape.
- Experiment with Yarn Types: Try cotton yarn for a crisp look or acrylic yarn for a softer feel.
- Layer for Dimension: Create multiple clovers in varying sizes and layer them for a 3D effect.
- Incorporate Beads: Add small beads at the center of each clover for a decorative touch.
Crochet clovers are a charming and versatile addition to your St. Patrick's Day celebrations. Whether you're decorating your home, creating festive accessories, or adding a personal touch to gifts, these handmade treasures are sure to spread luck and joy.
With simple techniques and endless creative possibilities, you’ll enjoy crafting these delightful symbols of fortune.
CHECK MORE CROCHET PATTERNS