Crochet Dragonfly Keychain: A Creative and Whimsical DIY Project
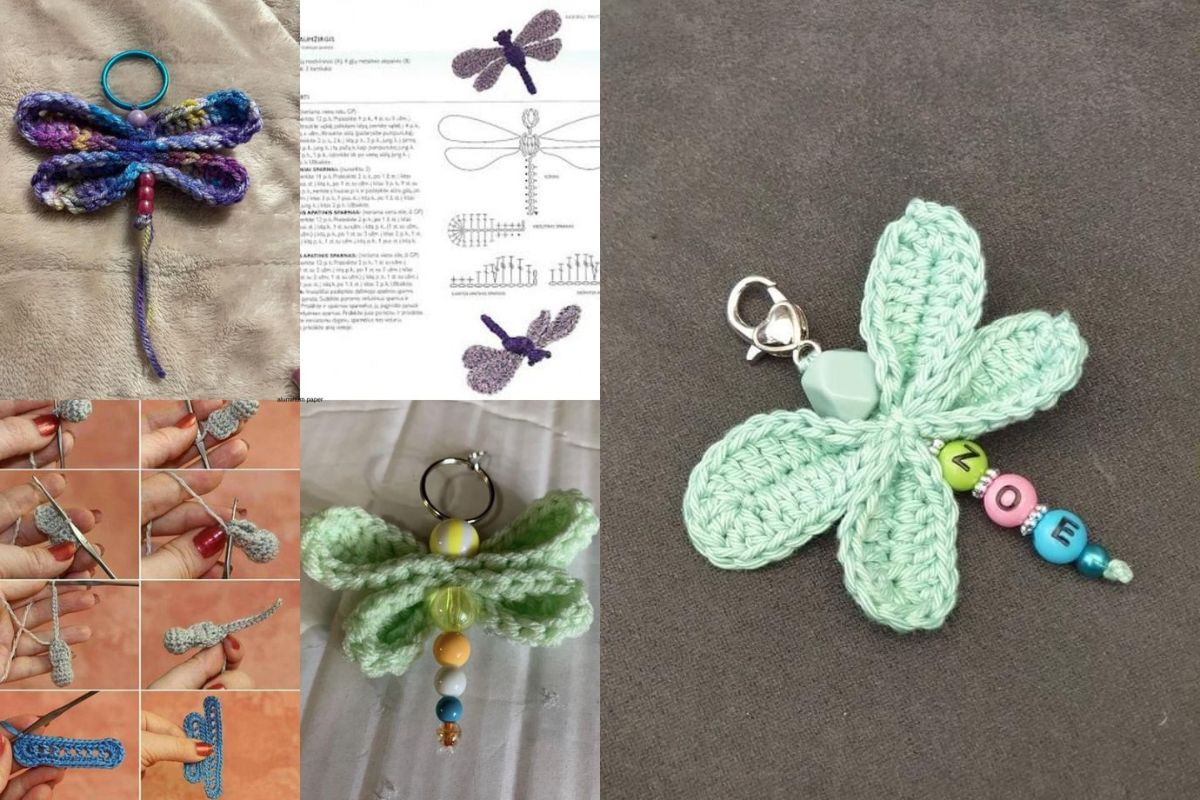
A crochet dragonfly keychain is more than just a charming accessory; it’s a perfect way to add a touch of whimsy and nature to your everyday life. Whether you're looking to create a gift for a loved one or want a unique way to decorate your keys, bags, or purses, a crochet dragonfly keychain can be a fun, colorful, and meaningful DIY project.
The dragonfly, known for its delicate wings and graceful flight, is often associated with transformation, joy, and the beauty of nature. By crocheting a dragonfly keychain, you’re not only creating an adorable accessory but also embracing the symbolism of change and freedom.
In this article, we’ll guide you through the process of making your own crochet dragonfly keychain with simple steps and materials, giving you a project that is both creative and functional.
Materials Needed to Make a Crochet Dragonfly Keychain
The crochet dragonfly keychain is a charming and creative way to add a personal touch to your holiday season or everyday accessories. This DIY project is easy to follow, customizable, and fun to make. Whether you're gifting them or keeping them for yourself, these adorable dragonfly keychains will surely bring a bit of whimsy and nature into your life.
Before starting, gather all the materials you’ll need. Fortunately, this project doesn’t require many specialized supplies, and most of them are likely available at your local craft store or already in your crochet stash.
Materials:
- Yarn: Choose a yarn in your favorite colors. For the dragonfly body, cotton yarn or acrylic yarn works well. For the wings, you can use a lighter weight yarn or thread for a more delicate look.
- Crochet Hook: Size 3.5mm to 4mm is ideal for most yarns.
- Scissors: To cut your yarn.
- Tapestry Needle: For weaving in ends.
- Keychain Ring: A metal keyring or plastic keychain ring to attach your dragonfly.
- Beads or Buttons: For added decoration or to create the eyes of the dragonfly.
- Stitch Markers: Helpful for keeping track of your rounds if needed.
- Optional Embellishments: Glitter, small rhinestones, or sequins for a bit of sparkle.
Step-by-Step Guide to Making Your Crochet Dragonfly Keychain
Now that you have all your materials ready, it’s time to start crocheting! Follow these simple steps to create your crochet dragonfly keychain.
Step 1: Create the Dragonfly Body
The body of the dragonfly is the central part of the keychain. Here’s how to crochet it:
- Make a Magic Ring: Start by making a magic ring (adjustable ring) to begin your crochet work. This will form the base of the dragonfly's body.
- Round 1: Inside the magic ring, crochet 6 single crochets (sc). Pull the ring tight to close it.
- Round 2: Work 2 single crochets (sc) in each stitch around (12 stitches).
- Round 3: Crochet 1 single crochet in the first stitch, then 2 single crochets in the next stitch. Repeat this pattern around for a total of 18 stitches.
- Rounds 4-6: Continue working 1 single crochet in each stitch around for 3 rounds, creating a long and slender body.
- Finish Off: Cut the yarn, leaving a long tail. Pull the yarn through the last loop to secure it.
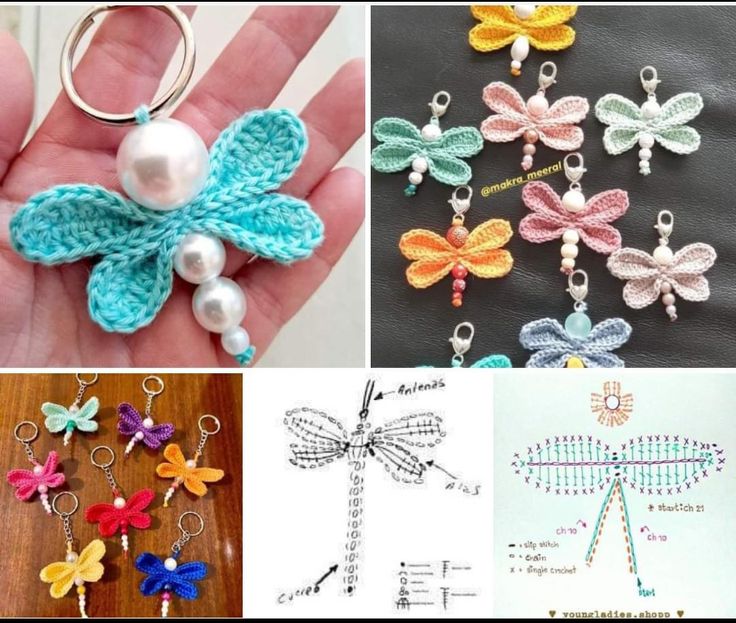
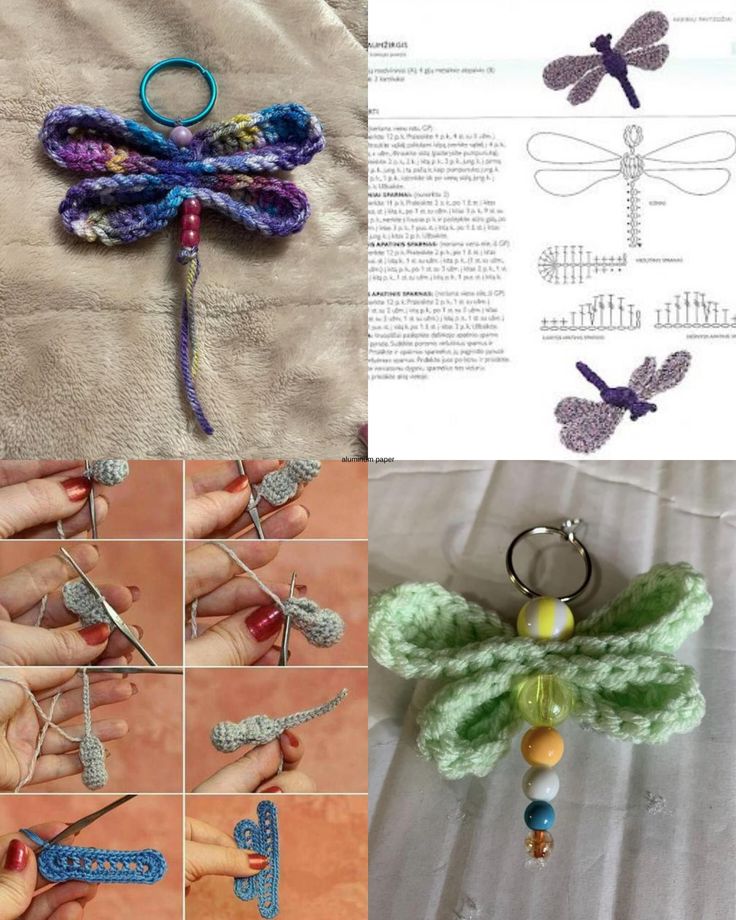
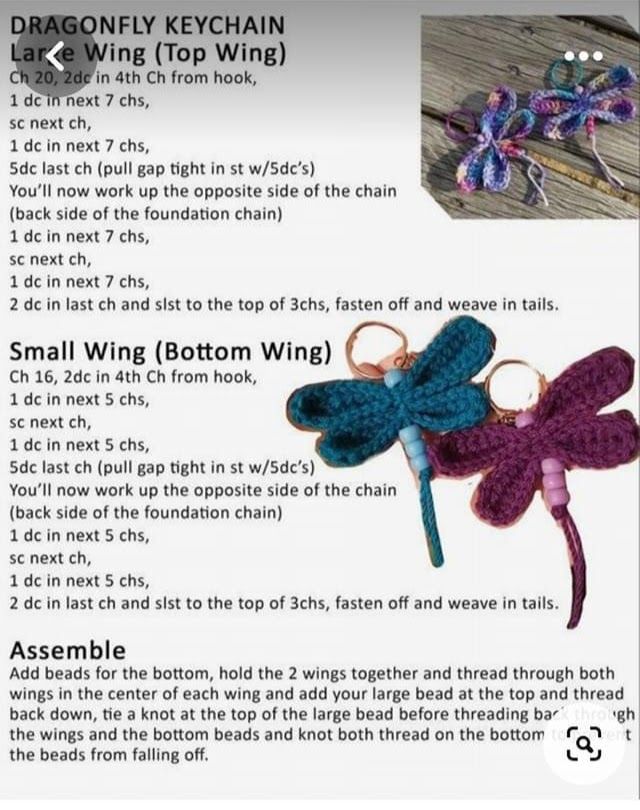
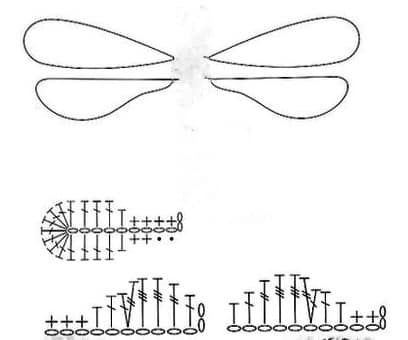
Step 2: Make the Dragonfly Wings
The wings are the most beautiful part of the dragonfly and require a bit of finesse. Here’s how to create them:
Upper Wings (Make 2):
- Ch 12 (chain 12).
- Row 1: Skip the first chain, then work 1 double crochet (dc) in each chain across (11 stitches).
- Row 2: Turn, chain 1, and work 1 single crochet (sc) in each stitch across.
- Row 3: Turn, chain 1, and work 1 slip stitch (sl st) across to finish the top part of the upper wing.
Lower Wings (Make 2):
- Ch 10 (chain 10).
- Row 1: Skip the first chain, then work 1 double crochet (dc) in each chain across (9 stitches).
- Row 2: Turn, chain 1, and work 1 single crochet (sc) in each stitch across.
- Row 3: Turn, chain 1, and work 1 slip stitch (sl st) across to finish the lower wing.
Step 3: Attach the Wings to the Body
Once you’ve crocheted the wings, it’s time to attach them to the body of your dragonfly.
- Position the upper wings on each side of the body, slightly angled outward. Use a tapestry needle to sew them securely.
- Attach the lower wings beneath the upper wings, slightly overlapping. Again, use the tapestry needle to stitch them into place.
Step 4: Add the Eyes and Final Details
Now that the wings are attached, it’s time to finish off the look of your crochet dragonfly.
- Eyes: Use small beads, buttons, or even sew on small stitches to create the eyes of the dragonfly on the body.
- Optional Embellishments: You can add a bit of sparkle by sewing on rhinestones, adding a glittery finish to the wings, or using sequins to enhance the dragonfly’s wings.
Step 5: Attach to Keychain Ring
Finally, it’s time to make your crochet dragonfly ready for use as a keychain.
- Use the long tail left from the body and attach it to the keychain ring. Tie a secure knot, and trim any excess yarn.
- Your crochet dragonfly keychain is now ready to hang on your keys, bags, or as a gift!
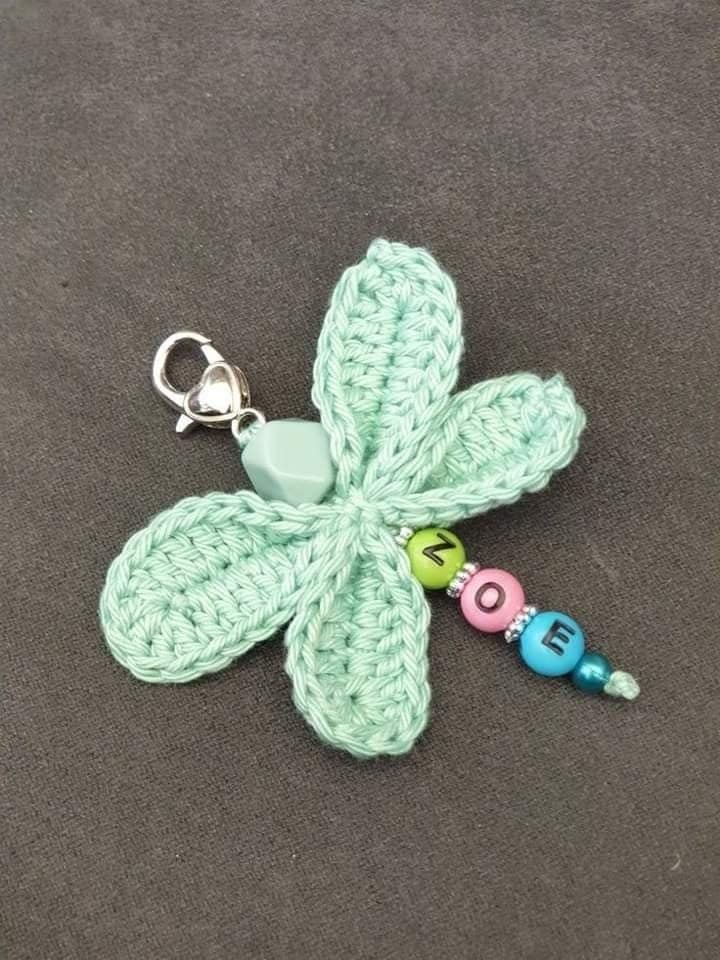
So grab your crochet hook and yarn, and start creating your own dragonfly keychains today. They’re sure to make a beautiful addition to your key collection!
CHECK MORE CROCHET PATTERNS