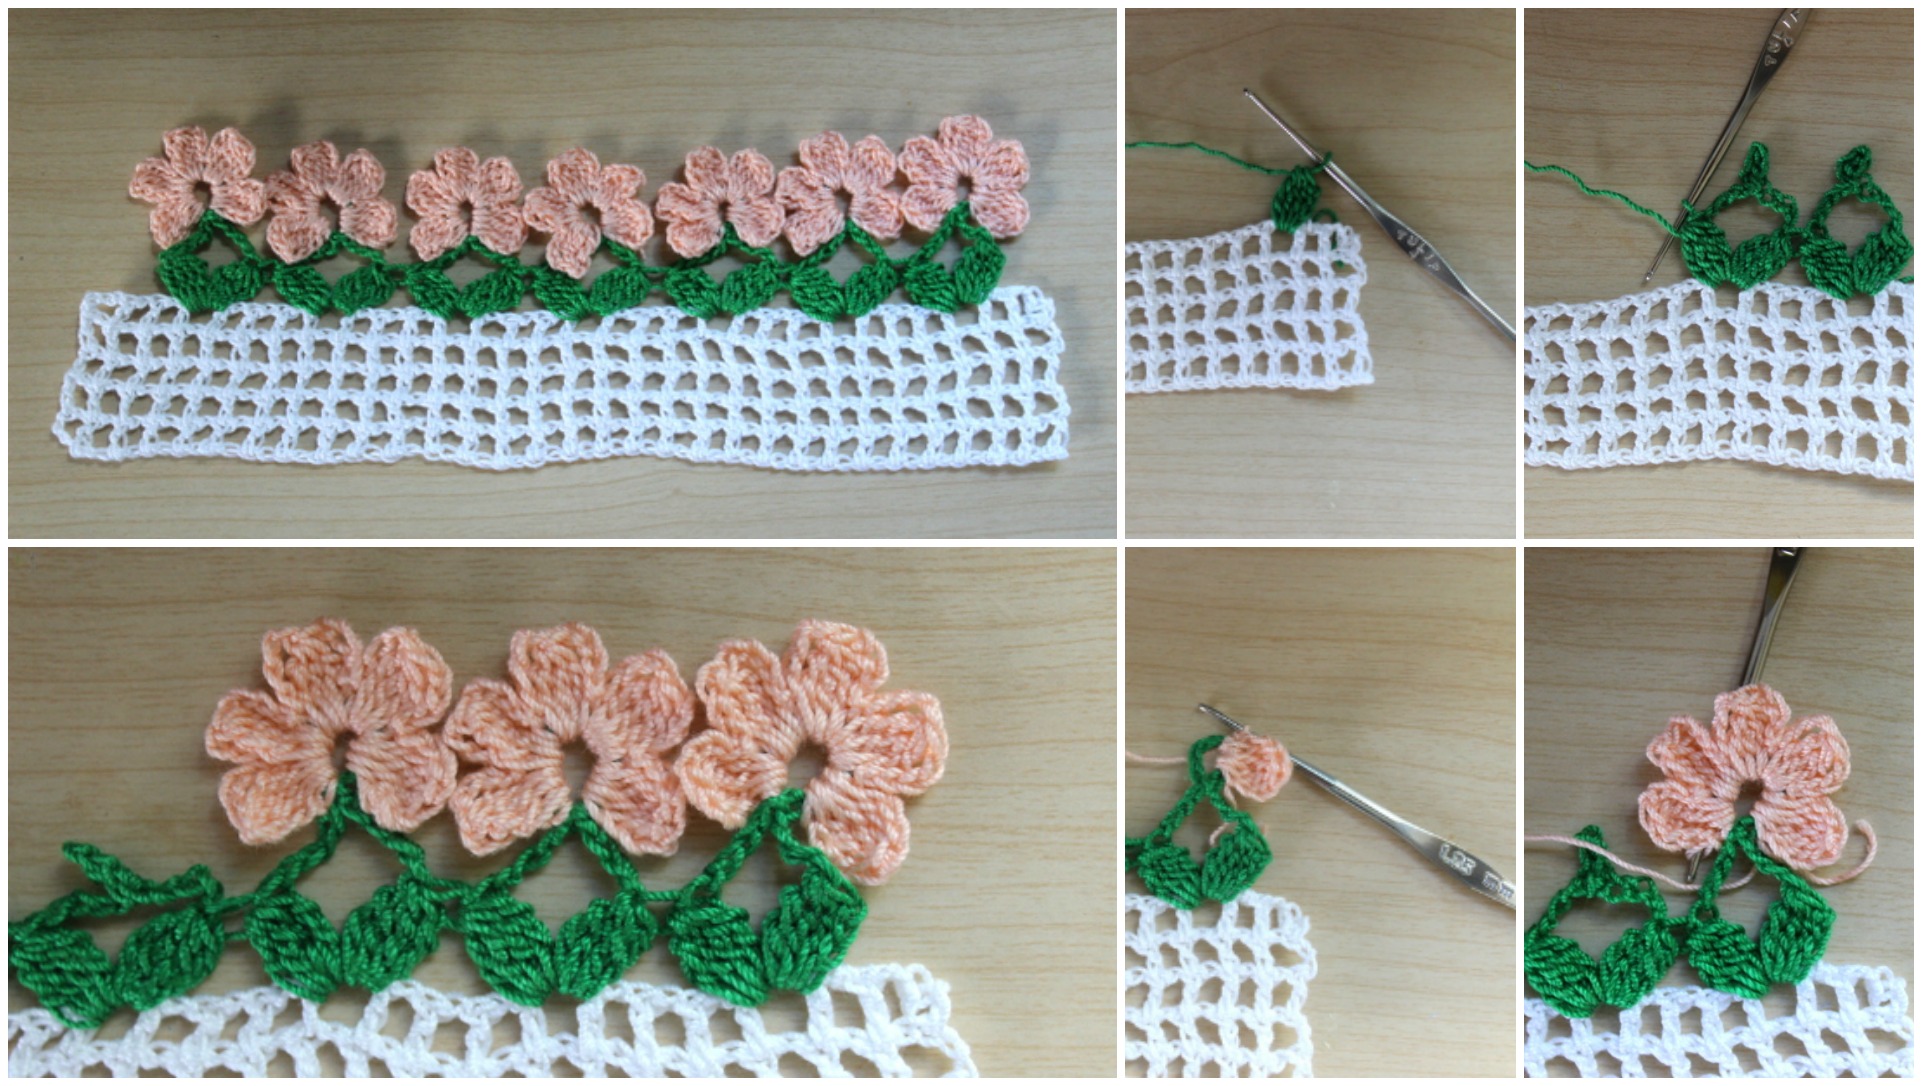
Crochet Flower Border

If you have crocheted blanket and don’t know which border you want to crochet this post we have made for you.
In this great tutorial you can learn with pictures step by step Flower Border Design from Olga Poltava. Thanks to author for great design and tutorial.
You next Blanket may will most beautiful you have crocheted before. Choose any colors that you think will look better on your blanket and make lovely blanket for your bedroom or restroom.
Crochet Flower Border
We this tutorial we have searched for you will be useful and you will enjoy. Good Luck.

How to Crochet a Flower Border (Step-by-Step Tutorial)
Step 1: Prepare the Foundation Row
- Single Crochet Foundation:
- Start with a single crochet foundation row along the edge of your project. This row provides a stable base for the flower border.
- Chain 1 and Turn:
- At the end of the row, chain 1 and turn your work to get ready for the next step.
Step 2: Begin the Flower Pattern
- Chain 4:
- Chain 4 to create a small loop. This loop will form the base of the first flower petal.
- Petal Cluster:
- Work 3 double crochets (DC) into the next stitch. This forms the first petal cluster of your flower.
- Slip Stitch to Close Petal:
- Slip stitch into the base of the petal to close and secure it.
Step 3: Continue Adding Petals
- Repeat the Petal Pattern:
- After each petal, chain 2 and repeat the petal pattern along the row.
- Adjust Petal Size:
- If you want larger petals, try using treble crochets (TR) instead of double crochets.
Step 4: Create the Flower Centers
- Attach Center Color:
- Choose a contrasting color for the flower centers. Attach the new yarn color to the base of each flower petal cluster.
- Work Single Crochets:
- Work single crochets around the center of each flower petal cluster to define the center.
- Secure with a Slip Stitch:
- Slip stitch to close and cut the yarn, leaving a neat finish.
"Adding a contrasting center makes each flower pop, adding depth and interest to the border."
Step 5: Add Leaves (Optional)
- Chain 4 for Leaf Stem:
- Chain 4 to create a stem for the leaf. This stem can be positioned between each flower for a natural look.
- Work Leaf Shape:
- Work 2 double crochets into the next stitch, chain 2, and slip stitch to secure the leaf.
- Repeat Along the Border:
- Continue adding leaves between each flower to complete your floral border.
Learn how to crochet a beautiful flower border with this step-by-step tutorial! Perfect for blankets, scarves, and home decor, this border adds a natural touch to any project.
CHECK MORE CROCHET PATTERNS