A Modern Twist: Crochet Headbands with Graphics That Speak Your Style
In the evolving world of handmade fashion, crochet headbands have taken on a whole new personality. No longer just simple bands of warmth or style, they’re now canvases for graphic expression, intricate patterns, and textured storytelling.
Enter the era of the crochet headband with graphics — where yarn meets imagination.
Whether you're a beginner with a hook or an experienced yarn whisperer, this guide will unravel creative ideas, stitches, design tips, and even how to chart your own graphics into wearable masterpieces.
Types of Graphics You Can Try:
- Geometric designs
- Nature motifs (leaves, rainbows, mountains)
- Seasonal icons (snowflakes, pumpkins, suns)
- Pop art (smiley faces, lightning bolts)
- Custom names or initials
Materials You Need
To create your own crochet headband with graphics:
- Yarn: DK or worsted weight works best for color changes
- Hook size: Usually 4.0 mm to 5.5 mm
- Graph paper or digital chart tool (like StitchFiddle or Chart-Minder)
- Yarn needle for weaving in ends
- Scissors
- Optional: Elastic band for a snug fit

Techniques for Graphic Crochet
1. Tapestry Crochet
- Work with two or more yarns at once.
- Carry the unused yarn along the row, crocheting over it.
- Creates a dense, non-stretchy fabric ideal for headbands.
2. Intarsia Crochet
- Use separate bobbins for each color block.
- Great for large, clear images without yarn carried behind.
- Minimal bulk, smooth fabric.
3. Overlay Crochet
- Raised designs created over a base fabric.
- 3D effect: great for flowers, shapes, or lettering.
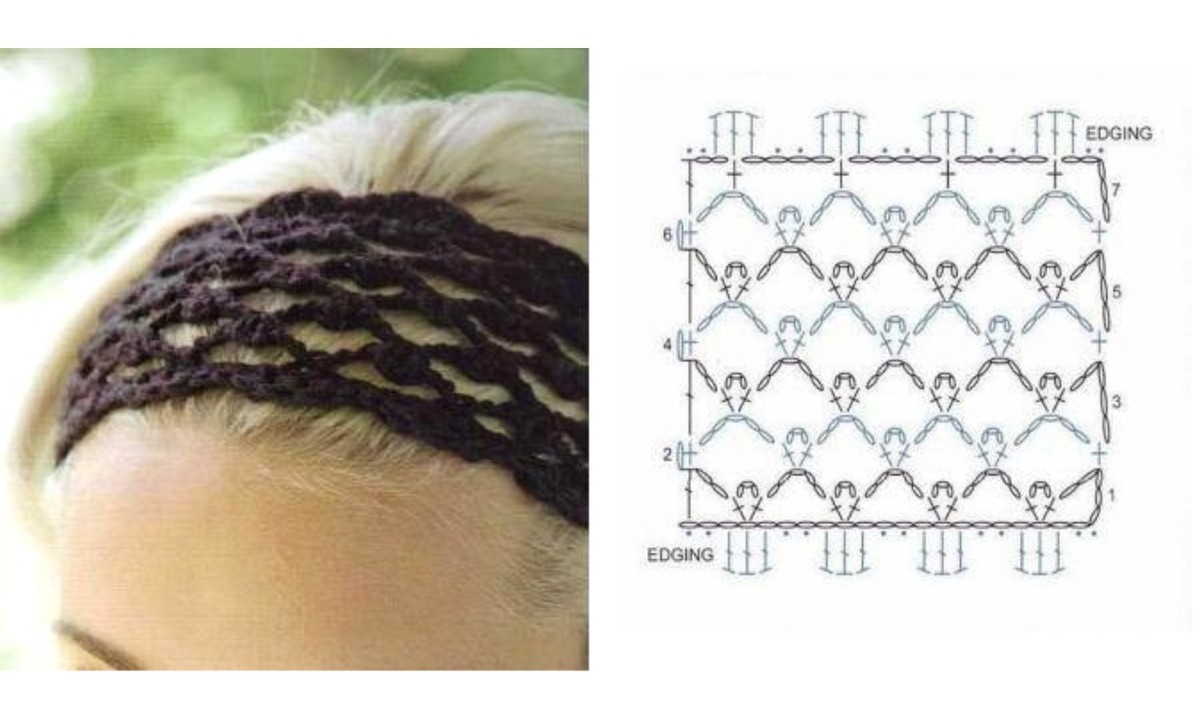
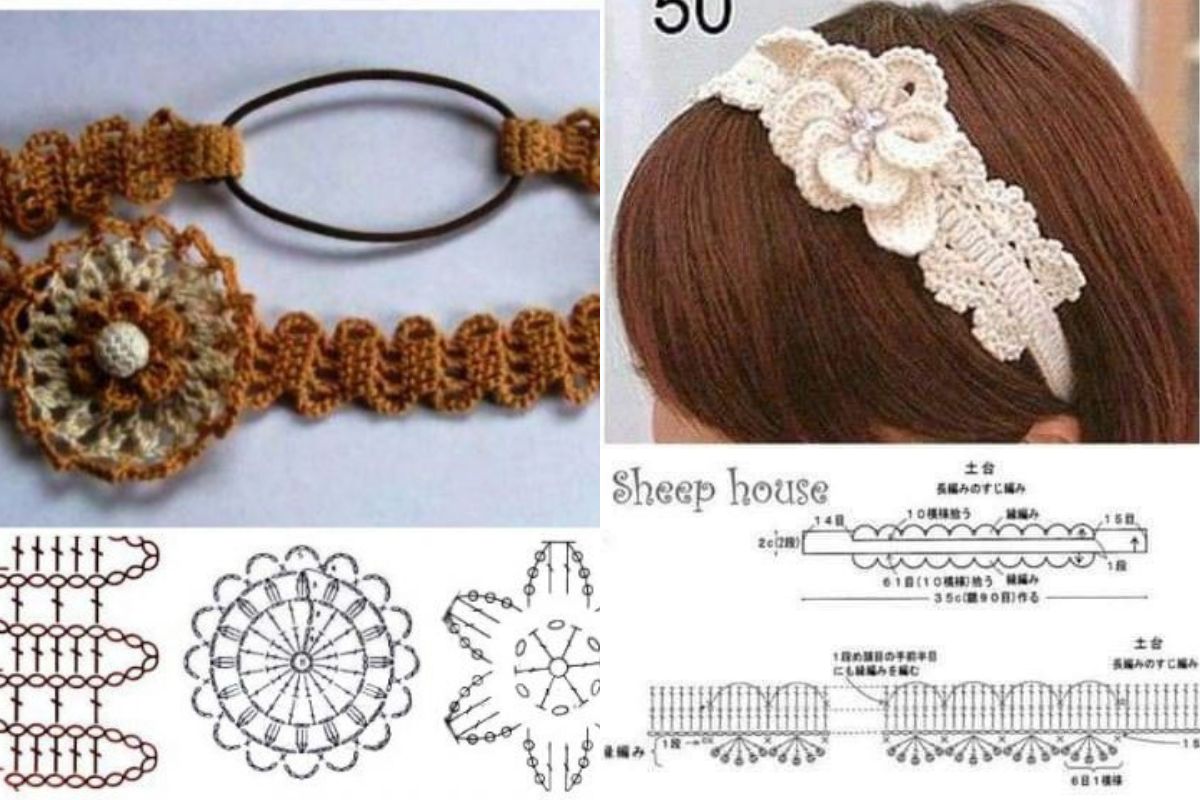
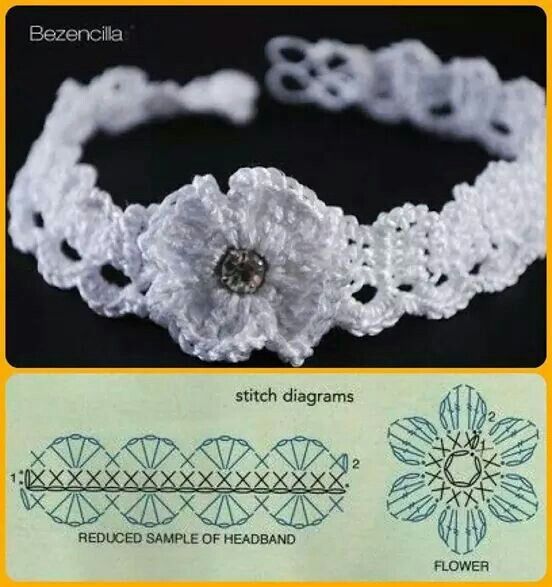
Via: m.blog.naver.com
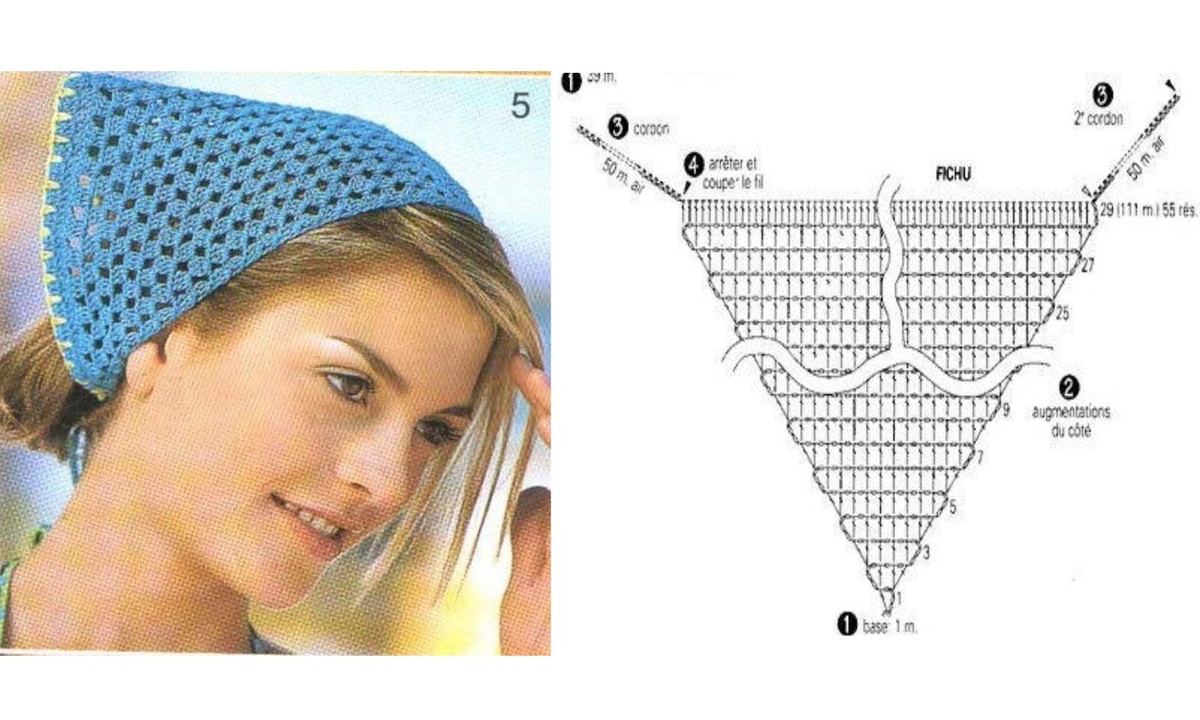
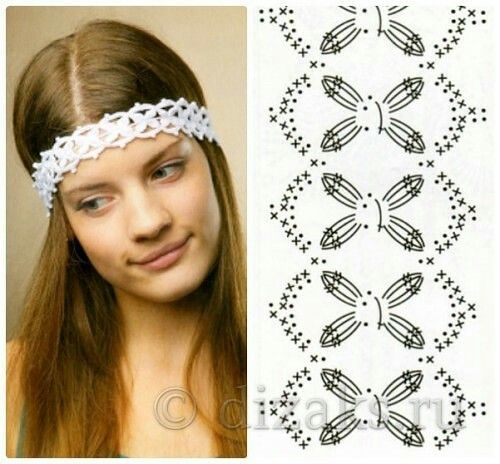
Via: m.blog.naver.com
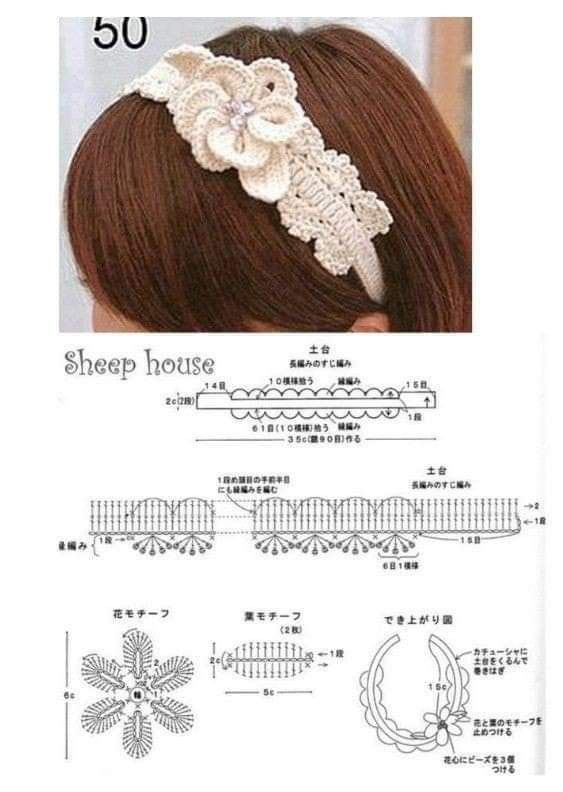
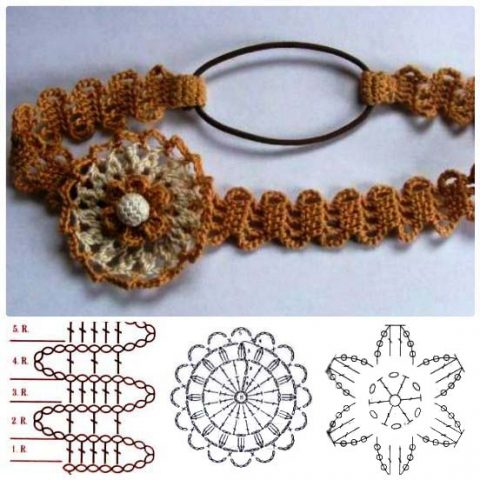
Via: m.blog.naver.com
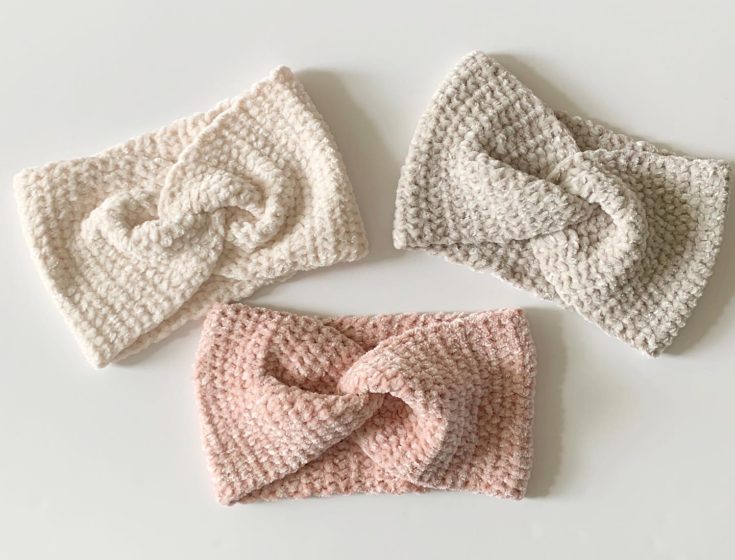
Via: kru4ok.ru
Designing Your Own Graphic Headband
Step-by-Step:
- Measure the head circumference (usually 18-22" for adults).
- Determine your gauge (stitches per inch).
- Multiply width x height in stitches = your design canvas.
- Use graph paper or software to chart your design.
- Select your technique (tapestry for bold lines, intarsia for smooth images).
Popular Design Themes (with Sample Graphics)
1. Boho Arrows and Diamonds
- Earthy tones, textured arrows in repeating patterns
- Great with fringe or wooden buttons
2. Text Graphics
- Words like:
COZY,WILD,HAPPY,MAMA - Use capital block fonts for clarity
3. Seasonal Themes
- Autumn: Leaves, pumpkins, acorns
- Winter: Snowflakes, trees, stars
- Spring: Tulips, bunnies, bees
- Summer: Suns, waves, flowers
4. Kids’ Fun Bands
- Dinosaurs, hearts, unicorns, animals
- Add puff stitch ears or embroidered eyes
5. Monogram Headbands
- Single-letter bold initials framed in circles or hearts
- Perfect for personalized gifts or sibling sets
Tips for Neat Colorwork in Headbands
Use bobbin winders or wrap mini yarn balls for cleaner color changes
Always change color in the last pull-through of the previous stitch
Keep your yarn tension even to avoid puckering
Block your headband after finishing for crisp stitch definition
- Add beads to some stitches for sparkle
- Use faux leather labels stamped with your brand
- Edge with reverse single crochet (crab stitch) for a polished finish
- Sew on a fabric lining for added warmth and comfort
Choose smooth, non-fuzzy yarns like cotton or acrylic for clean stitch definition. Count the total stitches in your headband and place your design in the middle section, leaving equal stitch counts on both sides.
Add a small piece of elastic in the back or use a stretch-friendly stitch like half-double crochet for flexibility. If you're familiar with basic stitches and willing to try color changes, it's a great next step for beginners!
Create expressive crochet headbands with bold graphics, colorwork patterns, and custom designs. Explore techniques, design tips, and get inspired with trending ideas and charts.
CHECK MORE CROCHET PATTERNS