Beautiful Crochet Owl Applique Graphics
Welcome to the delightful world of crafting, where creativity meets charm. In this guide, we'll dive into the enchanting universe of creating beautiful crochet owl applique graphics. Whether you're new to crochet or a seasoned artisan, these unique and adorable designs are sure to inspire your next project. From
intricate details to vibrant patterns, crochet owl appliques are perfect for decorating baby blankets, home decor, and much more.
Embracing the art of crochet not only sparks joy but also allows you to create personalized and heartfelt handmade pieces.
The Charm of Crochet Owl Applique Designs
Discover the allure of crafting with crochet owl design and see how these DIY owl appliques add a delightful touch of whimsy to any project. Handmade owl decor creates a charming and cozy aesthetic that can enhance your home or serve as a unique, personalized gift.
The popularity of owl appliques is due to their adorable appearance and the variety of ways they can be utilized, from embellishing baby blankets to decorating home interiors.

Materials Needed for Crochet Owl Appliques
To start creating your own crochet owl design, gather the essential materials: yarn (such as Sugar and Cream cotton yarn), a crochet hook (like an H/8 - 5 mm hook), and additional supplies for embellishments, such as embroidery yarn for the eyes and beak. Having the right tools ensures a smooth crafting experience and allows you to bring your vision to life with precision.
How to Start Your DIY Owl Applique Project
Initiating a DIY project for a cute owl crochet pattern can be immensely rewarding, especially when you see the delightful final product.
This process, however, begins with selecting the right materials and employing essential techniques. Ensuring these steps are followed properly is crucial for the durability and aesthetic appeal of your unique crochet applique.
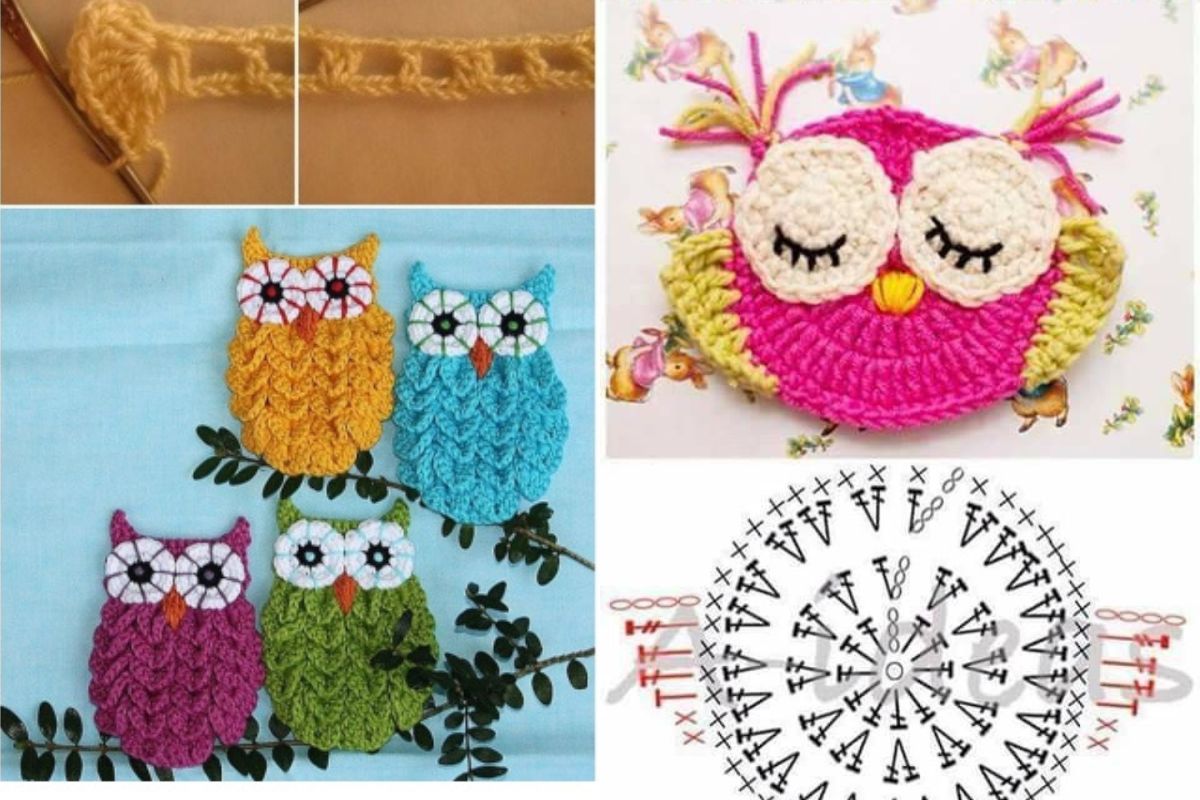
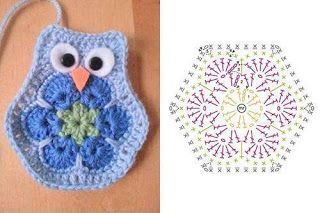
Begin with a Magic Ring
Once you have your materials ready, begin with a magic ring to ensure a tight center. This technique prevents holes in the center of your crochet fabric, which is essential for the structural integrity of the unique crochet applique. The crochet owl amigurumi pattern involves a sequence of increasing stitches: starting from 6 single crochets (SC) in the first round and gradually increasing to 36 SC by the sixth round. For the eyes, start with 5 SC in the first round and increase to 10 SC in the second round to achieve the distinct owl eye look.
Following these initial steps will set a strong foundation for your DIY owl applique project. As you proceed through each round, remember to enjoy the process and take pride in creating a beautiful piece that showcases your skill and creativity.
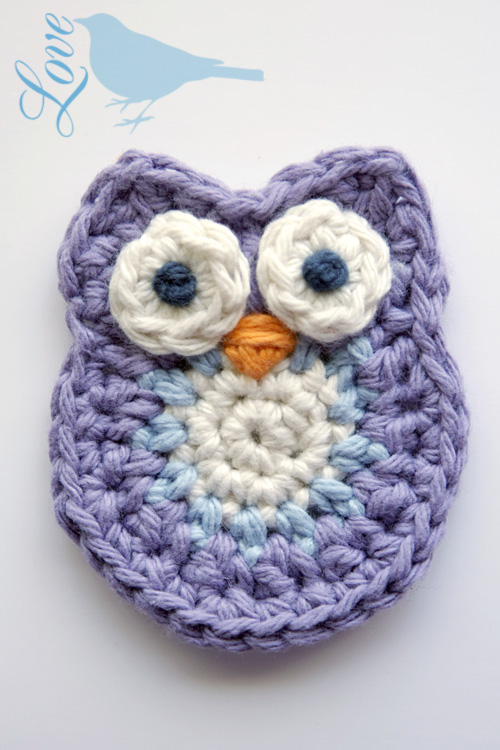

From Pinterest
Source: lutyartescrochet.blogspot.com
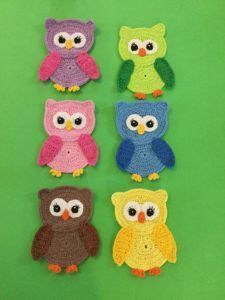
From Pinterest
Source: lutyartescrochet.blogspot.com
Beautiful Crochet Owl Applique Graphics: Step-by-Step Tutorial
In this section, we will guide you through a detailed crochet owl applique tutorial that breaks down the process into manageable steps. From creating the owl's body to adding intricate details like eyes and a beak, this DIY owl applique project is perfect for all skill levels.
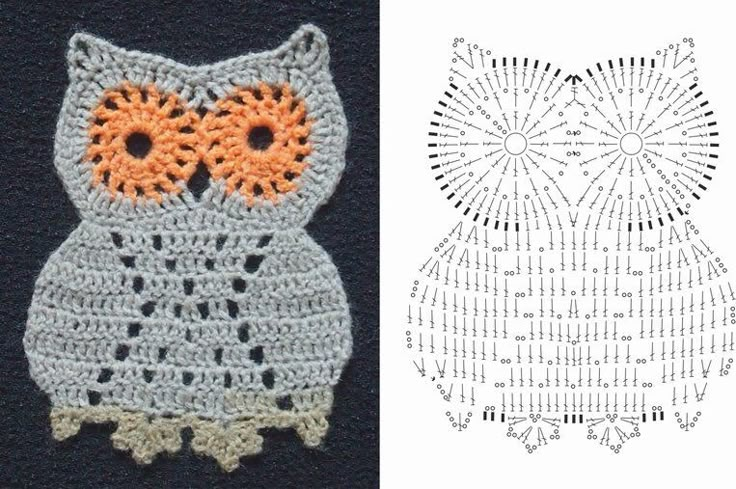
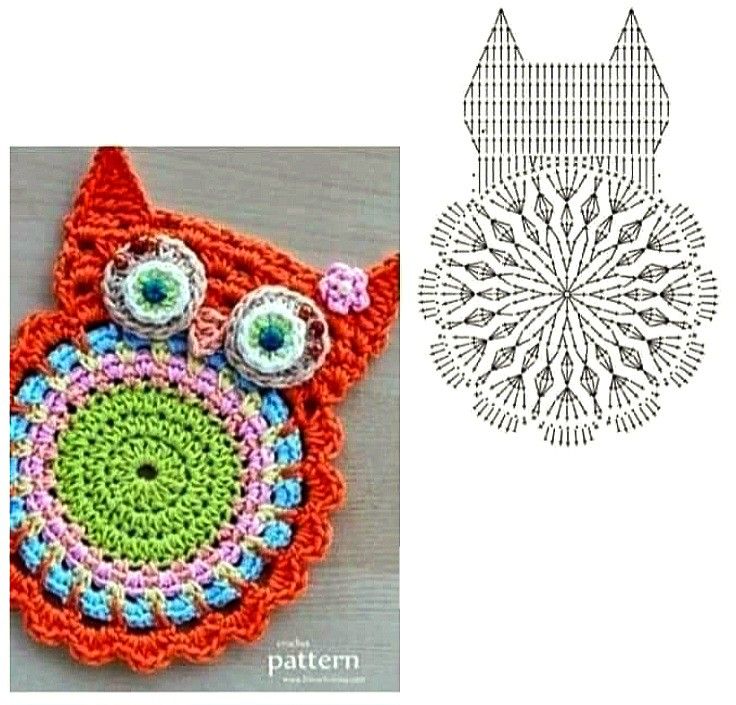
Creating the Owl's Body
The first step in our crochet owl applique tutorial is crafting the owl's body. Start with a magic ring and follow these steps:
- Round 1: 10 double crochets (DC) into the magic ring.
- Round 2: 2 DC in each stitch around (20 DC).
- Round 3: 2 DC, DC in next stitch (30 DC).
- Round 4: 2 DC, DC in the next 2 stitches (40 DC).
- Ensure your gauge is correct: 4 inches across = 14 DC stitches and 8 rows of double crochets.
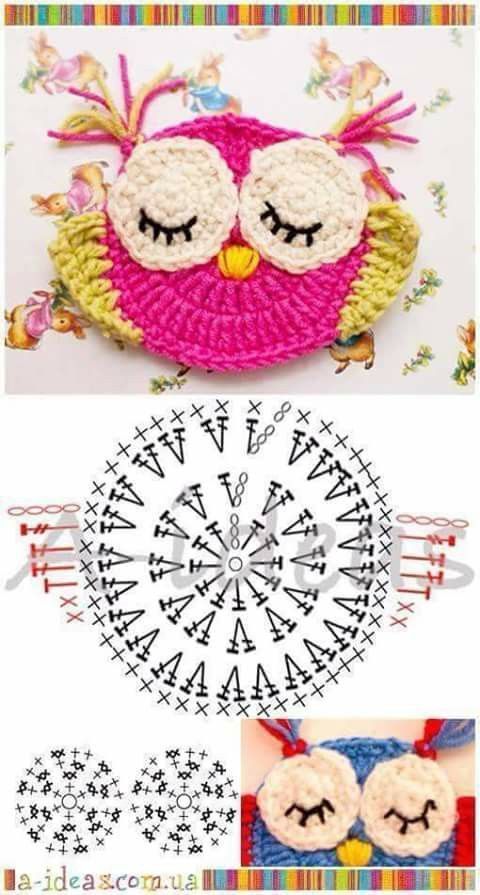
Making the Owl Eyes and Beak
For the eyes, begin with a magic ring and proceed as follows:
- Round 1: 6 single crochets (SC) into the ring.
- Round 2: 2 SC in each stitch around (12 SC).
- Round 3: 1 SC in each stitch (30 SC after completion).
Use safety eyes or buttons (3/4" black recommended). To make the beak, use French knots or simple embroidery stitches with contrasting yarn.
Finishing Touches
Complete your DIY owl applique by securing all loose ends and weaving them in carefully. Add any additional embellishments like feathers or patterns as desired. With these final adjustments, your owl applique will not only look stunning but also be durable and long-lasting.
By following these steps, you'll have a beautiful crochet owl applique that will be a fantastic addition to any project, whether for home decor, gifts, or personal use.
CHECK MORE CROCHET PATTERNS