Crochet Pillows Made with Squares - Easy DIY Guide
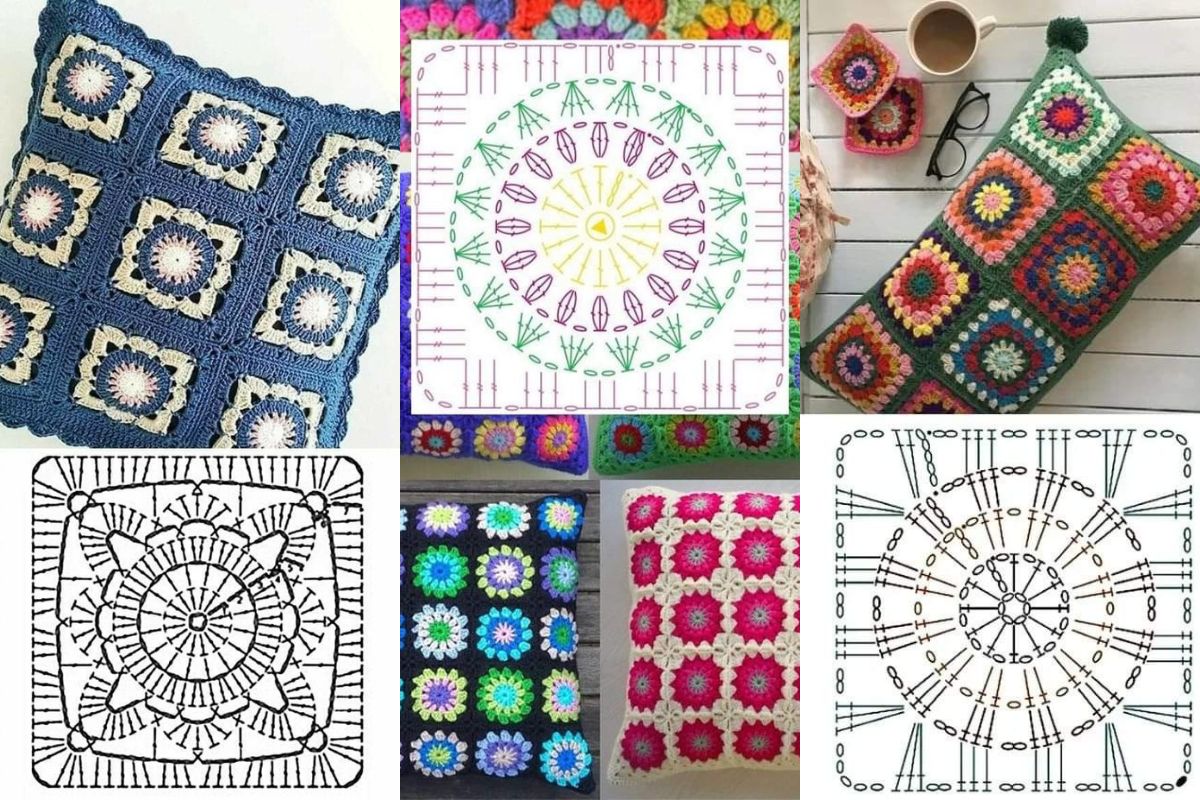
Crochet pillows made with squares are a fun and creative way to make your home look better. These cozy throw pillows bring a personal touch to any room. Whether you're new to crochet or have been doing it for years, making your own pillows is rewarding. It lets you show off your style.
With just a few basic supplies and simple techniques, you can make beautiful home decor pieces.
This guide will show you how to make crochet pillows using squares. You'll learn from choosing the right yarn to adding the final touches.

Get ready to explore the world of crochet and change your living space with handmade pillows. These pillows will show off your unique taste. Let's start this creative journey and learn how to make stunning crochet pillows using squares!
Crochet Pillows Made with Squares
Crochet pillows are cozy home decor items made from yarn and a crochet hook. They come in many styles, but squares are especially popular. These pillows feature crochet granny squares joined together for a unique look.
Step-by-Step Guide to Crocheting Squares
Crocheting squares is a fun way to make crochet pillow patterns. This guide will help you learn the basics. You'll get consistent results for your crochet cushion covers.
Basic Crochet Techniques
Begin by making a slip knot and chain stitches. For most squares, chain multiples of three plus one extra. Then, work single crochet stitches into each chain.
At the end of the row, chain one and turn your work. Keep doing this until your square is the size you want.
Tips for Consistent Square Sizing
To keep your squares the same size, use stitch markers to count rows. Measure your work often with a ruler or gauge swatch. If your squares are a bit different, block them.
Pin them to the correct size and spray with water. Let them dry completely before putting your crochet pillow patterns together.
Practice makes perfect when creating crochet cushion covers. Try different yarn weights and hook sizes to find what works best for you. With these techniques, you'll be crafting beautiful crochet pillows in no time.
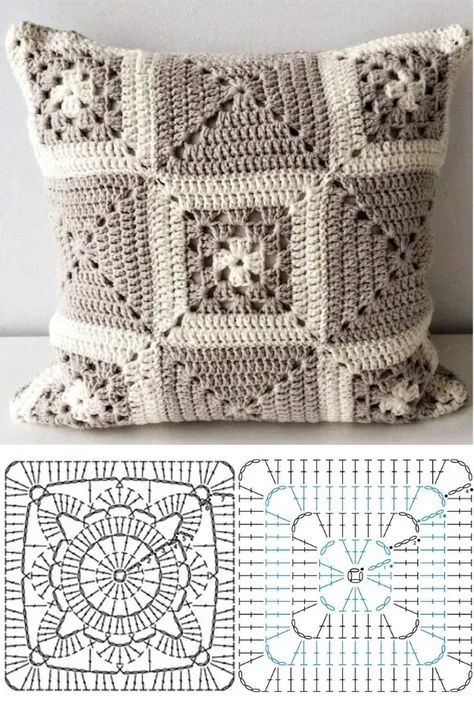
Via: Pinterest
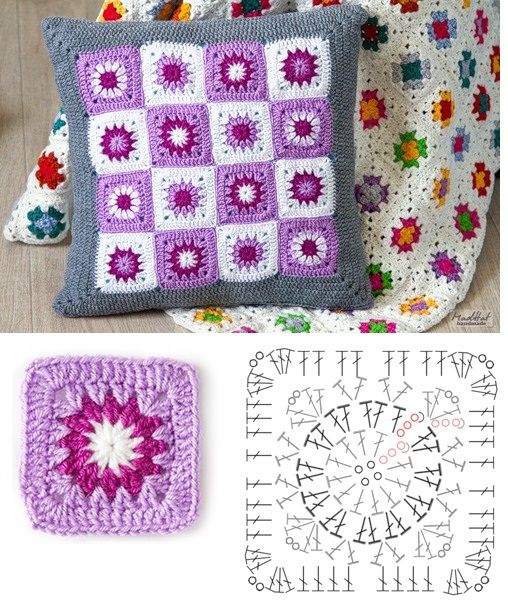
Via: Katiaribeiro
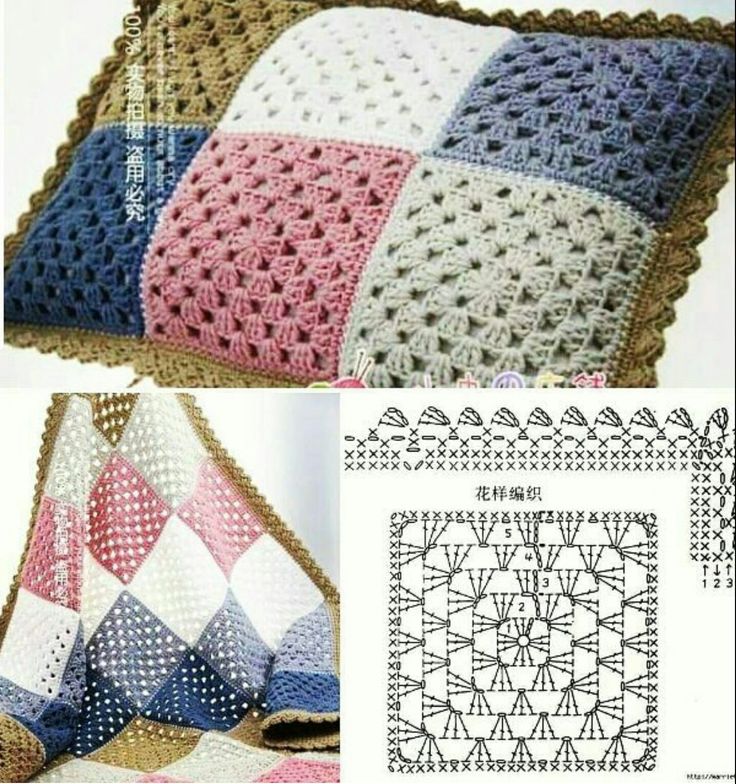
Via:
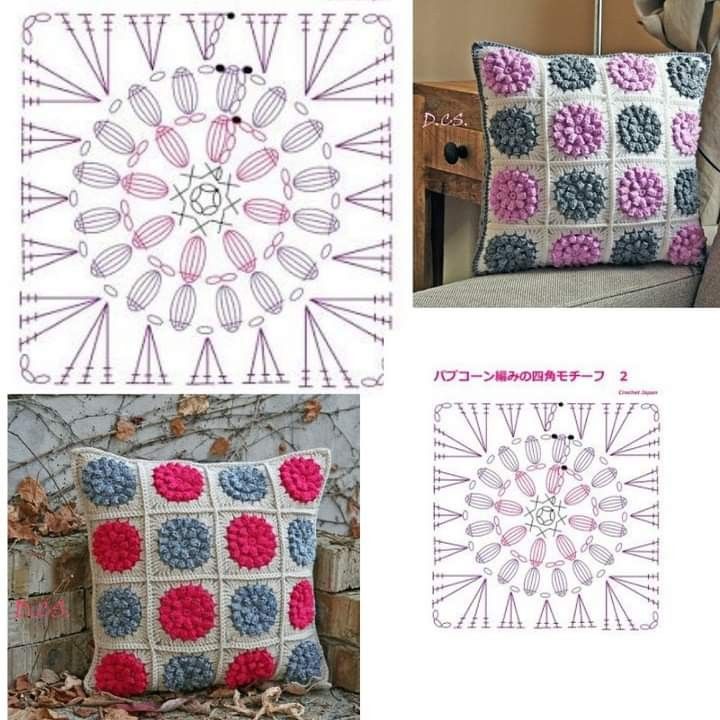
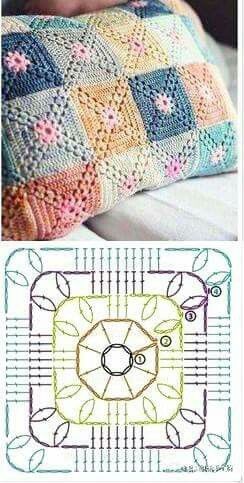
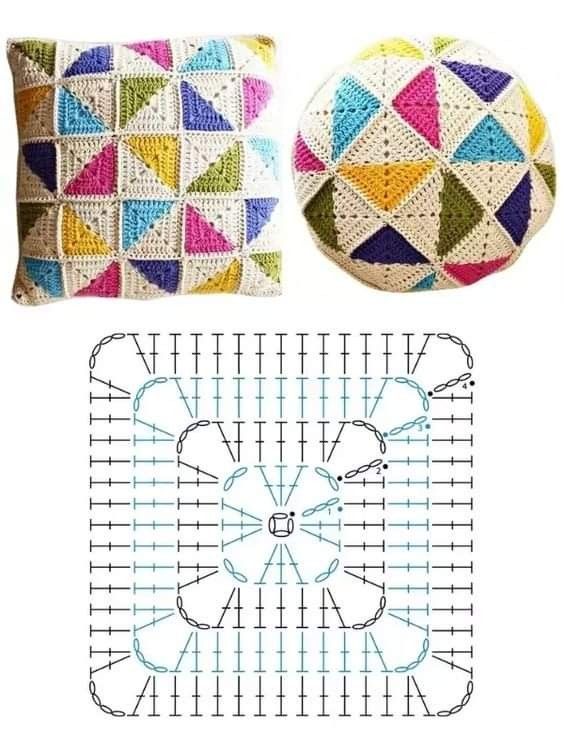
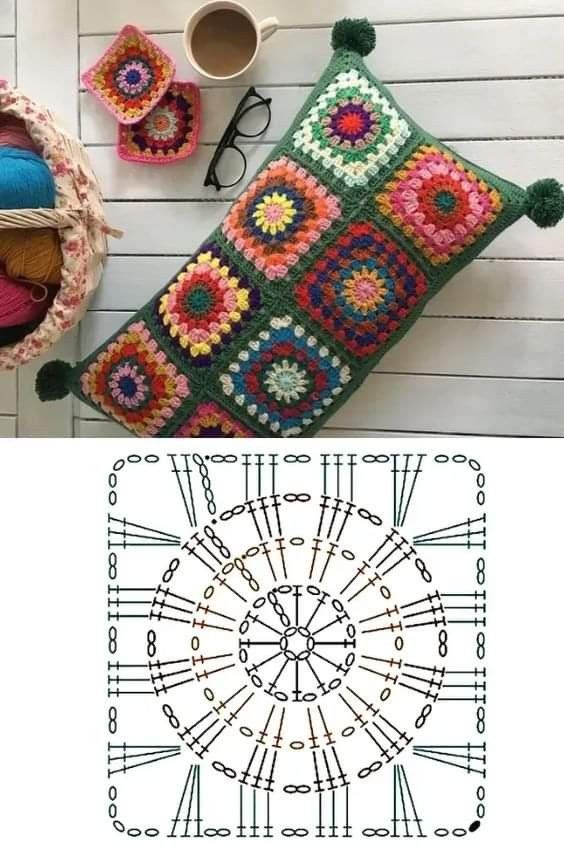
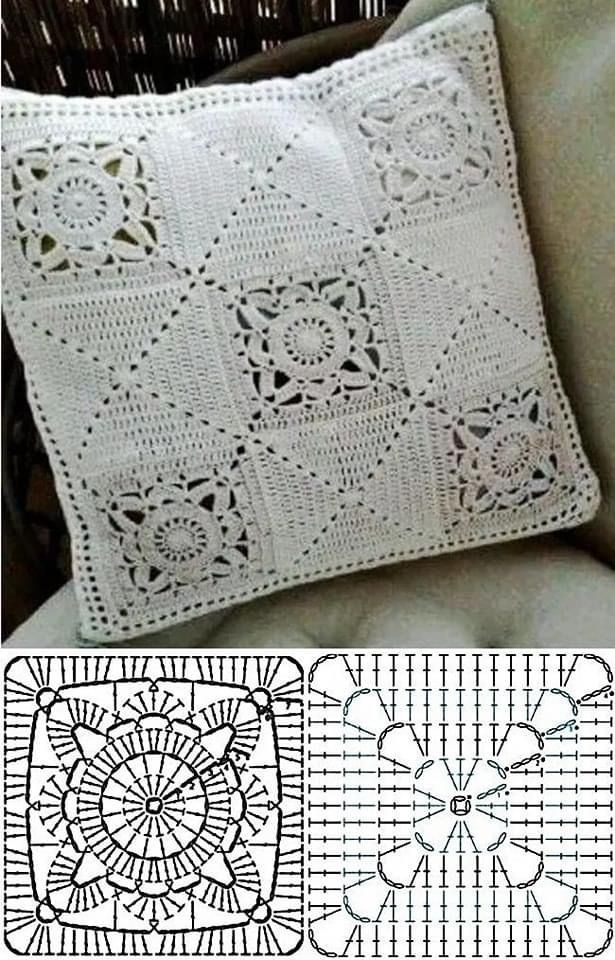
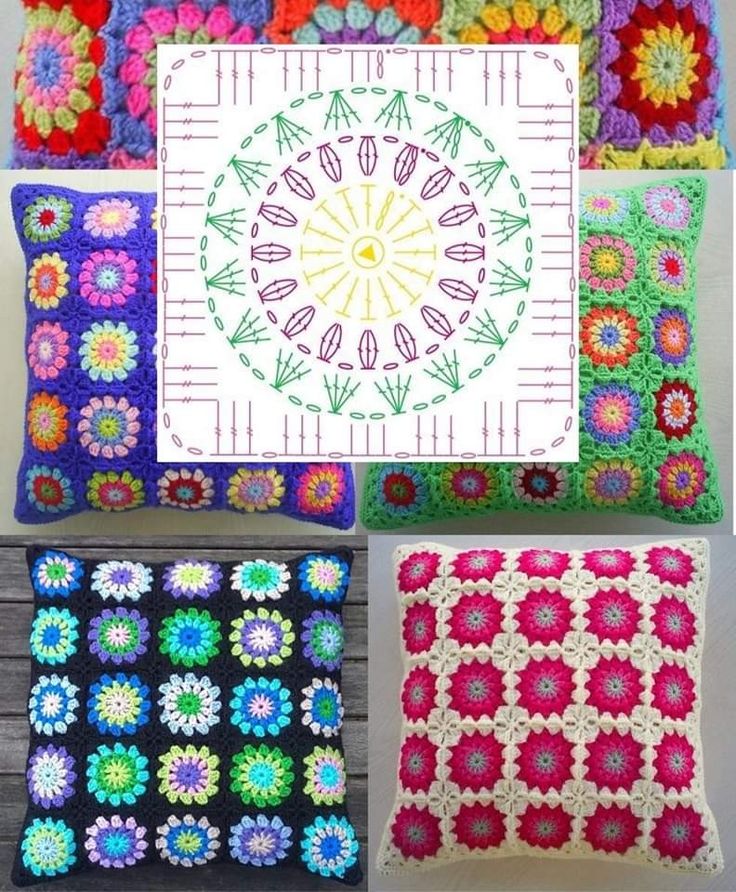
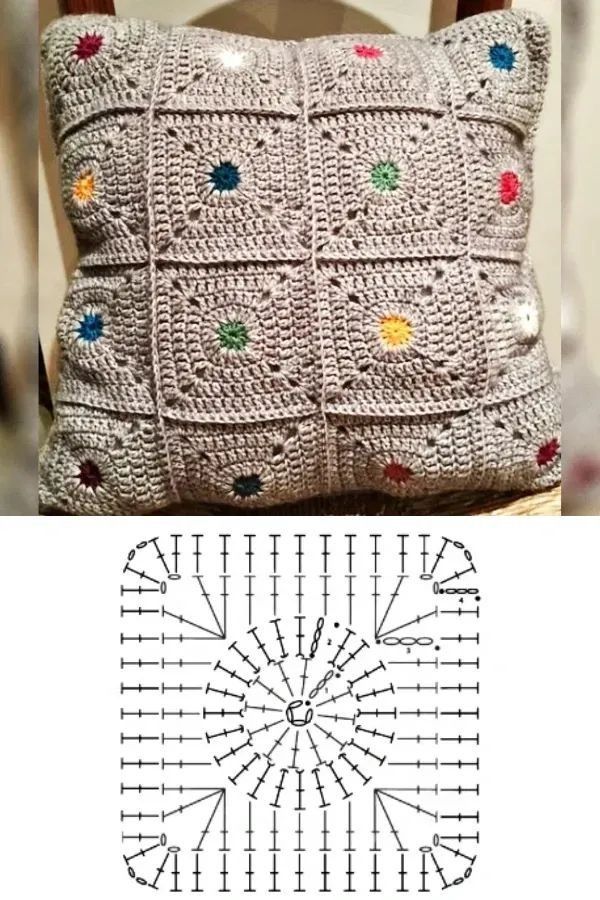
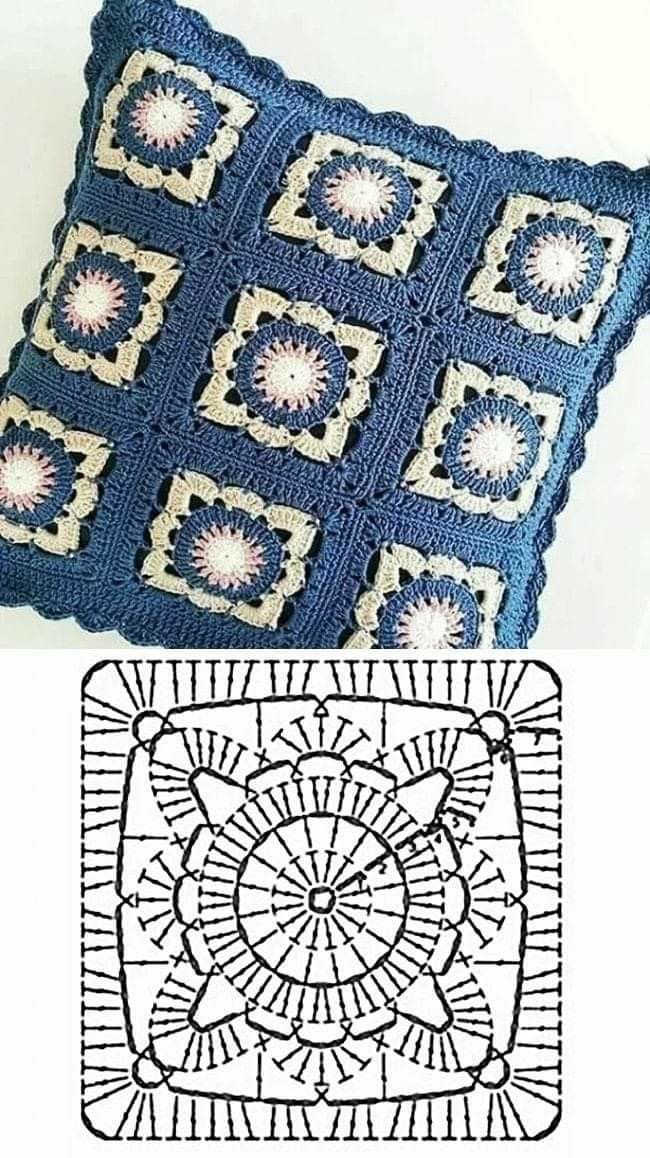
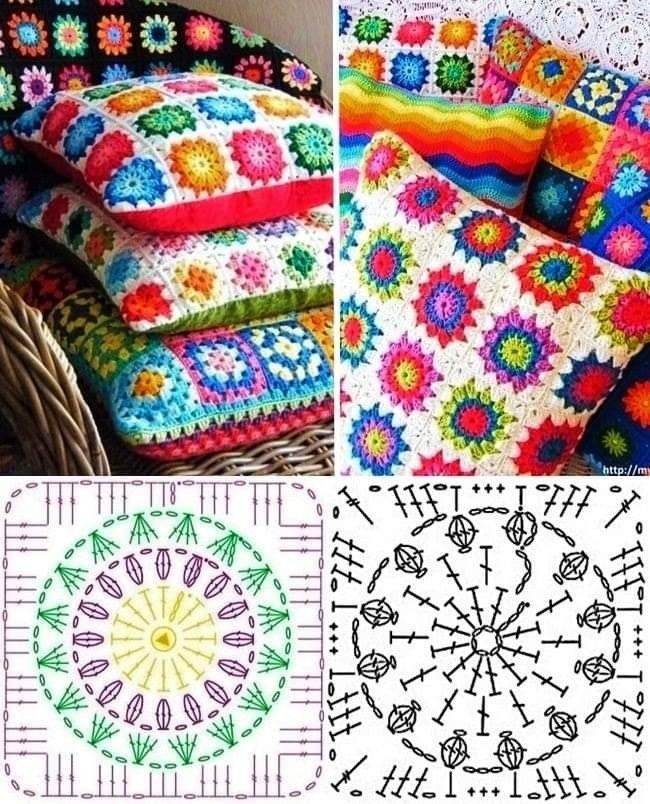
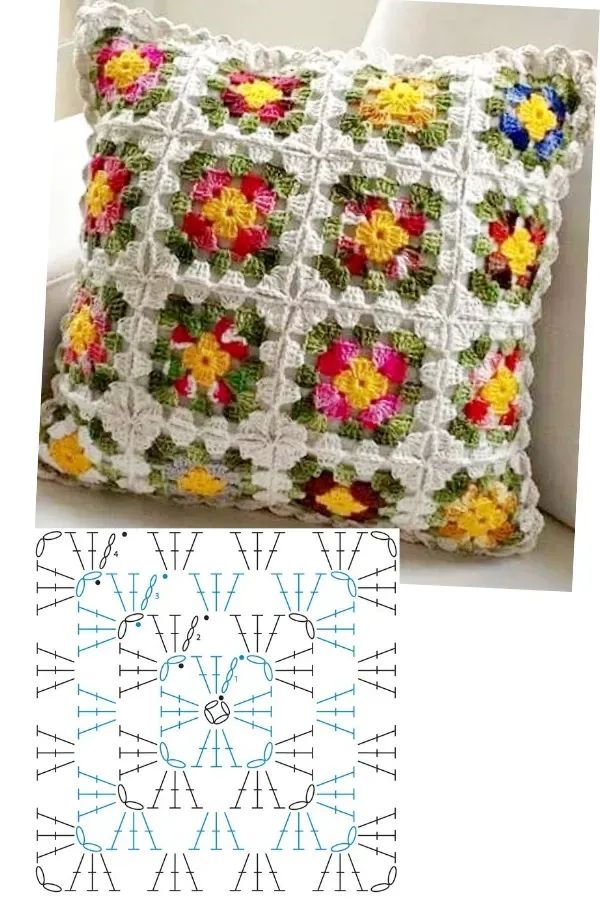
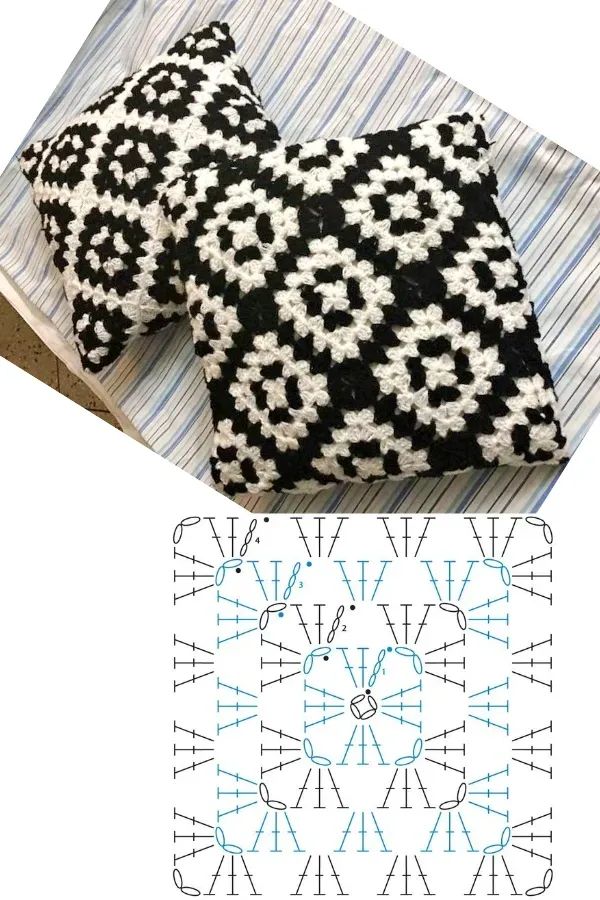
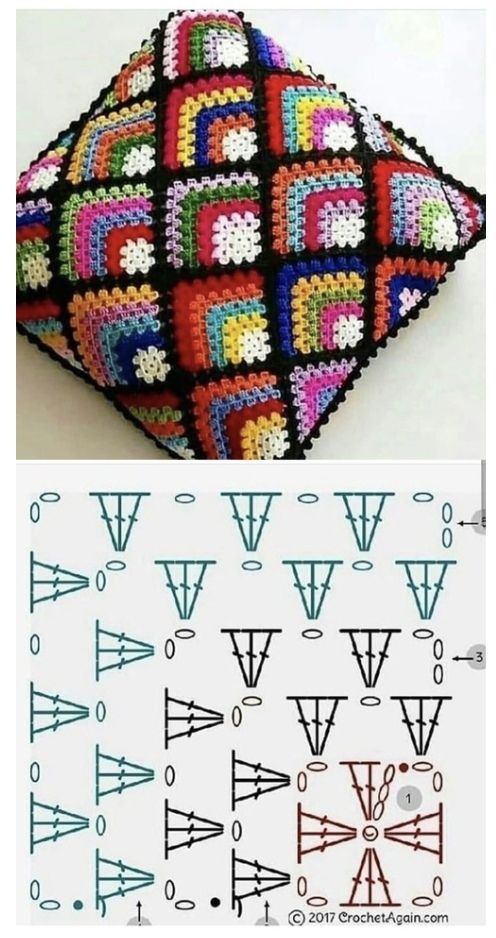
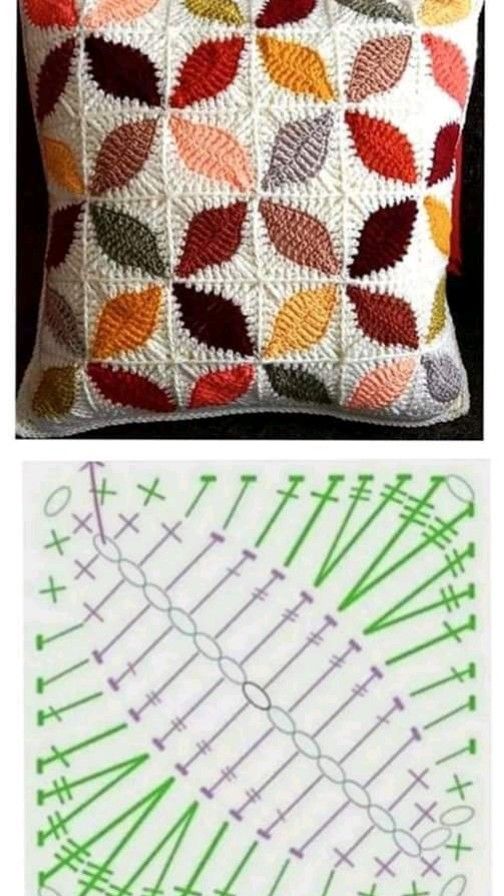
Images from Pinterest.
Basic Steps for Making Crochet Pillows with Squares
1. Crochet the Squares
The first step is to crochet the individual squares. The simplest design is the granny square, but you can also use other designs like solid squares or star motifs.
Granny Square Instructions:
- Create a magic ring (or chain 4 and join into a ring).
- Round 1: Chain 3 (this counts as your first double crochet), then crochet 2 double crochets into the ring, followed by chain 2 and then 3 double crochets. Repeat this process until you have four sets of 3 double crochets, each separated by a chain-2 space.
- Round 2: Turn your square. In the corner spaces (where you have the chain-2 spaces), work 3 double crochets, chain 2, and then 3 more double crochets in each corner space. Fill in the spaces between the corners with 3 double crochets.
- Continue adding rounds as needed until your square reaches the desired size.
Repeat this process until you have as many squares as needed for your pillow.
2. Join the Squares Together
Once you've crocheted all the squares for your pillow, it's time to join them. You can use a few different methods to join squares, such as:
- Slip Stitch Join: Place two squares right sides together, insert your hook through the front loops of both squares, and slip stitch them together.
- Whip Stitch: Use a yarn needle to whip stitch the squares together along the edges.
- Join-as-you-go (JAYG): This method involves joining the squares as you crochet the last round of each square, making it a faster process.
3. Assemble the Pillow
Now that your squares are joined, it's time to create the actual pillow. You can either crochet an envelope-style cover or make a more traditional pillow case with a zipper.
- Crochet a Back Panel: If you prefer to crochet both sides of the pillow, simply crochet a square to match the size of the front panel.
- Stuff the Pillow: Insert polyester fiberfill into the pillow cover to give it shape and softness.
- Sew the Sides Together: If you’ve made an envelope-style cover, fold the edges in and sew them together with your yarn needle. If you’re using a zipper, carefully insert it between the two panels.
4. Finishing Touches
To give your pillow a polished look, consider adding a few decorative touches:
- Fringe: You can crochet a fringe along the edges of your pillow to give it a boho vibe.
- Pom-poms: Add small crochet pom-poms at the corners of your pillow for a playful touch.
- Button Closure: If you prefer a removable cover, consider adding a few buttons to one side for easy opening and closing.
CHECK MORE CROCHET PATTERNS