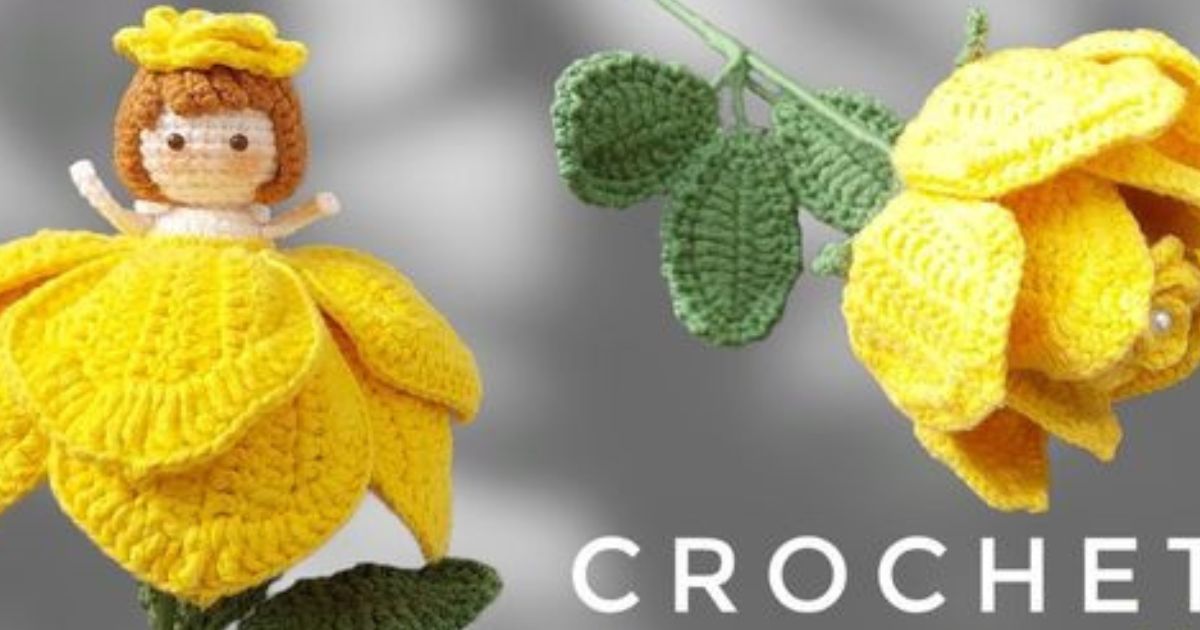
Crochet Rose Fairy- Video tutorial

For those who are always looking for ideas and novelties in the world of crochet, today we suggest a very different and creative idea.
They are mini crochet flowers that keep a secret, they turn into dolls or fairies. Beautiful and perfect, they will make someone's day happier.
The video is subtitled in English, so you can follow the step by step.
Crochet Rose Fairy Step by step
To decorate your home or to offer someone on a special day, crochet flower dolls are perfect.

Materials Needed for the Crochet Rose Fairy
Gather these materials to bring your rose fairy to life:
- Yarn: Choose lightweight or DK yarn in colors like pink, red, green, and white for a classic rose theme.
- Crochet Hook: A 2.5mm to 3.5mm hook is ideal for amigurumi projects, helping to create tight, well-defined stitches.
- Safety Eyes: Small black safety eyes (6mm or smaller) for a charming, lively expression.
- Fiberfill: Stuffing for shaping the fairy’s body, head, and limbs.
- Stitch Markers: Helpful for marking rounds, especially for small, intricate pieces.
- Tapestry Needle: For sewing parts together and weaving in ends.
- Wire (Optional): Use floral or jewelry wire to shape the wings and poseable limbs.
Color Tip: Experiment with different shades to create a rose fairy that reflects your unique vision, whether it’s a bright red or soft lavender fairy.
Step-by-Step Guide to Crocheting a Rose Fairy
1. Start with the Fairy’s Head and Body
The head and body of the fairy are created with a classic amigurumi technique: working in the round.
- Head:
- Begin with a magic ring.
- Work single crochet (sc) stitches, gradually increasing each round until reaching the desired head size.
- Add safety eyes around Round 5 and embroider a small mouth if desired.
- Body:
- Start with a magic ring and increase until reaching the width of the body.
- Continue crocheting in the round, adding fiberfill as you go.
- Gradually decrease stitches toward the waist and finish off, leaving a tail for sewing to the head.
Proportion Tip: Make the body slightly smaller than the head for a cute, fairy-like appearance.
2. Create the Petal Skirt
The rose fairy’s skirt resembles rose petals, which adds to her whimsical charm.
- Petal Foundation:
- Chain 10 and slip stitch to form a small loop.
- Work double crochet (dc) in each chain to form the base of the petal.
- Form the Petals:
- Work several petals in rounds, overlapping each petal around the waist.
- For a fuller skirt, crochet multiple rows of petals in a circular pattern.
Skirt Variation: Use alternating colors for the petals, such as light and dark pink, to give the skirt a realistic rose effect.
3. Crochet the Wings
Fairy wings are often delicate and lace-like. Here’s a simple approach:
- Wing Shape:
- Chain 20 and form a loop.
- Work treble crochet (tr) stitches around the chain to create an airy, wing-like shape.
- Add Details:
- Use picot stitches along the edge of each wing to give it a feathery effect.
- For sturdier wings, crochet around wire for a poseable, three-dimensional effect.
- Attach:
- Sew the wings onto the back of the fairy, positioning them slightly above the petal skirt.
4. Make the Fairy’s Arms and Legs
The arms and legs of the fairy should be slim and delicate, matching her magical look.
- Arms:
- Begin with a magic ring.
- Work sc stitches, keeping the arm narrow and adding a small amount of fiberfill as you go.
- Legs:
- Follow a similar approach to the arms, but make them slightly longer.
- Optionally, add a small shoe or slipper by changing yarn colors for the last few rounds.
5. Add Finishing Details
Once all parts are completed, assemble and add any final touches.
- Assemble: Sew the head to the body, attach arms and legs, and secure the wings.
- Add Hair: Use yarn or embroidery thread to create hair. Sew each strand onto the head, then style as desired.
- Optional Accessories: Add small flowers, beads, or a tiny crown to enhance the fairy’s enchanting look.
CHECK MORE CROCHET PATTERNS