Crochet Scented Sachet Bag Tutorial: Create Delightful Aromatics

Crocheting has always been a fascinating craft that allows you to create beautiful and practical items.
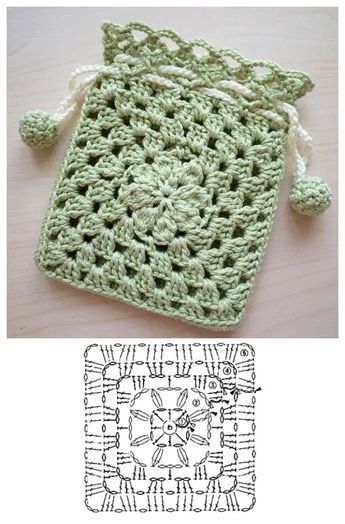
In this tutorial, we will guide you through the process of making a crochet scented sachet bag.
Not only will this project allow you to showcase your crochet skills, but it will also fill your space with a delightful fragrance. Let's dive into this creative and aromatic journey!
Crochet Scented Sachet Bag Tutorial
Crochet scented sachet bags are not only aesthetically pleasing but also serve a functional purpose.
They can be placed in your wardrobe, drawers, or even your car to keep your belongings smelling fresh and delightful.
Materials:
Before we begin, let's gather the materials required for this project. You'll need:
- Crochet Yarn: Choose a soft and durable yarn in your preferred color.
- Crochet Hook: Ensure it matches the yarn weight for the best results.
- Scissors: For cutting the yarn.
- Tapestry Needle: To weave in ends.
- Lavender Buds or Your Favorite Fragrance: For filling the sachet.

Filling with Fragrance
Fill your sachet bag with lavender buds or your favorite dried flowers and herbs. Make sure not to overfill it; leave some space for the fragrance to move around.
Close the top of your bag by pulling the drawstring tight. Secure it with a knot to keep the fragrance sealed inside.
Trim any excess yarn and weave in the ends to give your bag a polished look.
Feel free to get creative with your crochet sachet bag. Add embellishments, buttons, or beads to personalize it further.
To refresh the fragrance, gently squeeze the bag to release the scent. You can also replace the filling when the scent fades.


Benefits of Scented Sachets
Scented sachet bags offer numerous benefits, including:
- Keeping your clothes and belongings smelling fresh.
- Repelling moths and insects from your wardrobe.
- Providing a calming and soothing aroma.
Materials Needed
Before diving into the creation process, gather the following materials:
- Yarn: Choose a soft cotton or acrylic yarn in a color of your choice. Natural fibers are preferred for their breathability.
- Crochet Hook: Use a hook appropriate for your yarn (commonly 4.0mm to 5.0mm).
- Scented Filling: This can include dried herbs, essential oils, or scented potpourri. Some popular choices are lavender, chamomile, or cedarwood.
- Scissors: For cutting yarn.
- Yarn Needle: For weaving in ends and closing the sachet.
- Stitch Markers: Optional, but helpful for keeping track of your rounds.
Basic Crochet Stitches Used
To create your crochet scented sachet bag, you'll primarily use the following stitches:
- Chain (ch): The foundation for most crochet projects.
- Single Crochet (sc): A basic stitch that creates a tight fabric.
- Double Crochet (dc): Adds height and is useful for creating texture.
- Slip Stitch (sl st): Used for joining rounds or finishing off.
Step-by-Step Instructions for Crocheting a Scented Sachet Bag
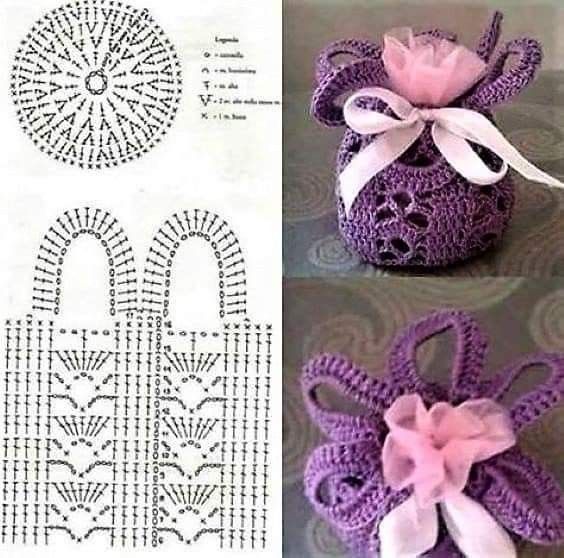
Step 1: Create the Base of the Sachet
- Start with a Magic Ring:
- Create a magic ring and secure it with a slip knot.
- Round 1:
- Ch 2 (this counts as your first dc), and work 11 dc into the ring. Pull the ring tight to close. (12 dc)
- Round 2:
- Ch 2, 2 dc in each stitch around. Join with a sl st to the top of the starting ch 2. (24 dc)
- Round 3:
- Ch 2, dc in the first stitch, 2 dc in the next stitch. Repeat around. Join with a sl st. (36 dc)
Step 2: Create the Body of the Sachet
- Rounds 4-8:
- Ch 1, sc in each stitch around for 5 rounds. This will create a cylindrical shape for your sachet.
Step 3: Create the Closure
- Round 9:
- Ch 1, sc in the first 3 stitches, then sc2tog (single crochet two together). Repeat around to decrease the size. Join with a sl st.
- Round 10:
- Repeat the previous round to tighten the top of the sachet.
Step 4: Finishing the Sachet
- Cut the Yarn:
- Leave a long tail and pull it through the last stitch to secure.
- Weave in Ends:
- Use a yarn needle to weave in any loose ends for a clean finish.
Step 5: Fill the Sachet
- Add Scented Filling:
- Choose your desired scented filling (such as dried lavender or essential oils) and fill the sachet until it reaches your preferred level of fullness.
- Close the Sachet:
- Gather the top of the sachet and tie it closed with a decorative ribbon or string to secure the filling.
Creating a crochet scented sachet bag is not only a delightful craft but also a practical way to add fragrance to your life.
Enjoy the soothing scent and personalized touch these bags bring to your space.
Get started on your creative journey today by crafting your very own scented sachet bag. It's a charming and aromatic addition to any space, and you'll love the personalized touch it brings to your life.
CHECK MORE CROCHET PATTERNS