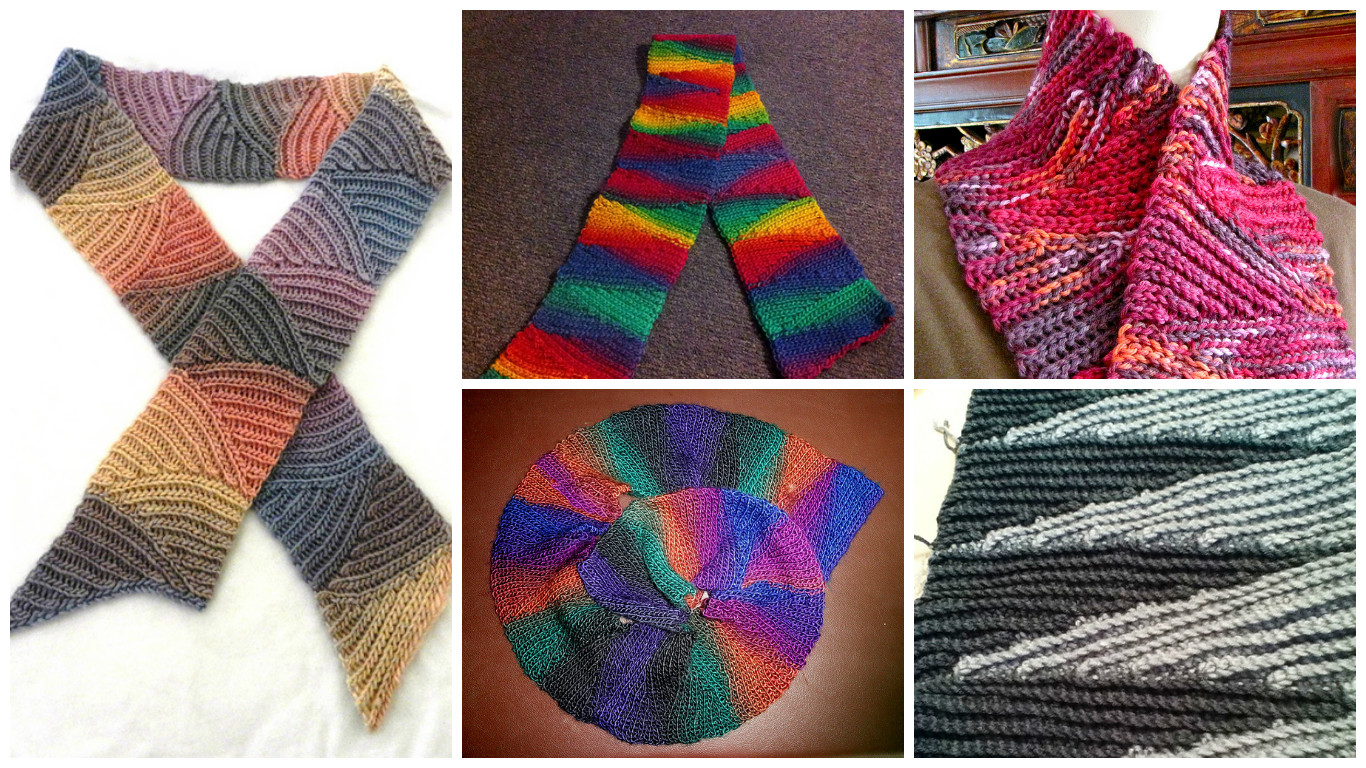
Crochet Slip Slop Scarf

The Crochet Slip Slop Scarf is a fun, textured scarf that’s perfect for adding cozy layers to your wardrobe. The unique “slip slop” technique combines slip stitches with half-double crochet stitches to create an elegant, ribbed texture that’s both warm and stylish.
This pattern is easy to work up, making it an ideal project for beginners and experienced crocheters alike who are looking to create a versatile and cozy scarf.
Crafted from soft, high-quality yarn, each piece can be customized to match your favorite colors, patterns, and even personalized embellishments.
Crochet Slip Slop Scarf
We know that you are in love with scarfs and searching lot in internet for patterns, so today we have searched and want to show you how to crochet the slip slop scarf that you can see on these pictures.
Start crocheting now if you have neccessary suplies and some free time, you will not regret about wasted time. As you can see there are many scarves in different colors and you an choose at least on of them or if you don’t like non of them you can choose other one of course.
Ideas for the Slip Slop Scarf
Here are some ideas to personalize your Crochet Slip Slop Scarf and make it uniquely yours:
1. Play with Color Combinations
Add interest by experimenting with colors:
- Two-tone: Use a different color for the slip stitch rows and half-double crochet rows.
- Gradient yarn: Use a self-striping or gradient yarn to add beautiful color transitions throughout the scarf.
- Bold stripes: Alternate colors every few rows to create bold stripes that stand out.
2. Add Texture with Different Stitches
Try varying the stitches for a unique twist:
- Single crochet rows: Substitute slip stitches with single crochets to add more texture.
- Cluster stitches: Replace every few half-double crochet stitches with cluster stitches for an extra pop.
- Bobble rows: Add a row of bobble stitches every 8-10 rows for a more playful texture.
3. Embellish with Buttons or Appliqués
Buttons or small appliqués add character to the scarf:
- Decorative buttons: Sew buttons at regular intervals to create visual interest.
- Crochet appliqués: Attach small crocheted flowers or leaves to one end for a nature-inspired look.
- Pockets: Add small, flat crochet pockets at each end for a cozy, practical feature.

Download Free Pattern
For Slip Slop Scarf’s Pattern Click Here
Enjoy and crochet another beautiful and useful scarf for your collection with your hands.
Materials Needed for Crochet Slip Slop Scarf
To get started on the Slip Slop Scarf, gather the following materials:
- Yarn: Choose a soft, medium-weight yarn (worsted weight or bulky) for warmth and drape.
- Crochet hook: Use a hook that suits your yarn weight, typically between 5mm and 6.5mm.
- Scissors: For trimming yarn ends.
- Darning needle: To weave in ends and finish the scarf.
Crochet Slip Slop Scarf Pattern
This scarf uses slip stitches and half-double crochet stitches to create a ribbed, textured look. The pattern is worked in rows, with a simple repeat that’s easy to memorize.
Abbreviations
- ch – Chain
- sl st – Slip Stitch
- hdc – Half Double Crochet
- st(s) – Stitch(es)
Step 1: Start with the Foundation Chain
The foundation chain will determine the width of your scarf. Aim for about 8-12 inches wide, depending on your preference.
- Foundation Chain: Ch 30-40 stitches, depending on your desired width.
Step 2: Begin the Slip Slop Pattern
The Slip Slop pattern alternates between rows of slip stitches and half-double crochets.
- Row 1: Hdc in the third ch from the hook and in each ch across. Ch 1, turn.
- Row 2: Sl st in the back loop only of each st across. Ch 2, turn.
- Row 3: Hdc in the back loop only of each st across. Ch 1, turn.
- Row 4: Repeat Row 2, continuing to alternate rows of hdc and sl st.
Repeat Rows 2-4 until the scarf reaches your desired length, around 60-70 inches for a standard scarf length. The back-loop-only technique creates a beautiful ribbed texture while maintaining flexibility and drape.
Tip: For a chunkier, warmer scarf, use bulky yarn and a larger hook size.
Step 3: Add a Finishing Edge
A finishing edge gives the scarf a polished look. Here are a few options:
- Simple Scallop Edge: Work 5 dc in one st, skip the next st, and sl st in the next st; repeat around the edges.
- Picot Edge: Sc in the next st, ch 3, sl st into the first ch; repeat around the edges.
- Fringe: Cut yarn strands about 6 inches long, fold each in half, and attach to the ends for a classic fringe look.
CHECK MORE CROCHET PATTERNS