Crochet Slipper with Flip Flop Sole: Comfort and Style Combined
Crochet enthusiasts rejoice! If you're looking for a fun and stylish project to tackle, why not try your hand at creating crochet slippers with flip flop soles?
Not only are they cozy and comfortable, but they also add a unique twist to your everyday footwear.
In this article, we'll delve into the world of crochet slipper-making, exploring everything from selecting the perfect yarn to mastering the flip flop sole technique.
Crochet Slippers
Crochet slippers are more than just cozy footwear; they're a testament to creativity and craftsmanship. Unlike store-bought slippers, crochet slippers can be customized to fit your unique style and preferences. Whether you prefer vibrant colors or subtle hues, there's a crochet slipper pattern out there for everyone.
What Makes Crochet Slippers Unique
What sets crochet slippers apart from their commercial counterparts is the handmade touch. Each pair is crafted with care and attention to detail, resulting in a one-of-a-kind creation. Additionally, crochet slippers offer a level of comfort that is unmatched by mass-produced alternatives.
Getting Started with Crochet
Before diving into your slipper project, familiarize yourself with essential crochet techniques. These include basic stitches such as chain, single crochet, double crochet, and slip stitch. Practice these stitches until you confident in your ability to execute them consistently. Additionally, familiarize yourself with reading crochet patterns, as they will serve as your guide throughout the project.
Understanding Flip Flop Soles
The flip flop sole technique involves repurposing a pair of flip flops to serve as the base for your crochet slippers. This innovative approach combines the comfort of flip flops with the warmth of crochet, resulting in a versatile and practical footwear option.
Benefits of Using Flip Flop Soles
- Durability: Flip flop soles are designed to withstand regular use, ensuring that your crochet slippers remain sturdy and long-lasting.
- Traction: The textured surface of flip flop soles provides traction, reducing the risk of slipping or sliding on smooth surfaces.
- Versatility: By using flip flop soles as a base, you have the freedom to create a wide range of slipper designs, from simple and functional to intricate and decorative.
Crochet Patterns for Slipper Tops
Once you've selected your yarn and familiarized yourself with basic crochet techniques, it's time to choose a pattern for the tops of your slippers. There are countless patterns available online, ranging from beginner-friendly to advanced. Consider factors such as stitch complexity and sizing when selecting a pattern that suits your skill level and preferences.
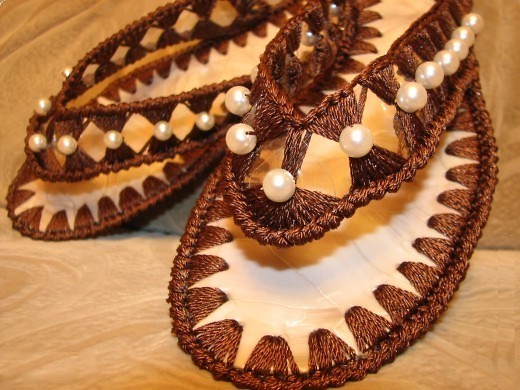
Variations in Slipper Designs
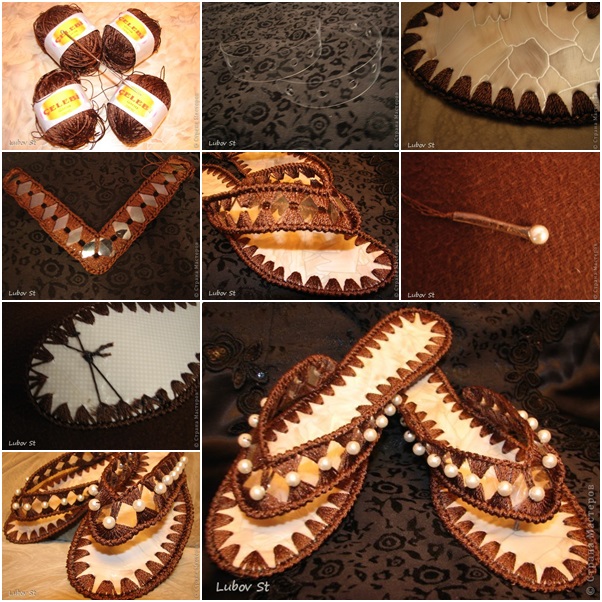
From classic granny squares to modern lace motifs, the options for slipper designs are endless. Experiment with different stitches, color combinations, and embellishments to create a pair of slippers that reflects your personal style.
Attaching Flip Flop Soles
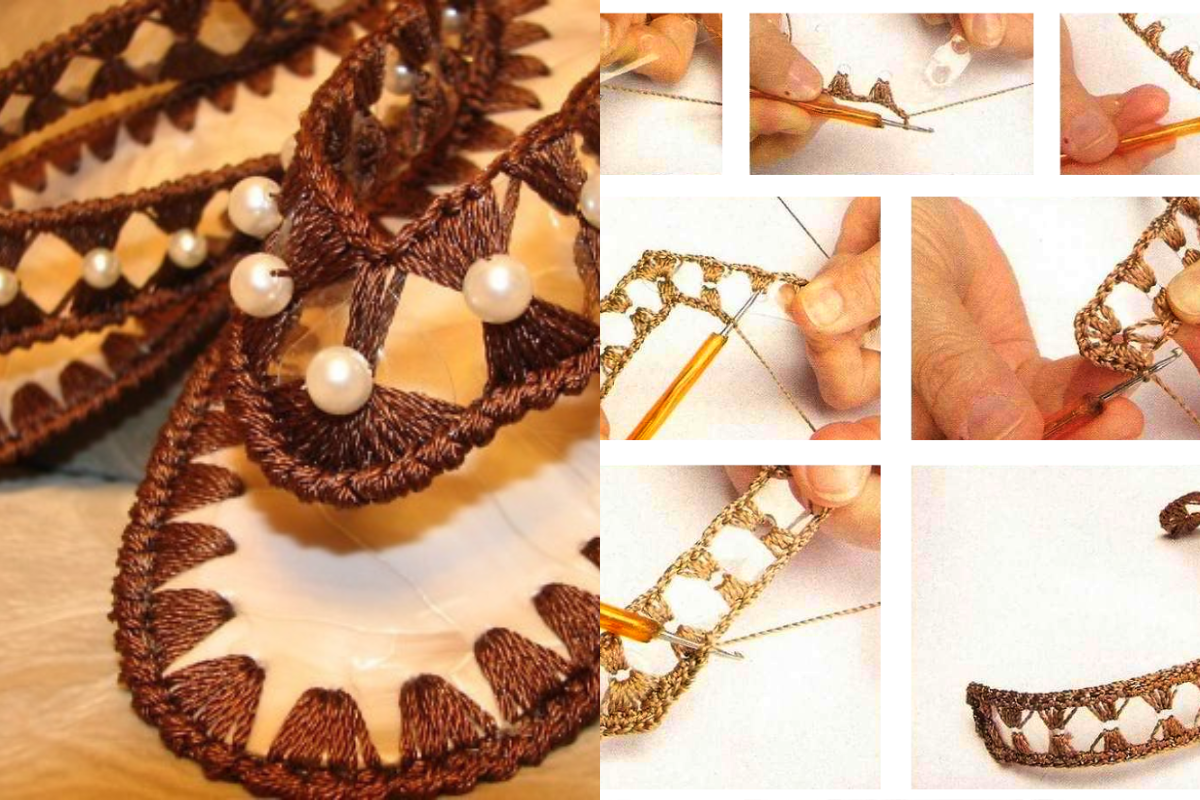
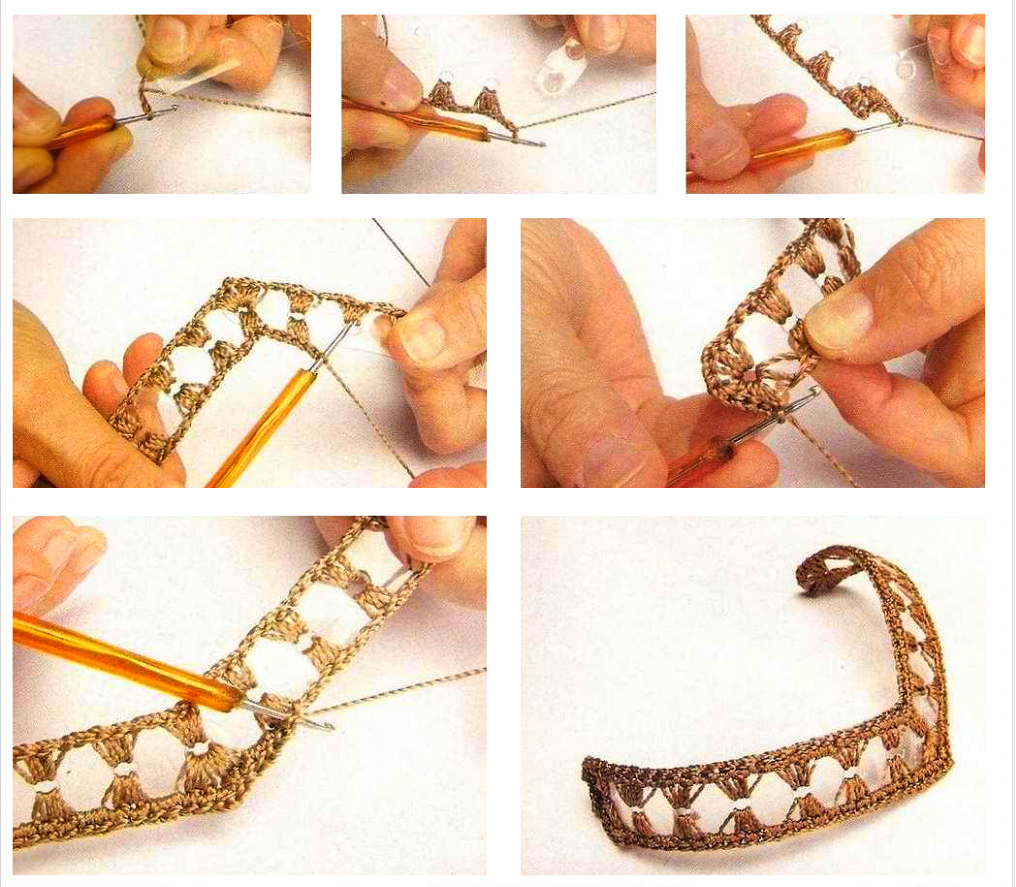
The process of attaching flip flop soles to your crochet slippers may seem daunting at first, but with patience and precision, it can be easily mastered. Follow these step-by-step instructions to ensure a seamless attachment:
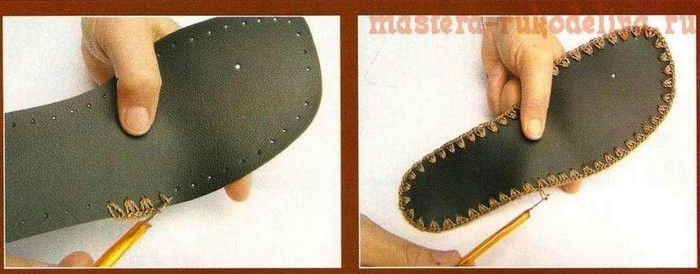
- Prepare the flip flop soles by removing any straps or embellishments.
- Place the sole on a flat surface and position your crochet work on top, aligning the edges.
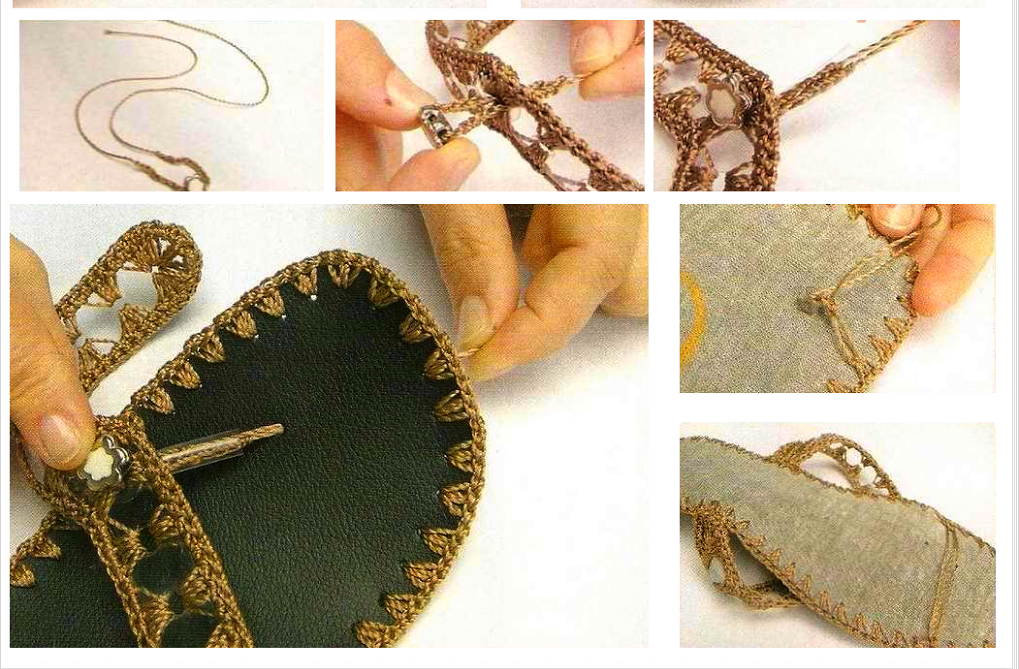
- Using a sturdy yarn and a yarn needle, begin stitching around the perimeter of the sole, securing the crochet fabric in place.
- Work in small sections, stitching evenly and securely to prevent any gaps or puckering.
- Continue stitching until the entire sole is attached, taking care to maintain an even tension throughout.
CHECK MORE CROCHET PATTERNS