Crochet Square Baby Hat: The Perfect DIY Baby Accessory
Crochet, a timeless craft, has seen a resurgence in popularity over recent years, and one of the most adorable projects to emerge from this creative renaissance is the Crochet Square Baby Hat.
This charming and functional accessory not only adds a personal touch to any baby wardrobe but also serves as a fantastic introduction for beginners into the world of crochet.
In this comprehensive guide, we will explore everything you need to know to create the perfect crochet square baby hat, from materials and techniques to step-by-step instructions. Whether you are a seasoned crocheter or a beginner, this project will bring joy and warmth to your little one’s life.
- Materials You’ll Need
- Essential Supplies:
- Step 1: Begin with a Foundation Chain
- Step 2: Create the First Round
- Step 3: Create the Second Round
- Step 4: Continue Increasing
- Step 5: Measure and Fit
- Step 6: Fold the Square
- Step 7: Seam the Sides
- Step 8: Add the Edging
- Step 9: Weave in Loose Ends
- Step 10: Add a Pom-Pom (Optional)
- Final Touch: Enjoy Your Creation!
Materials You’ll Need
Before diving into the creation process, make sure you have the right materials at hand. Here’s a simple list of what you’ll need to complete your crochet square baby hat:
Essential Supplies:
- Yarn: Choose a soft yarn that’s gentle on a baby’s skin. Cotton or acrylic yarn is an excellent choice for this project. Consider using yarn with a soft texture and good elasticity.
- Recommended Weight: DK (double knit) or worsted weight yarn.
- Suggested Colors: Go for soft pastels like baby blue, pink, or cream for a classic look, or experiment with vibrant colors for a more modern touch.
- Crochet Hook: Select a hook size that corresponds with your yarn weight. Typically, a 4mm (G-6) crochet hook works well with most baby yarns.
- Scissors: Always have a pair of sharp scissors on hand for cutting yarn ends.
- Yarn Needle: Used to weave in the loose yarn ends once your project is complete.
- Stitch Marker: Optional but helpful for marking the beginning of each round.
Step 1: Begin with a Foundation Chain
Start by making a foundation chain of 4 chains (ch 4). Join the chains into a ring with a slip stitch (sl st). This ring will be the center of your square.
ch 4, join with a sl st to form a ring.
Step 2: Create the First Round
In the ring, make 3 double crochet stitches (dc). These will form your first cluster. Then, chain 2, and make 3 double crochet stitches into the ring again. Repeat this process 3 more times to complete the first round. You should have 4 clusters in total.
At the end of the round, join the last stitch to the top of the first dc with a slip stitch.
Step 3: Create the Second Round
For the second round, chain 3 (this will count as your first double crochet). Then, in the next gap between clusters, make 2 dc, chain 2, and make 3 dc. Repeat this process for all four gaps between clusters, joining at the end of the round with a slip stitch.
Step 4: Continue Increasing
Now, continue working the following rounds, increasing in each corner to form the square. For each round, add 3 double crochets in the corner spaces (the spaces created by the chain-2 gap in the previous round) to make your square expand symmetrically.
- Round 3: In the corners, work 3 dc, chain 2, 3 dc in the corner spaces, and continue with 3 dc between corners.
- Round 4: Repeat the same process but increase the space between each corner set of 3 dc.
Keep repeating this process until your square is large enough to fit around the baby’s head.

From Pinterest
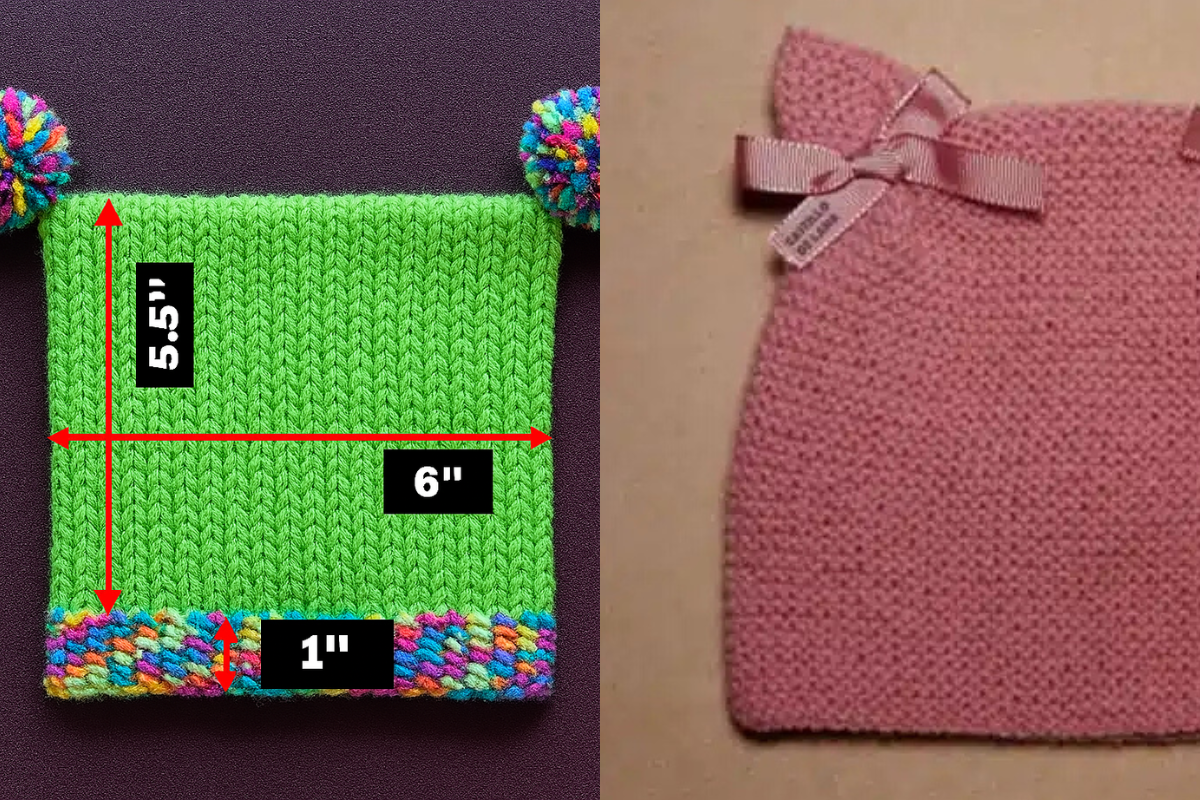
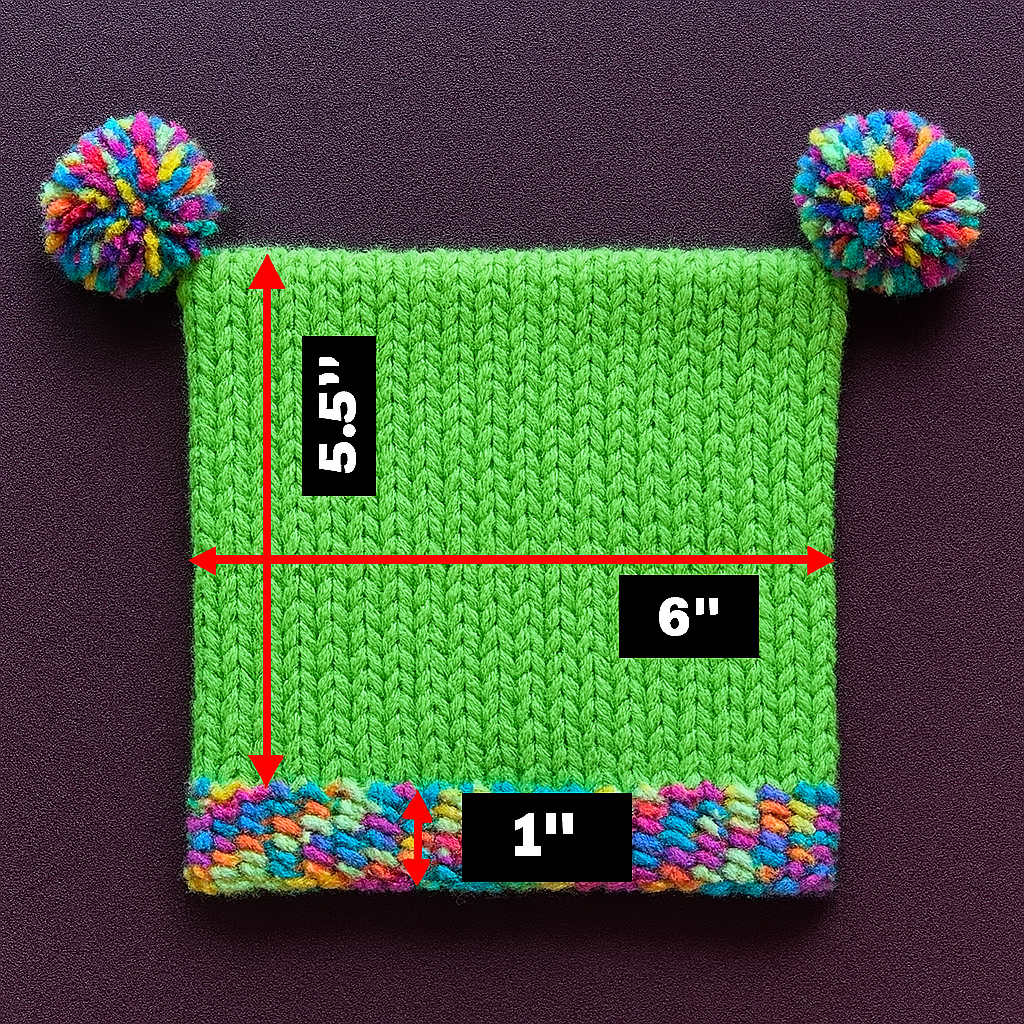
Step 5: Measure and Fit
Before you finish the square, measure the size against the baby’s head to ensure it fits comfortably. If necessary, add or subtract rounds until the hat fits. The goal is for the square to have a side length that matches the circumference of the head.
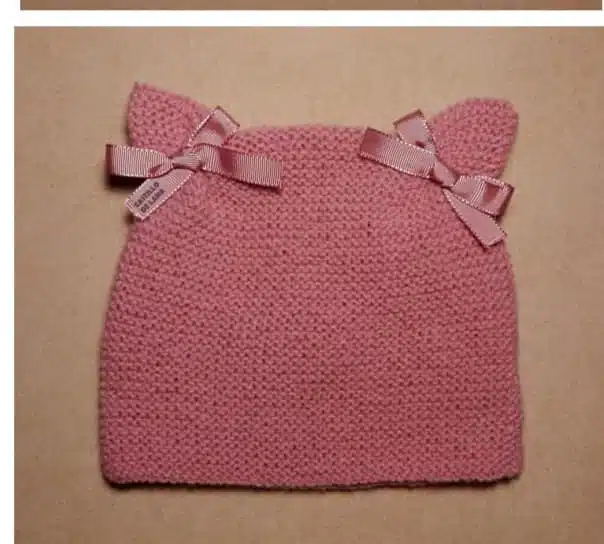
Step 6: Fold the Square
Once you’re happy with the size of the square, fold it in half, aligning two opposite corners. This will form the basic shape of the hat.
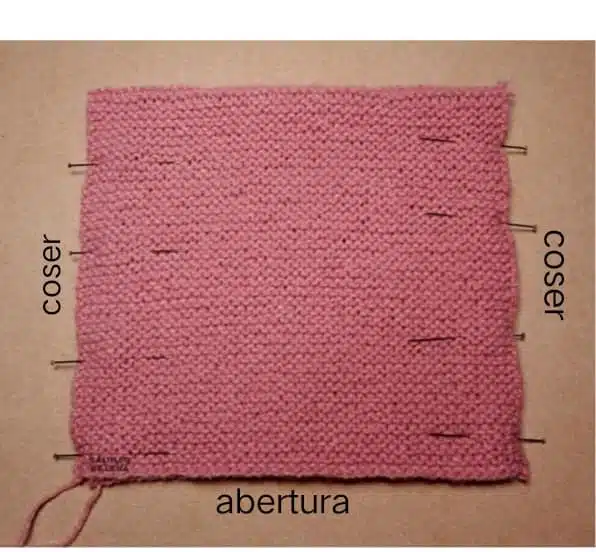
Step 7: Seam the Sides
Now, using a yarn needle, stitch the sides of the square together. This can be done with a simple whip stitch, or you can use a slip stitch if you prefer a neater seam. Ensure the sides are aligned properly so that the top of the hat is symmetrical.
Step 8: Add the Edging
To finish off your crochet square baby hat, add a simple scalloped edge or shell stitch around the hat’s opening. This adds a charming touch and keeps the hat from looking too plain.
For a shell stitch, work 5 dc into each stitch around the hat’s edge.
For a scalloped edge: *dc, chain 2, dc* in each stitch around.
Step 9: Weave in Loose Ends
Once you’ve finished the hat, use your yarn needle to weave in any loose ends. Be sure to do this carefully to ensure there are no loose yarn ends that might irritate the baby’s skin.
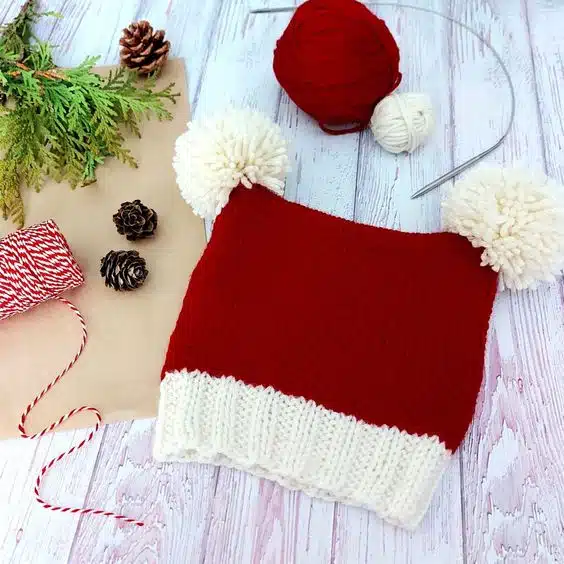
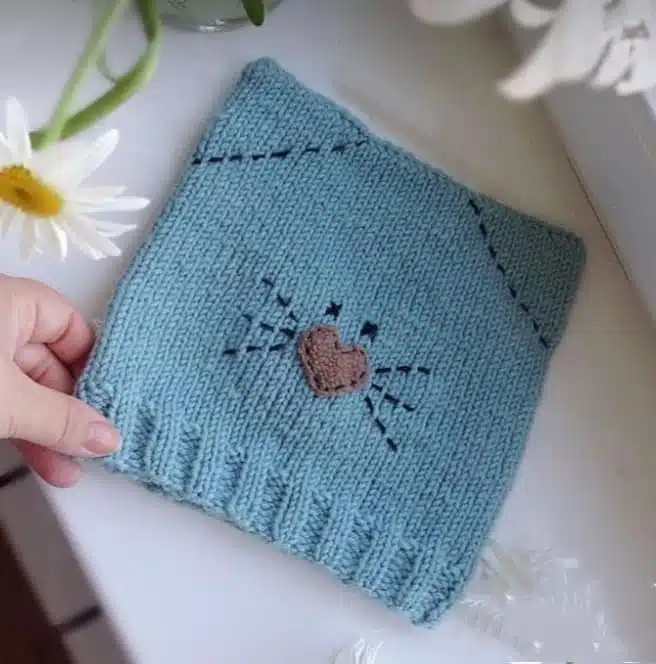
Step 10: Add a Pom-Pom (Optional)
For an extra adorable touch, you can add a pom-pom to the top of the hat. This step is entirely optional, but it can make the hat even more charming.
Final Touch: Enjoy Your Creation!
And there you have it — your very own crochet square baby hat! This delightful hat is not only a great project for crocheting enthusiasts but also a perfect gift for new parents.
Measure the baby’s head circumference before starting, and compare it to the size of your square. Make adjustments by adding or removing rounds until the square fits comfortably around the baby’s head.
While the square shape is unique and functional, you can adapt this project to other shapes, such as circles, if you prefer a more traditional look.
You can change colors at the beginning of each round to create a striped effect or even add small color blocks at the corners. Just be sure to weave in the ends neatly.
Learn how to crochet a square baby hat with this detailed, step-by-step guide. Perfect for beginners and seasoned crafters, create a personalized baby accessory with ease!
CHECK MORE CROCHET PATTERNS