Crochet Tulip Step by Step - Easy Floral Guide
Are you looking for a creative and rewarding craft project?
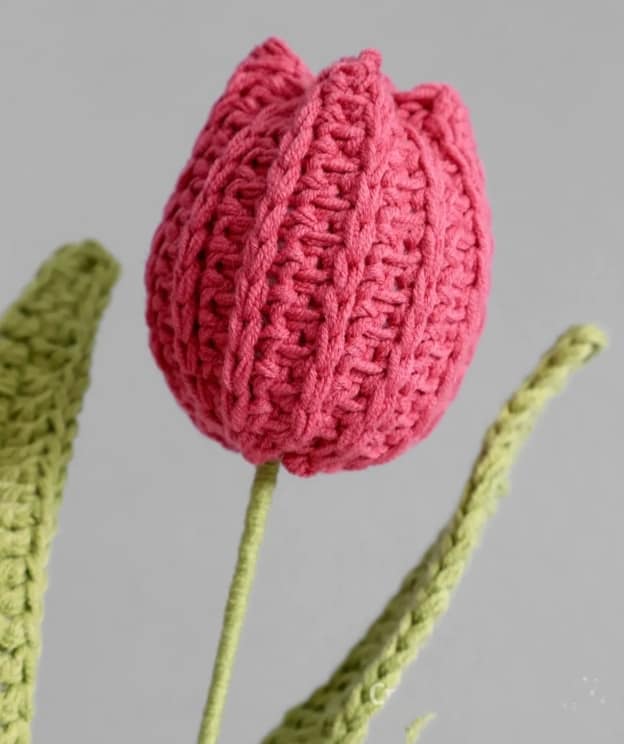
Look no further! In this article, I will guide you through the process of crocheting a beautiful tulip flower.
Whether you're a beginner or an experienced crocheter, you'll find this easy floral guide invaluable in creating charming handmade flowers to brighten up any space.

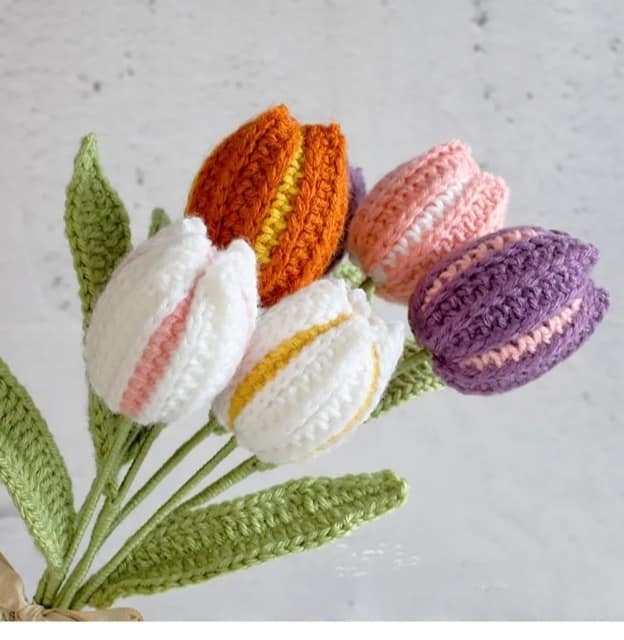
Using my step-by-step instructions, you'll be able to make your own crochet tulips with ease. Experiment with different colors and yarns to create unique and stunning floral arrangements that will impress your friends and family.
Not only is crocheting tulips a fun and enjoyable activity, but it also allows you to express your creativity and add a personal touch to your home decor. Whether you're making a single tulip or a whole bouquet, each flower will be a labor of love that will bring joy and beauty into your life.
Key Takeaways:
- Learn how to crochet a tulip flower using the step-by-step guide.
- Perfect for beginners and experienced crocheters alike.
- Choose from a wide variety of colors and yarns to customize your tulips.
- Create stunning floral arrangements that will brighten up any space.
- Express your creativity and add a personal touch to your home decor.
How to Crochet Tulip - A Beginner's Tutorial
In this section, I will walk you through the process of crocheting a tulip flower, perfect for beginners. You'll learn the basic stitches and techniques needed to create your own handmade tulips. Follow along with the step-by-step instructions and helpful tips to achieve beautiful results.
Getting Started
To begin your crochet tulip project, you'll need a few supplies:
- Yarn in the colors of your choice
- Crochet hook (size will depend on the weight of your yarn)
- Scissors
- Tapestry needle
Once you have your supplies ready, we can start crocheting!

Step 1: Creating the Stem
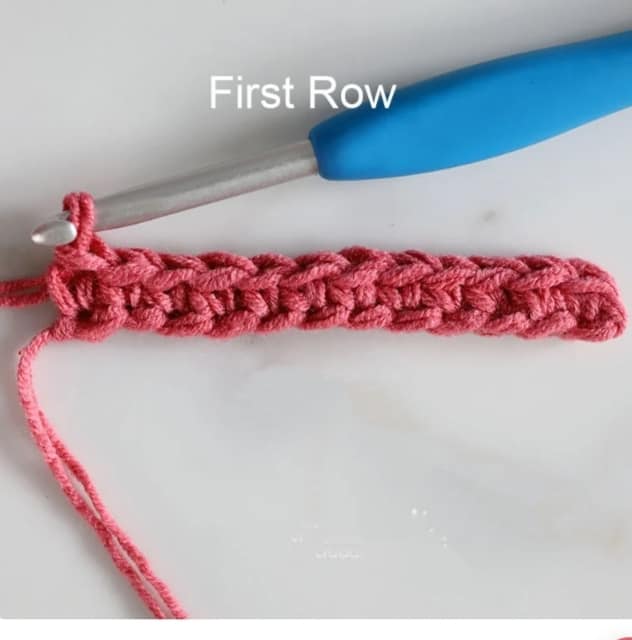
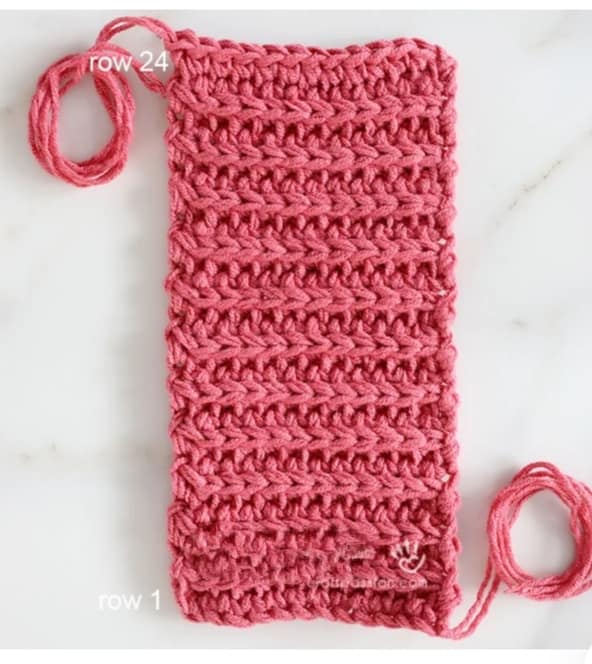
Start by making a slip knot on your crochet hook. Insert your hook into the slip knot and yarn over, pulling the yarn through the slip knot. This will create a chain.
Continue crocheting chains until you reach the desired length for the stem of your tulip. Remember to keep your stitches loose but even.
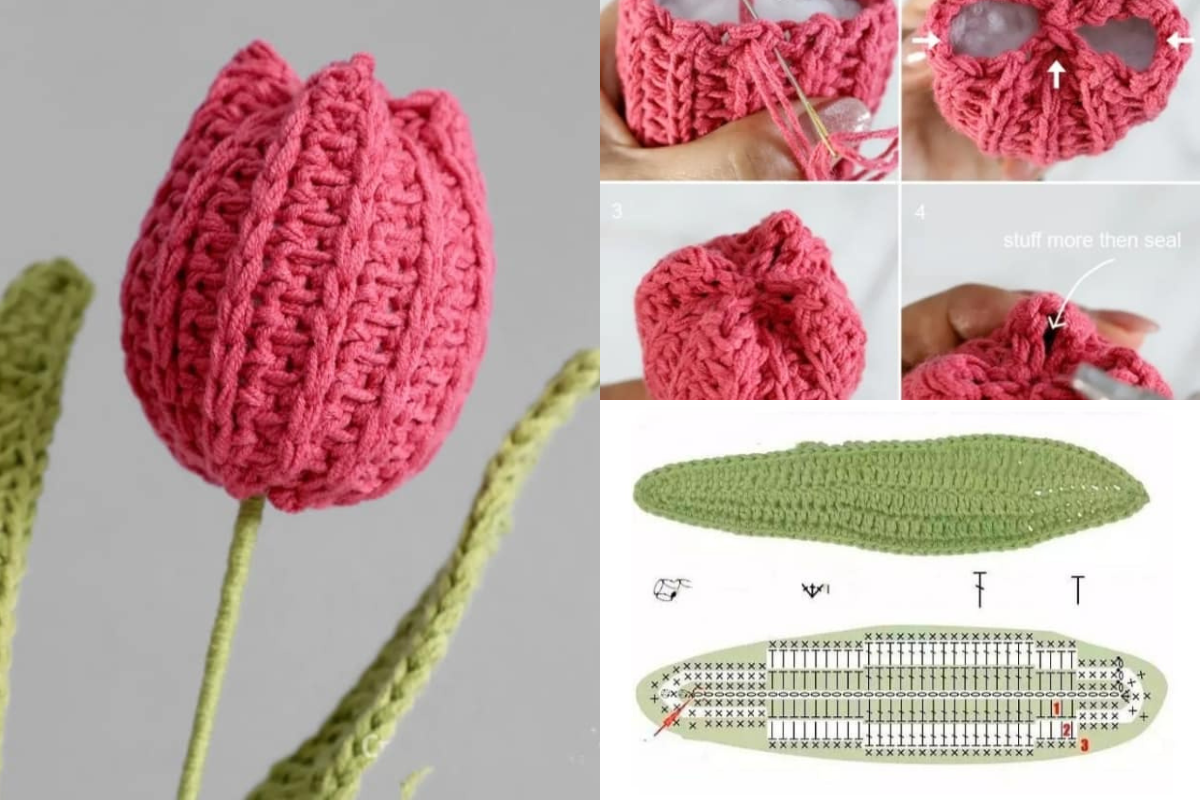
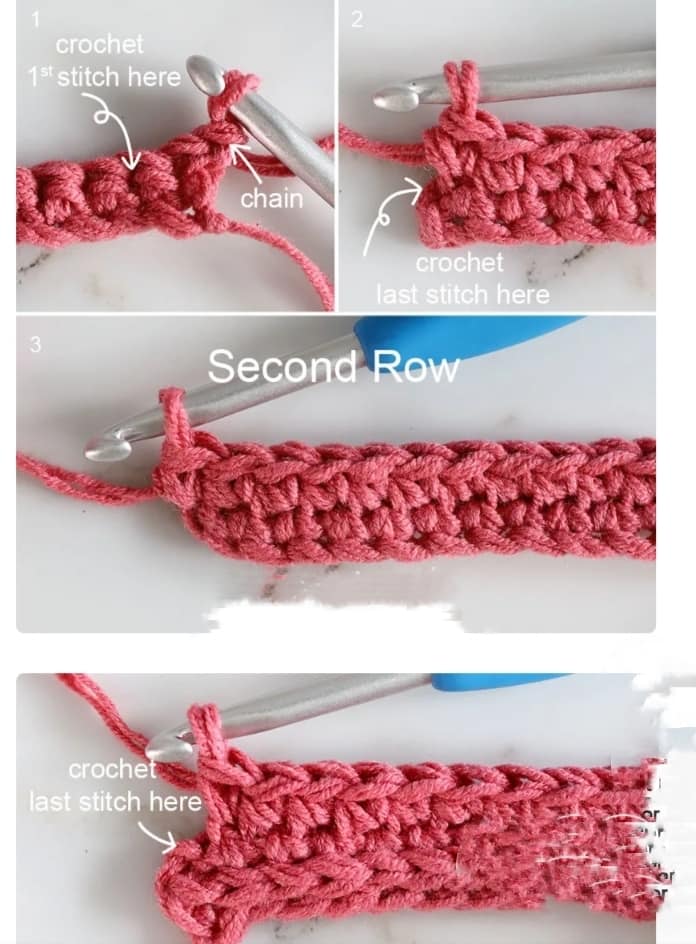
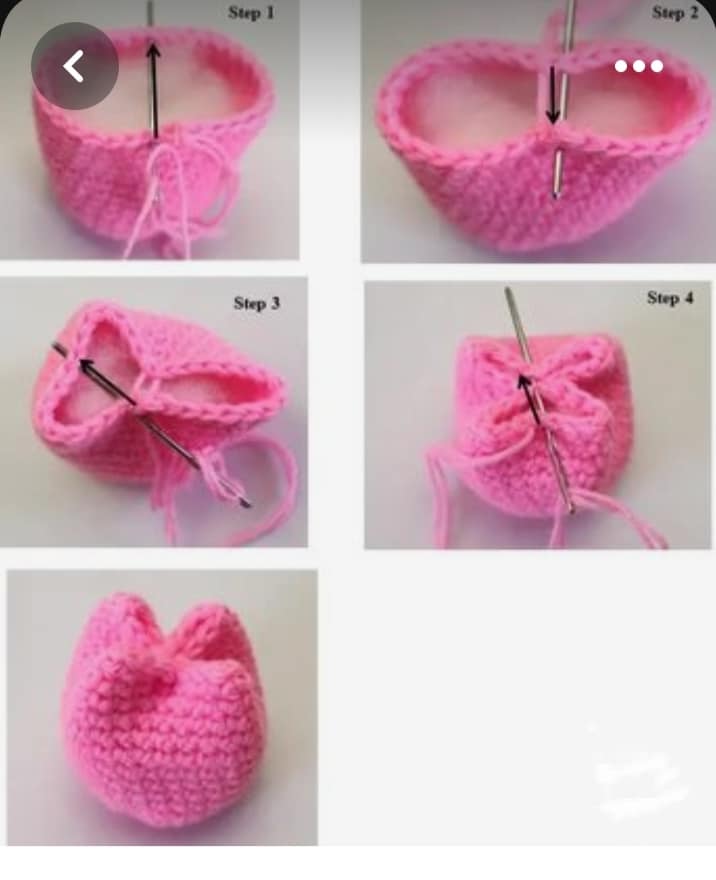
Step 2: Forming the Petals
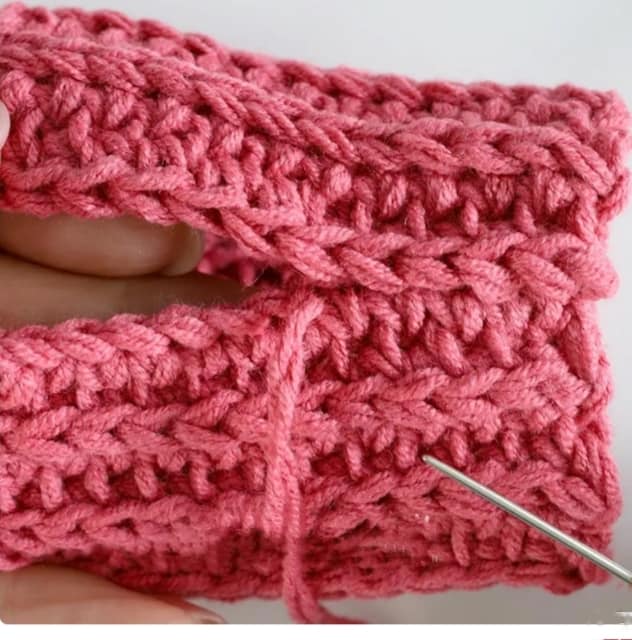
Once you've completed the stem, it's time to crochet the petals. Insert your hook into the top of the stem, yarn over, and pull up a loop. This will create a single crochet stitch on the stem.
Next, yarn over and pull through both loops on your hook. This completes the first petal. Repeat this process to create additional petals, spacing them evenly along the stem.
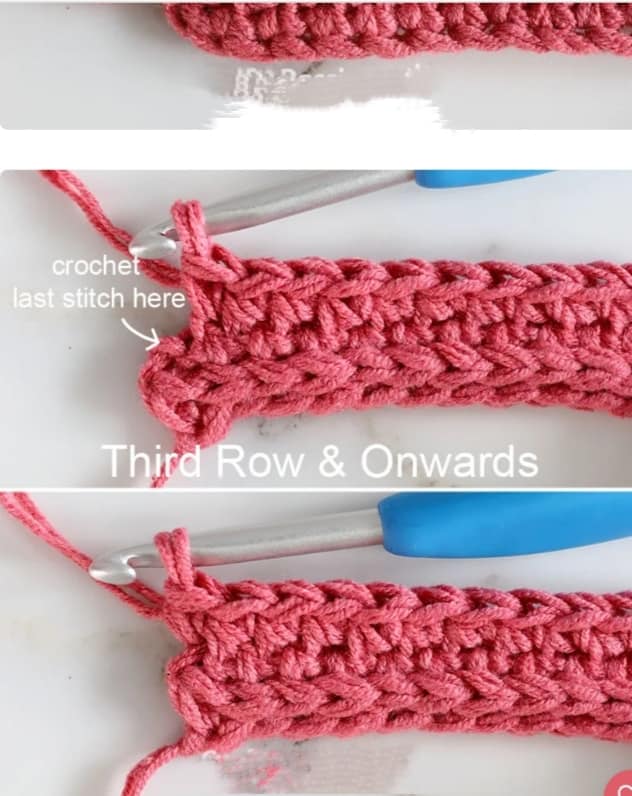
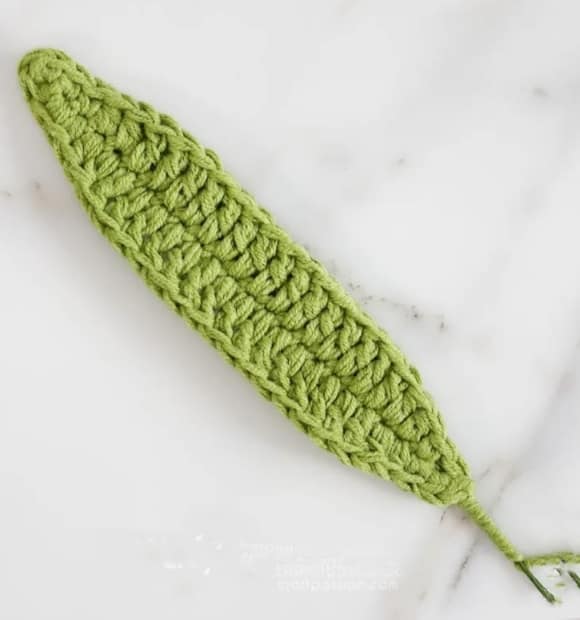
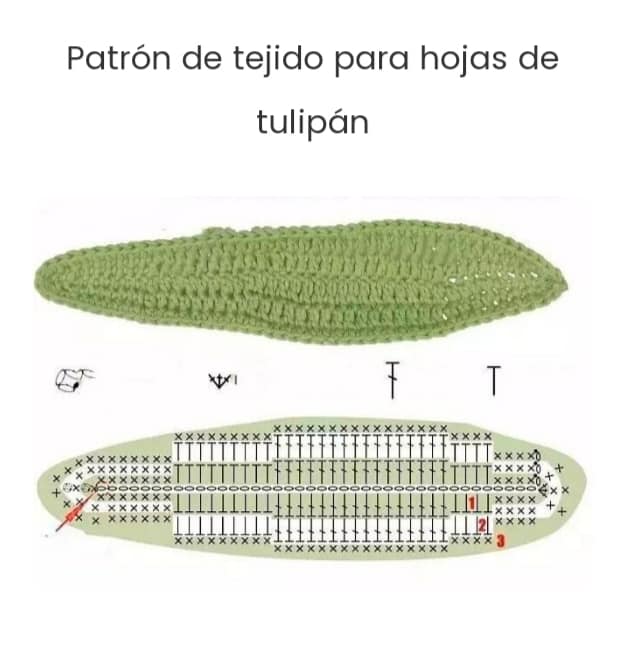
Step 3: Adding the Leaf
To add a leaf to your crochet tulip, insert your hook into the stem where you want the leaf to be. Yarn over, pull up a loop, and crochet a chain of 5. Slip stitch into the same stitch on the stem to create the leaf.
Continue crocheting additional leaves on different parts of the stem to give your tulip a realistic look.
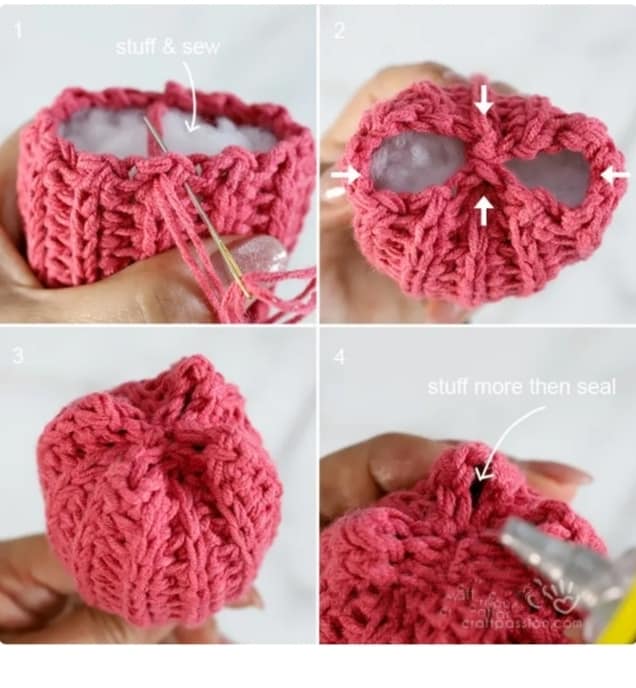
Step 4: Finishing Touches
Once you're satisfied with the number of petals and leaves, fasten off your yarn by cutting it, leaving a tail. Use a tapestry needle to weave in any loose ends and secure them in place.
And there you have it! You've successfully crocheted a beautiful tulip flower. Feel free to experiment with different colors and yarn weights to create a variety of tulip designs.
Now that you have learned how to crochet a tulip, you can start working on your own crochet tulip project. Whether you want to create a single tulip or a whole bouquet, this beginner's tutorial has equipped you with the skills and knowledge needed to bring your floral creations to life. Happy crocheting!
Easy Crochet Tulip Pattern and Instructions
Are you ready to bring some floral beauty into your crochet projects? Look no further than this easy crochet tulip pattern! Whether you're a beginner or an experienced crocheter, you'll enjoy creating these charming handmade tulips.
Before we dive into the instructions, let's gather our materials. You will need:
- Medium-weight yarn in your desired tulip colors
- Crochet hook appropriate for your yarn weight
- Tapestry needle for weaving in ends
- Scissors to trim yarn
Now that we have everything ready, let's get started on making our crochet tulips!
Gauge and Sizing
It's important to note that gauge and sizing can vary depending on your yarn and tension. However, the approximate size of the finished tulip should be around 3 inches in height.
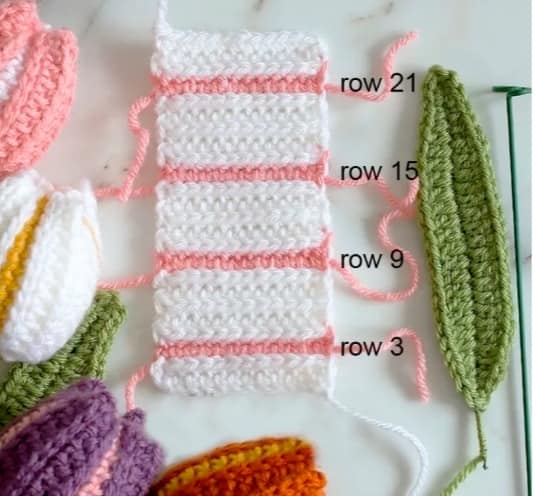
Instructions
Step 1: Begin by creating a magic ring with your chosen tulip color. If you're not familiar with the magic ring technique, you can refer to tutorials online for detailed instructions.
Step 2: Crochet 4 chain stitches to create the stem of the tulip.
Step 3: Make 2 double crochet stitches into the first chain stitch from the hook. This will create the first petal.
Step 4: *Skip 1 chain stitch, make 1 single crochet stitch and 1 double crochet stitch into the next chain stitch. Repeat from * until you reach the end of the chain. You should have a total of 3 petals.
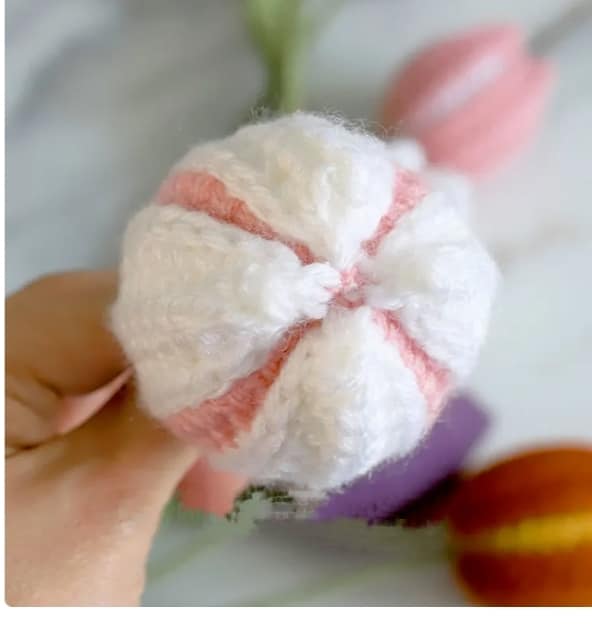
Step 5: Cut the yarn, leaving a longer tail for sewing. Pull the tail through the last stitch to secure it.
Step 6: To finish off the tulip, use a tapestry needle to weave in any loose ends and trim off excess yarn.
That's it! You've successfully crocheted a beautiful tulip flower. Repeat these steps to create as many tulips as you desire. You can mix and match colors, create different sizes, or even add leaves to make your tulips more realistic.
Remember to have fun with your crochet tulips and let your creativity bloom! You can use them as embellishments for hats, scarves, or even create a lovely bouquet to decorate your home.
With this easy crochet tulip pattern and instructions, you'll be able to add a touch of handmade beauty to your crochet projects. Enjoy the process of crocheting these charming tulips and let them brighten up your world!
In conclusion, crocheting tulip flowers can be a delightful and satisfying craft project. With the help of this step-by-step guide and easy crochet pattern, you'll have the ability to create stunning handmade tulips that will bring a touch of nature and beauty to any space.
CHECK MORE CROCHET PATTERNS