DIY Crochet Star Photo Frame: A Creative Way to Display Your Memories

Looking for a fun and creative way to display your favorite photos? A Crochet Star Photo Frame is not only an easy and enjoyable project but also a unique and personal way to show off your cherished memories.
This charming crochet frame adds a handmade touch to your home décor and makes a great gift for loved ones.
Whether you’re a seasoned crocheter or a beginner, this guide will walk you through how to make your very own crochet star photo frame.
DIY Crochet Star Photo Frame
In this tutorial, we’ll explore materials, step-by-step instructions, and creative ways to customize your frame to suit any occasion or style.
Let’s dive into this beautiful project and add a starry touch to your favorite snapshots!
- Unique Home Décor: Handmade crochet frames add a personal, cozy touch to your home, making your décor truly one-of-a-kind.
- Great for Gifting: A crochet star frame makes a thoughtful, handmade gift for holidays, birthdays, or baby showers.
- Easy to Customize: You can easily adapt the size, color, and embellishments to match your style or the recipient’s taste.
- Quick and Fun Project: This is a quick project that can be completed in an afternoon, perfect for when you need a creative break.
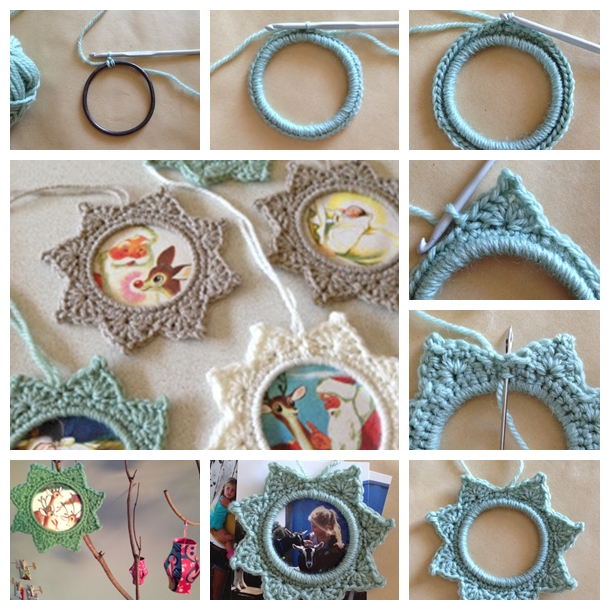
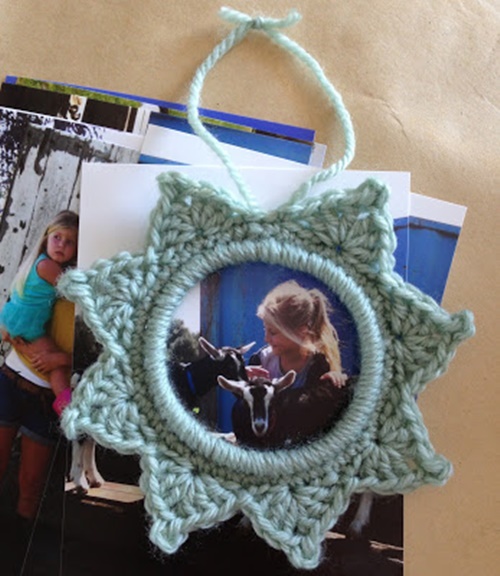
These crochet star frames are so cute ! Use them to frame photos of family members or treasured Christmas pictures, or just leave it empty and let it hang amongst the lights!

What you will need :.
metal bracelet
8 ply wool or acrylic yarn,and a 4mm hook.
Stitches used:
* Slip Stitch (sl st)
* Chain Stitch (ch)
* Single Crochet Stitch (sc)
* Double Crochet Stitch (dc)
* Picot stitch
Step-by-Step Guide: How to Crochet a Star Photo Frame
1. Create the Star Shape
- Start with a Magic Ring: Begin by creating a magic ring. This will be the center of your star.
- Chain 3 Stitches: After securing the magic ring, chain 3 stitches to form the base of the first star point.
- Double Crochet in the Magic Ring: Work 2 double crochets (DC) into the magic ring, followed by a slip stitch. This forms the first point of the star.
- Repeat for Each Star Point: Continue the process of chaining 3, working 2 double crochets, and slip stitching into the magic ring until you have 5 or 6 points to complete the star shape.
- Tighten the Ring: Once all points are created, pull the tail of the magic ring tightly to close the center of the star.
- Finish with a Slip Stitch: Slip stitch into the base of the first point and fasten off. Leave a long tail for sewing the backing.
Create the Backing
- Chain to Form a Base: Chain enough stitches to form a circle or star shape that matches the size of the front star frame you just created. This will be the backing that holds your photo in place.
- Single Crochet Around: Work single crochet (SC) stitches around the chain to create a solid backing for the frame. You can also use double crochet (DC) for a more textured look.
- Finish and Fasten Off: Once the backing is complete, fasten off and leave a long tail for attaching it to the front of the frame.
Assemble the Photo Frame
- Attach the Front and Back: Use a yarn needle to sew the front star shape to the backing. Leave a small opening at the top to slide the photo in.
- Insert the Photo: Place a small, cut-to-size photo between the front and back pieces. Make sure it fits snugly in the star frame.
- Close the Opening: Once the photo is in place, sew the remaining opening closed to secure the picture.
Creating a Crochet Star Photo Frame is a fun, quick, and rewarding project that lets you display your favorite memories in a personal and unique way. Whether you’re making these for holiday decorations, gifts, or just to add a touch of handmade charm to your home, this crochet project is perfect for all skill levels.

CHECK MORE CROCHET PATTERNS