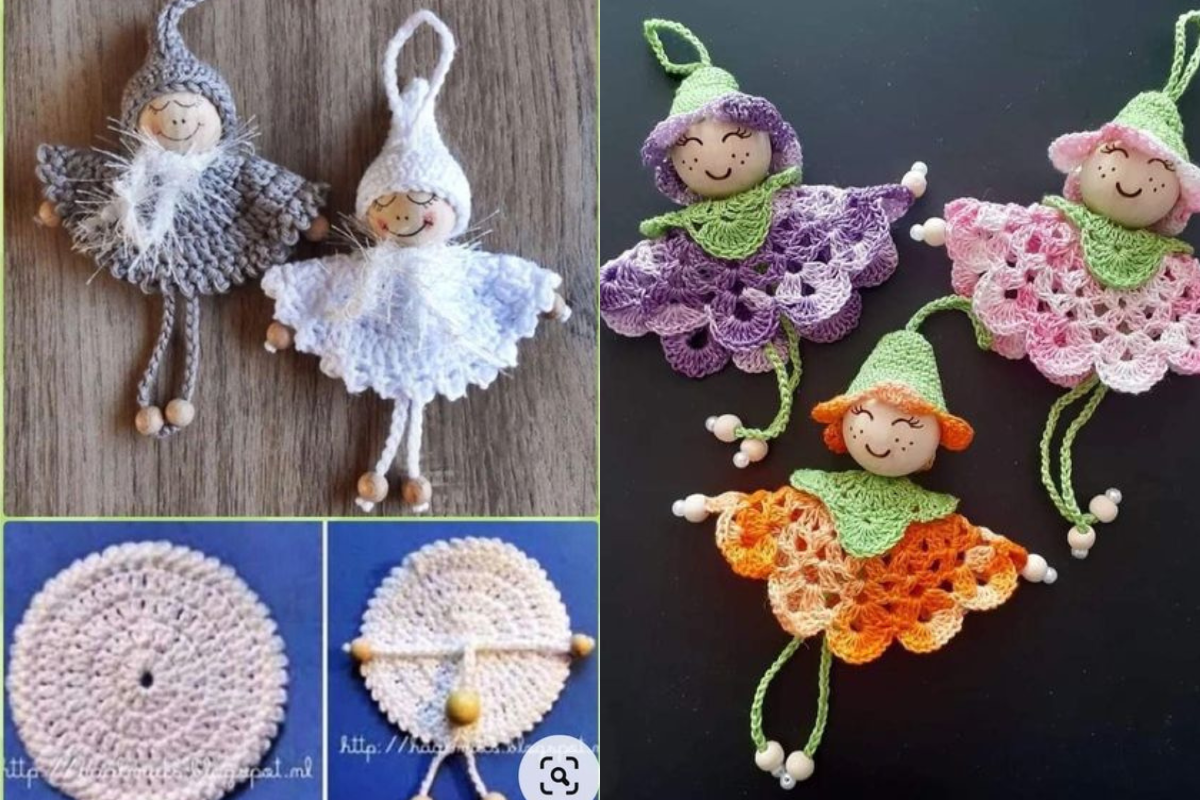
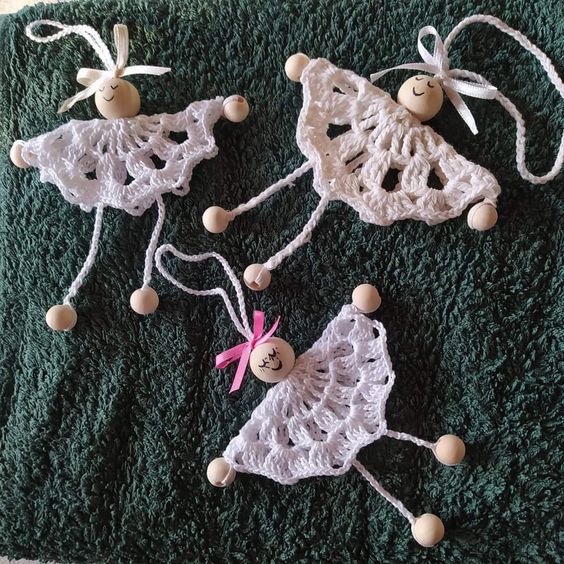
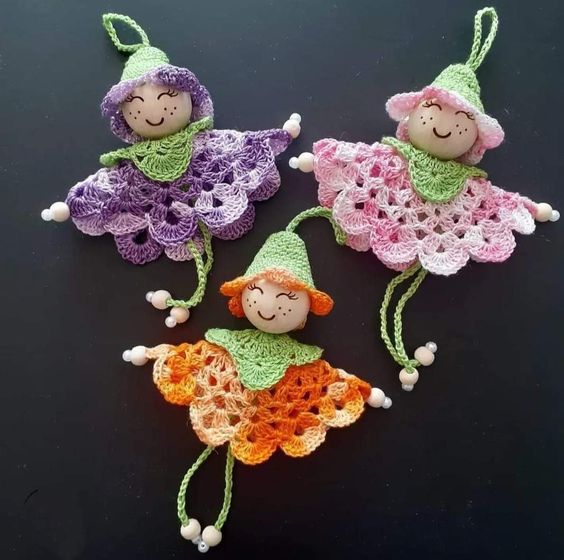
Fairies Made with Crochet Circles Step by Step
Crocheting is a wonderful craft that allows you to create beautiful and intricate designs with just a hook and some yarn. In this article, we'll explore how to make adorable fairies using crochet circles.
More ideas: How to Crochet Doll Dress (Step by Step)
These whimsical creations are perfect for adding a touch of magic to your home décor or gifting to loved ones.
Whether you're an experienced crocheter or just starting out, this step-by-step guide will help you bring these enchanting creatures to life.
Fairies Made with Crochet Circles
In this guide, we’ll walk you through each step to crochet your own fairies made with crochet circles, from the materials needed to the detailed instructions on how to shape your crochet circles into delicate wings, bodies, and heads.
Let’s dive into this magical crochet project!
Materials:
To get started on your crochet fairy journey, gather the following materials:
Yarn
Choose your favorite colors to bring your fairies to life. Opt for soft, lightweight yarn to achieve the best results.
Crochet Hooks
Select crochet hooks in various sizes to accommodate different yarn weights and achieve the desired tightness or looseness of stitches.
Fiberfill
You'll need fiberfill or stuffing to stuff your crochet circles and give your fairies shape and dimension.
Embellishments
Gather beads, sequins, ribbons, and other embellishments to add personality and flair to your fairies.
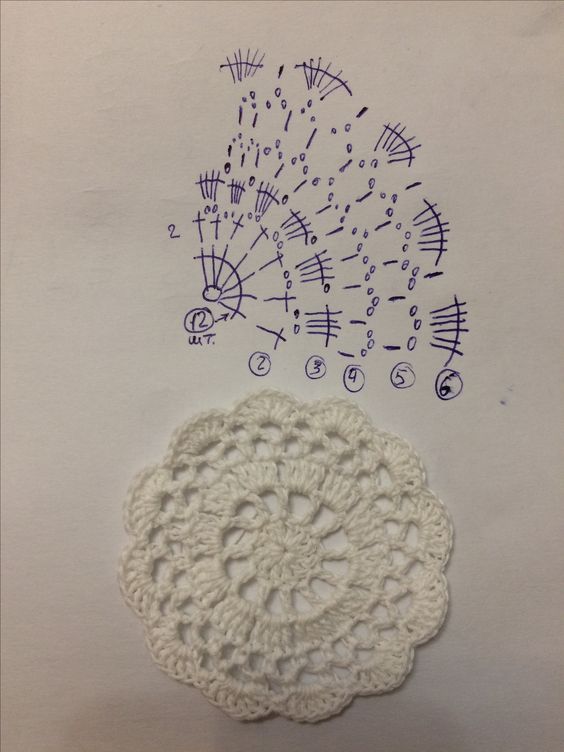
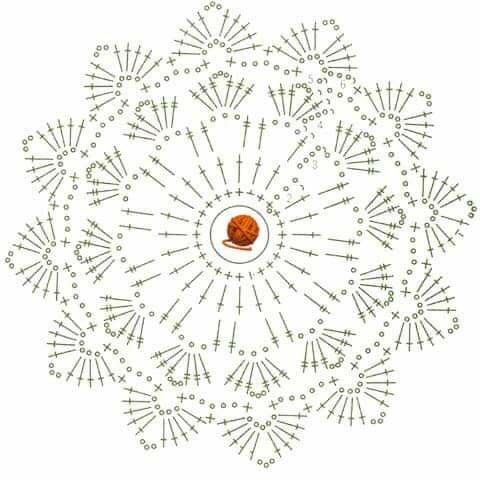
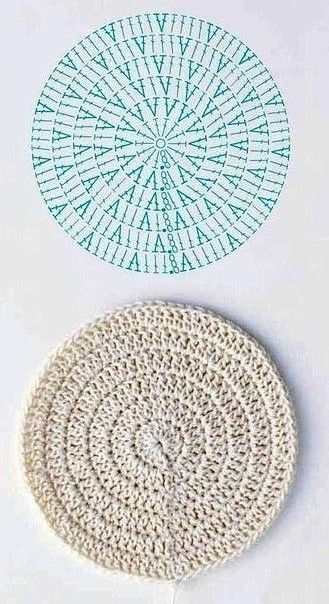
Creating the Crochet Circles
Step 1: Magic Ring
Begin by making a magic ring, also known as a magic circle, to start your crochet circle.
Step 2: Chain Stitches
Crochet a series of chain stitches into the magic ring, forming the center of your crochet circle.
Step 3: Single Crochet Stitches
Work single crochet stitches around the chain stitches, gradually increasing the number of stitches to expand the circle.
Step 4: Closing the Circle
Close the circle by joining the last stitch to the first stitch with a slip stitch.
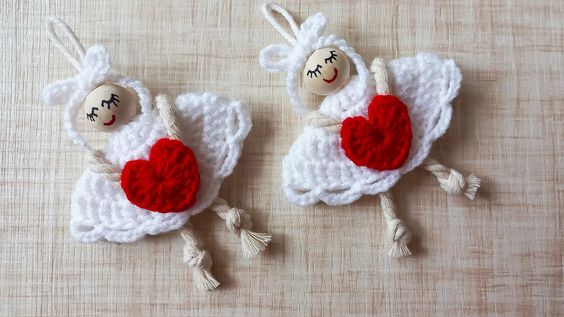
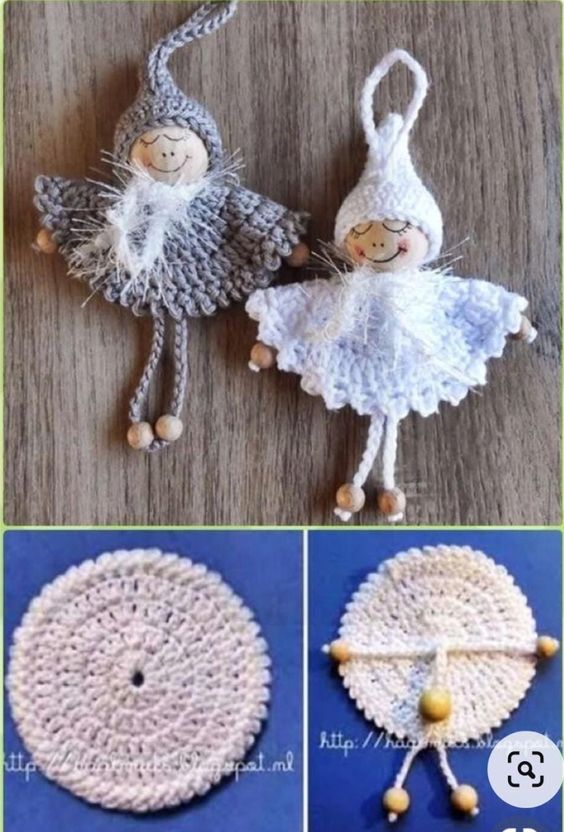
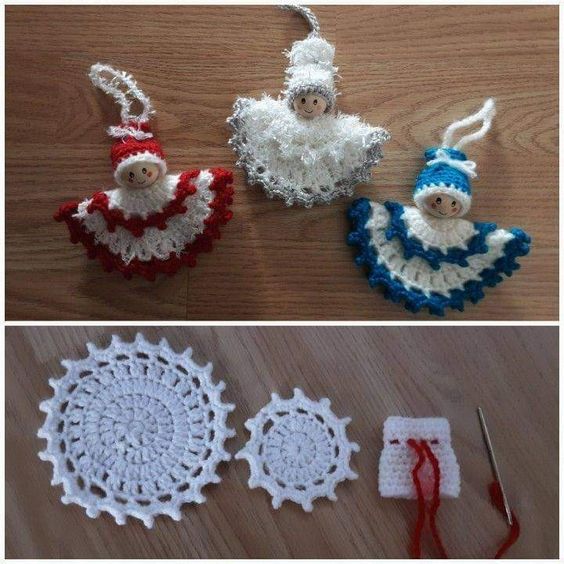
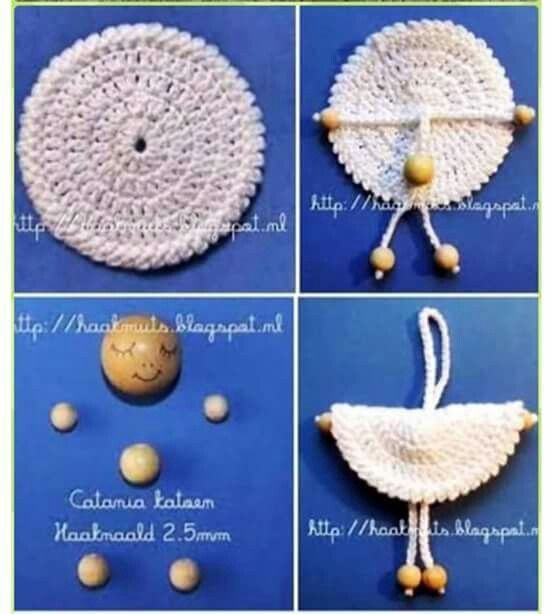
Assembling the Fairies
Step 1: Crochet the Body
Create larger crochet circles to form the bodies of your fairies, stuffing them with fiberfill as you go.
Step 2: Crochet the Head
Make smaller crochet circles for the heads of your fairies, stuffing them lightly to maintain their shape.
Step 3: Attach the Head to the Body
Securely attach the heads to the bodies using a yarn needle and matching yarn.
Step 4: Add Wings and Embellishments
Crochet or cut out wing shapes from felt or fabric and attach them to the backs of your fairies. Embellish their faces with beads for eyes, embroidery for mouths, and sequins for accents.
Tips for Perfect Crochet Fairies
- Tight Tension: Keep your stitches tight, especially for the wings and body, to ensure the fairies hold their shape.
- Even Stitching: Be consistent with your stitch counts, especially when increasing and decreasing for the circles. This will help maintain the perfect circular shape.
- Light Stuffing: Avoid overstuffing the body and head; just a light amount of fiberfill will give the fairies a soft, smooth shape.
Creating fairies made with crochet circles is a magical and rewarding project that allows you to combine creativity with basic crochet techniques. By following this step-by-step guide, you’ll be able to craft charming fairies that are perfect for decorating, gifting, or keeping as a whimsical companion.
Customize your fairies with different colors, textures, and embellishments, and watch as each one comes to life with its own personality.
Creating fairies with crochet circles is a delightful and rewarding craft that allows you to unleash your creativity and imagination.
By following these simple steps, you can craft charming fairies that will bring joy and whimsy to any space. So gather your materials, pick up your crochet hook, and let the magic begin!
CHECK MORE CROCHET PATTERNS