How to Crochet a Butterfly Step-by-Step
Butterflies are one of the most beautiful animals in the world. With colors, sizes and shapes the butterflies are simply wonderful.
Crochet butterflies are a favorite of crochet lovers. They can be used in different ways. Crochet butterflies can be used to apply necklaces, sweaters, and even hair accessories to other jobs.
Today we leave some tutorials of crocheted butterflies. Options with different techniques and styles. Check out.
Table
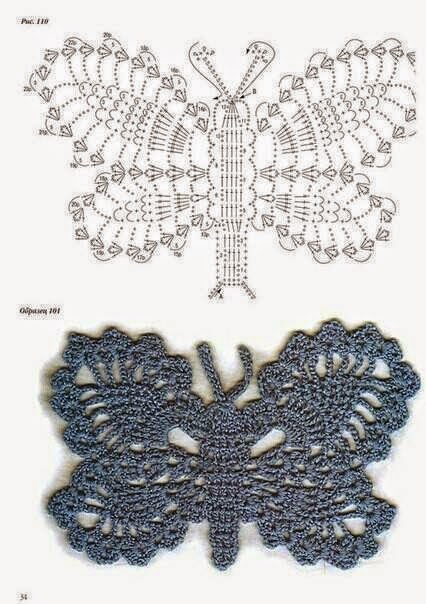
How to Crochet a Butterfly
To help you here we leave a video with another wonderful idea.
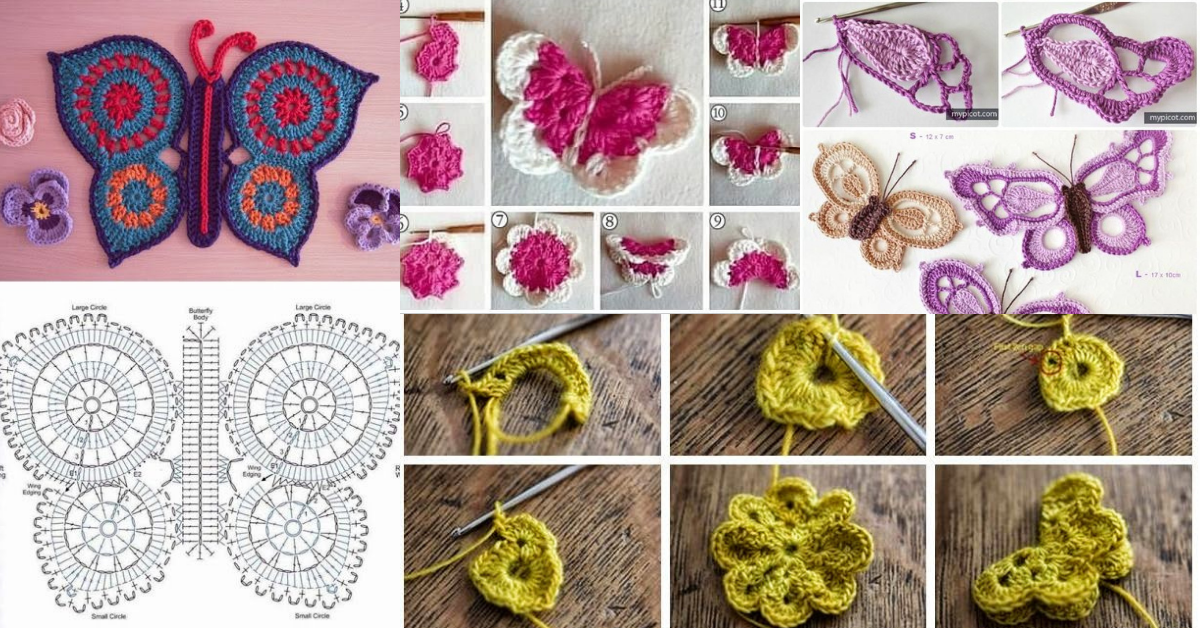
Crochet a Butterfly Step-by-Step
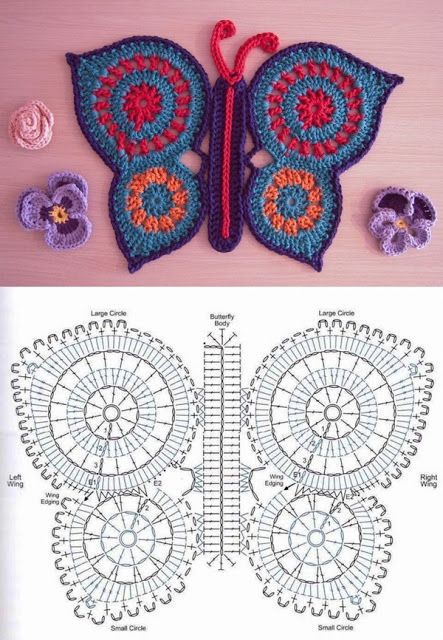
Via: www.certiferme.com

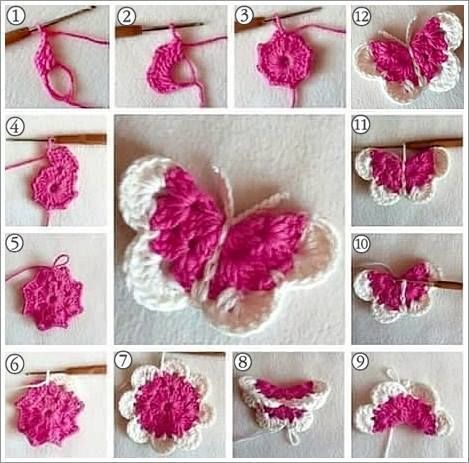
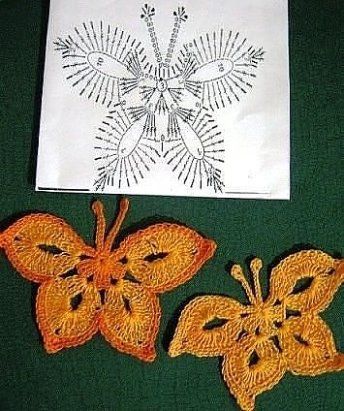
Via: www.otakulandia.es
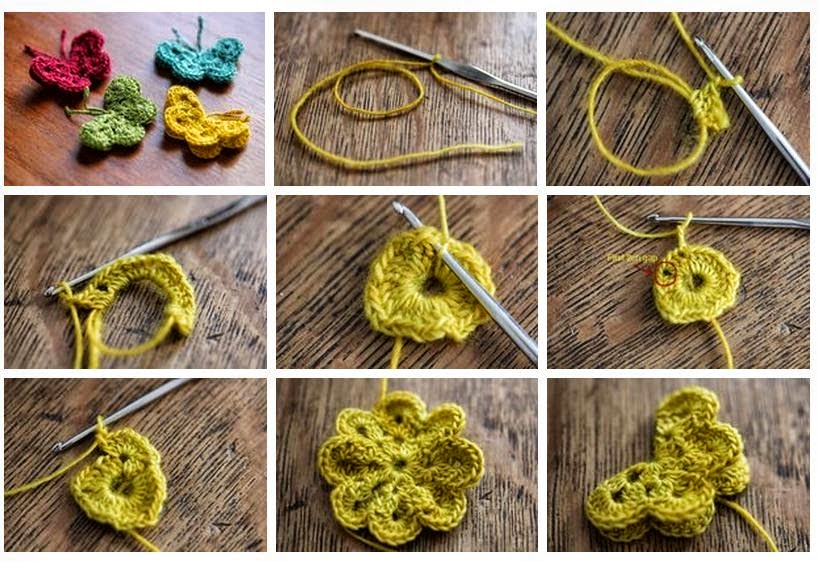
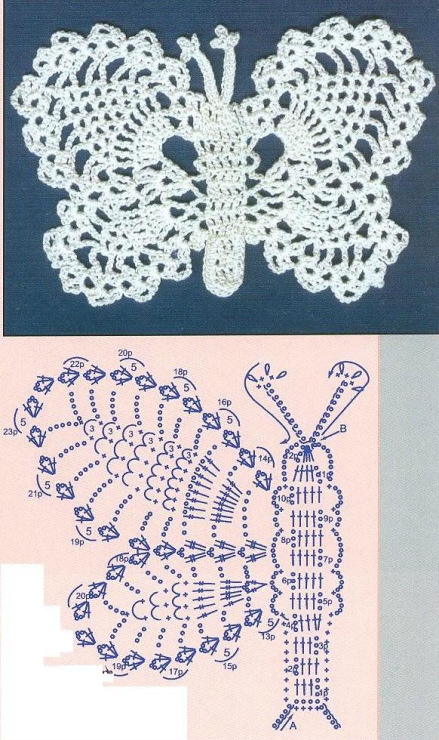
Via: mariesmaking.com

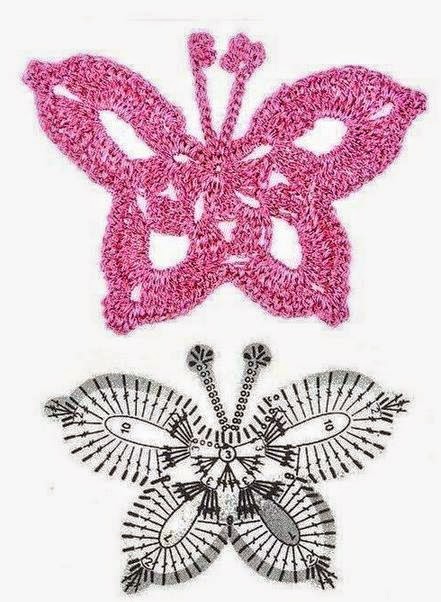
Via: mypicot.com
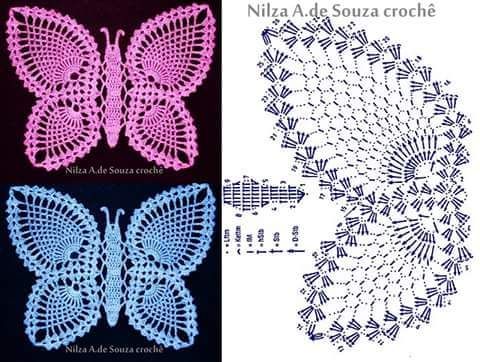
Via: www.liveinternet.ru
How to Crochet a Butterfly: Step-by-Step Tutorial
Step 1: Create the Butterfly’s Body
- Start with a foundation chain: Using the yarn for the body, chain 4.
- Row 1: In the second chain from the hook, make 1 single crochet. Continue by making 1 single crochet in each of the next two chains.
- Row 2: Turn your work, and in each stitch, make 1 single crochet for the next two rows to create the body. The body of the butterfly should now be a small, elongated piece of crochet.
Cut the yarn for the body and leave a long tail for sewing it onto the wings.
Step 2: Crochet the Butterfly’s Wings
For the First Wing (Upper Wing)
- Start with a magic ring or chain 4 and join to form a circle.
- Round 1: Make 6 single crochet stitches into the circle.
- Round 2: Increase by making 2 single crochet stitches into each stitch (12 stitches).
- Round 3: Make 1 single crochet, then 2 single crochet in the next stitch (repeat this around until you finish the round).
- Round 4: Continue by making 1 single crochet in each stitch for a smooth edge.
- After completing the first wing, cut the yarn and weave in the ends.
For the Second Wing (Lower Wing)
- Repeat the steps above, but this time, make the second wing slightly smaller by using 5 single crochet stitches in the initial magic ring instead of 6.
- Follow the same steps for increasing and making the final row.
- Complete the second wing and fasten off.
Step 3: Assemble the Butterfly
- Using the long tail from the body, sew the body of the butterfly onto the center of the wings. Position the upper wings and lower wings in such a way that the butterfly looks symmetrical.
- Weave in the ends carefully to hide them from sight.
Step 4: Add Final Touches
- To make the butterfly stand out, you can add small beads or embroidered details like antennae using black thread.
- You can also add some sparkle by using metallic thread for the body or the outlines of the wings.
CHECK MORE CROCHET PATTERNS