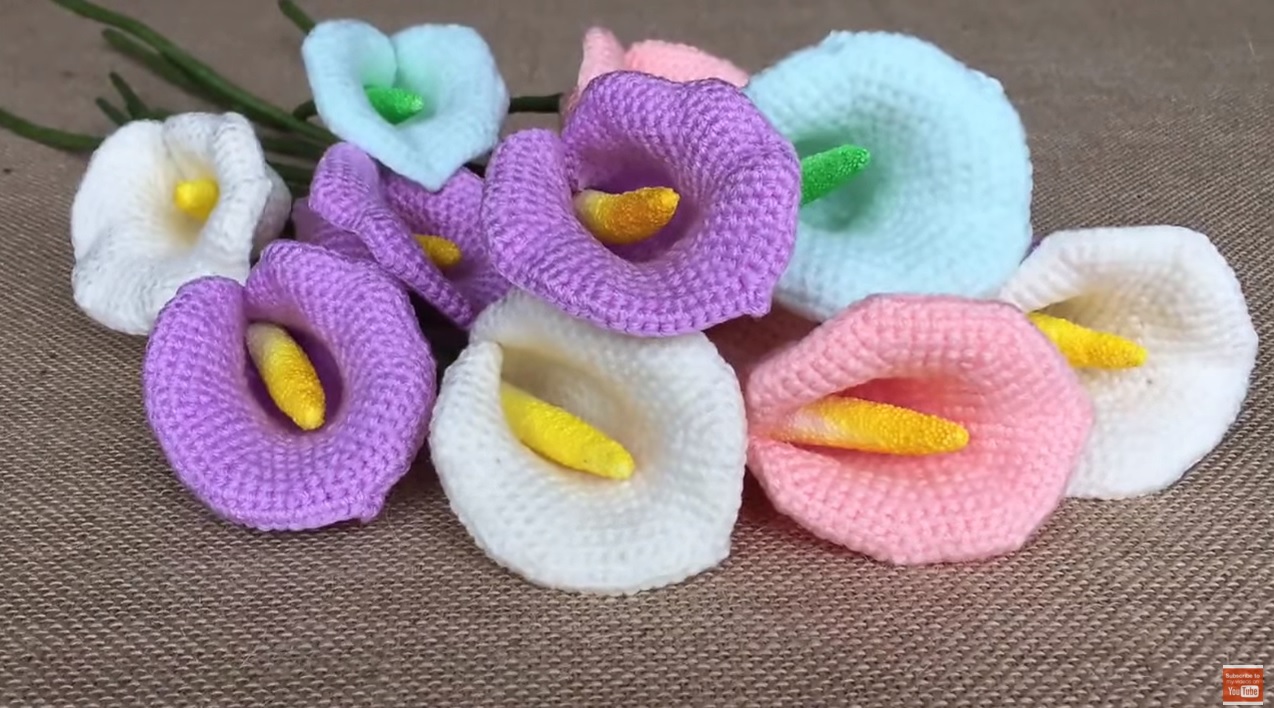
How to Crochet a Calla Lily: Step-by-Step Tutorial with Free Pattern

The Calla Lily is known for its elegant, trumpet-like shape, symbolizing beauty, purity, and rebirth. Imagine creating this iconic flower with just a crochet hook and yarn!
In this tutorial, you’ll learn how to crochet a Calla Lily that’s perfect for home décor, floral arrangements, or even as a heartfelt handmade gift.
Whether you’re a beginner or an experienced crocheter, this project is both fun and rewarding.
How to Crochet a Calla Lily
An elegant Calla Lily to be used in a bouquet or home decor. A beautiful, personal gift to give your loved ones, yourself, or a lonely corner in your house
Simple and elegant, the calla lily pattern is great for making bouquets. Mix and match with other crochet flower patterns or make a bunch of lilies.
Crochet A Calla Lily Tutorial

This flower pattern includes step by step picture instructions for sewing the lily together.
Materials Needed for Your Crochet Calla Lily
Before we begin, gather these materials to create your crochet Calla Lily:
- Yarn: Choose light worsted weight yarn in white or yellow for the petals, and green for the stem.
- Crochet hook: Size 3.5mm or 4mm.
- Tapestry needle: For sewing the pieces together and weaving in ends.
- Scissors.
- Floral wire (optional): To make the stem sturdy and shapeable.
- Stitch markers (optional).
Step-by-Step Guide: How to Crochet a Calla Lily
1. Crochet the Petal (Lily Trumpet)
The petal of the Calla Lily is the most distinctive part. We’ll be crocheting a long, oval-shaped petal with a slight curl.
**Instructions for the Petal:**

1. Start by chaining 10 with your white or yellow yarn.
2. Row 1: In the second chain from the hook, work 1 single crochet (sc). Continue to sc in each chain across. Chain 1 and turn. (9 stitches)
3. Row 2: Work 1 sc in each stitch across. Chain 1 and turn.
4. Row 3: *2 sc in the first stitch, sc in each of the next 7 stitches, 2 sc in the last stitch.* (11 stitches) Chain 1 and turn.
5. Rows 4-8: Repeat Row 3, increasing 2 stitches on both ends of each row until you have 19 stitches.
6. Row 9: Work 1 sc in each stitch across without increasing. Fasten off and weave in ends.
2. Shape the Petal
The Calla Lily’s petal has a gentle curve. Fold the petal in half lengthwise and sew the bottom part together to create the curled trumpet shape. You can leave the top open and slightly rolled back for that characteristic lily look.
3. Crochet the Spadix (Center)
The spadix is the yellow stalk in the center of the Calla Lily. You’ll create this as a separate piece and attach it to the petal later.
**Instructions for the Spadix:**

1. Chain 6 using yellow yarn.
2. Row 1: Work 1 single crochet (sc) in each chain across. Chain 1 and turn. (5 stitches)
3. Rows 2-3: Work 1 sc in each stitch across.
4. Fasten off, leaving a long tail for sewing.
"The spadix adds a realistic touch to your crocheted Calla Lily and brings the flower to life!"
4. Crochet the Stem
For a natural look, use green yarn to create the stem. You can also use floral wire inside the stem for added structure.
**Instructions for the Stem:**

1. Chain 25 with green yarn.
2. Row 1: Work 1 single crochet (sc) in each chain across.
3. Fasten off and leave a long tail for sewing. If you’re using floral wire, wrap the crochet stem around it for added stiffness.
5. Assemble the Calla Lily
Now it’s time to bring the parts together:
- Attach the spadix to the inside of the petal using the tail left from the spadix, sewing it securely at the base.
- Sew the stem to the base of the petal, ensuring it’s attached firmly. If you're using floral wire, carefully insert it into the stem for support.
CHECK MORE CROCHET PATTERNS