How to Crochet a Neck Warmer: A Stylish and Cozy Winter Accessory
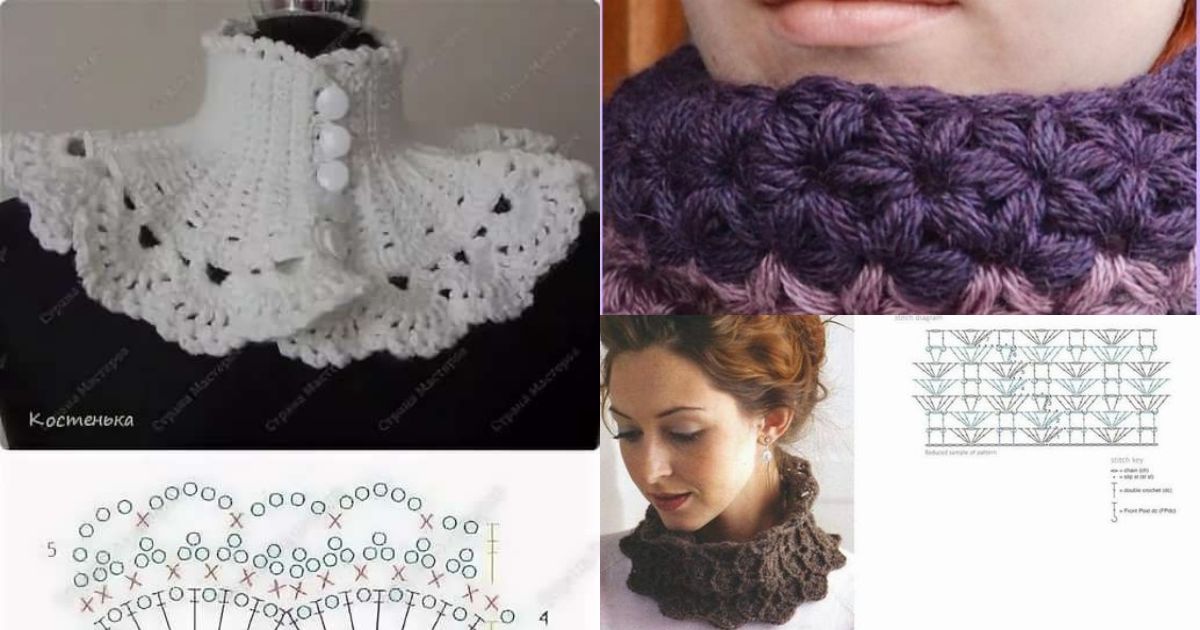
Are you looking to add a touch of warmth and style to your winter wardrobe? Crocheting a neck warmer is a wonderful way to achieve just that. With its versatility and endless design possibilities, a crocheted neck warmer can be a fashionable accessory that keeps you cozy during the chilly months.
In this article, we will guide you step by step on how to crochet a neck warmer that is unique to your personal style.
How to Crochet a Neck Warmer
A neck warmer, also known as a cowl, is a practical and fashionable accessory that can be worn in various ways. It provides warmth to the neck and can be easily paired with different outfits. Crocheting your own neck warmer allows you to personalize it according to your preferences, making it a unique and special piece.
Choosing the Right Yarn and Hook
To start crocheting your neck warmer, you'll need to choose the appropriate yarn and hook size.
Consider the level of warmth you desire and the texture you prefer. Bulky or chunky yarns are great for a cozy and quick project, while lighter weight yarns provide a more delicate look. Select a hook size that complements your chosen yarn for optimal stitch definition.
Getting Started: Foundation Chain
To begin your neck warmer, create a foundation chain of stitches.
The length of your foundation chain will depend on how snug or loose you want your neck warmer to fit. It's recommended to measure your neck circumference and add a few extra chains for a comfortable fit.
Crochet Stitch Patterns for Neck Warmers
There are various stitch patterns you can use to create a unique texture and design for your neck warmer. Here are a few popular ones:
Single Crochet
The single crochet stitch is a simple yet versatile stitch that creates a dense and sturdy fabric. It works well for a basic neck warmer or as a base row for more intricate patterns.
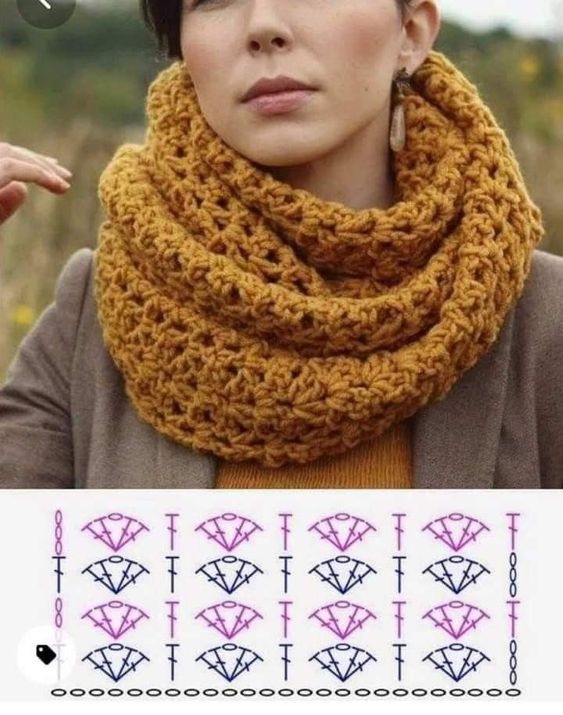
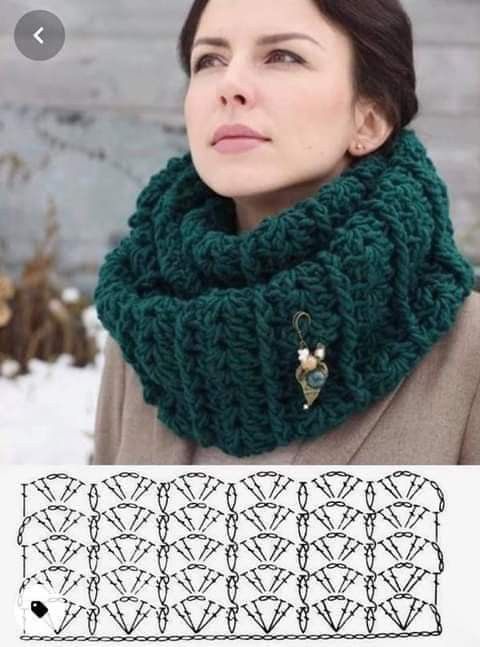
Via: Livemaster
Half Double Crochet
The half double crochet stitch is slightly taller than the single crochet and creates a looser fabric. It's great for achieving a more open and breathable design.
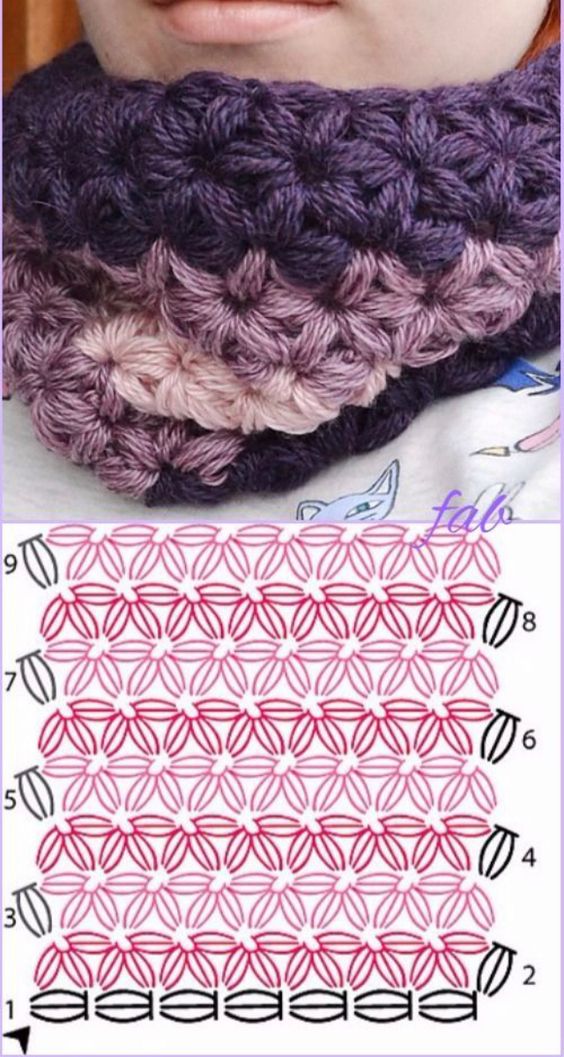
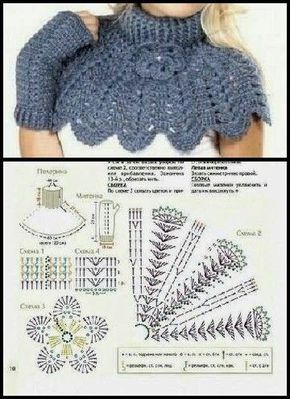
Via:www.liveinternet.ru
Double Crochet
The double crochet stitch is taller than both single and half double crochet stitches. It creates a lacy and lightweight fabric, perfect for a dainty and elegant neck warmer.
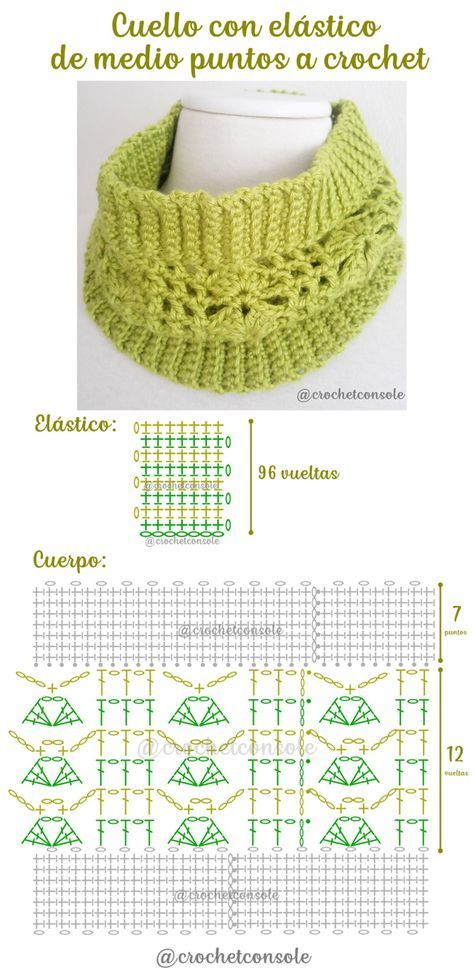
Shell Stitch
The shell stitch is a beautiful pattern that incorporates multiple stitches into one cluster, resembling the shape of a shell. It adds visual interest and texture to your neck warmer.
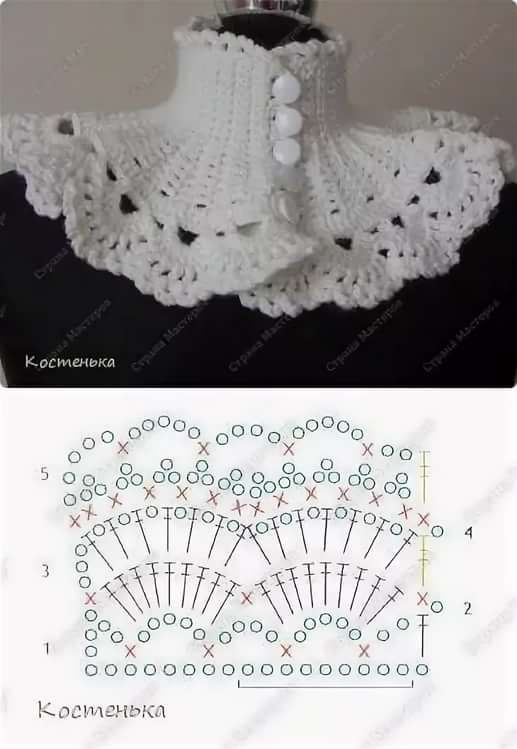
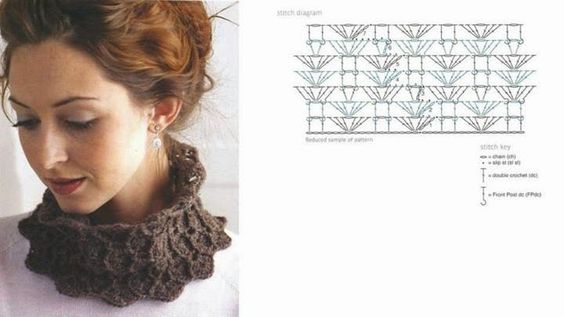
Ripple Stitch
The ripple stitch creates a wavy or zigzag pattern, giving your neck warmer a playful and eye-catching design. It's aversatile stitch that can be customized with different colors.
Creating a Basic Neck Warmer
To create a basic neck warmer, you can use a combination of the stitch patterns mentioned above or stick to a single stitch pattern. Follow these steps:
- Start with a foundation chain based on your desired length.
- Work the chosen stitch pattern across each row, following the instructions for that specific stitch.
- Continue crocheting until you reach the desired width of your neck warmer.
- Fasten off and weave in any loose ends.
Adding Embellishments and Details
To make your neck warmer even more unique, consider adding embellishments and details. Here are some ideas:
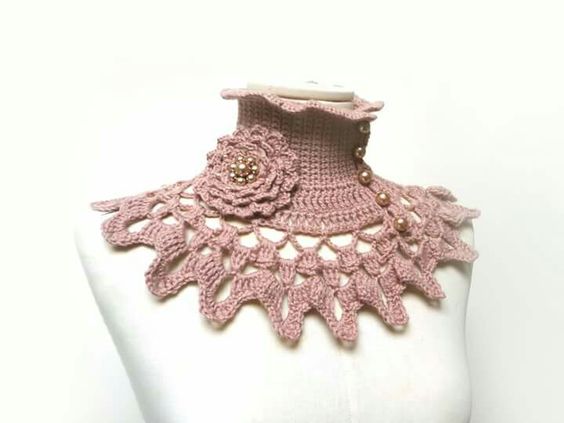
- Attach decorative buttons or toggles for a stylish closure.
- Incorporate a contrasting color for a bold and vibrant look.
- Add a crocheted flower or pom-pom for a whimsical touch.
CHECK MORE CROCHET PATTERNS