How To Crochet a Peppermint Throw: (VIDEO+PATTERN)

Looking for a festive and cozy addition to your home decor? A Crochet Peppermint Throw is a perfect holiday project to keep you warm while adding a touch of holiday spirit.
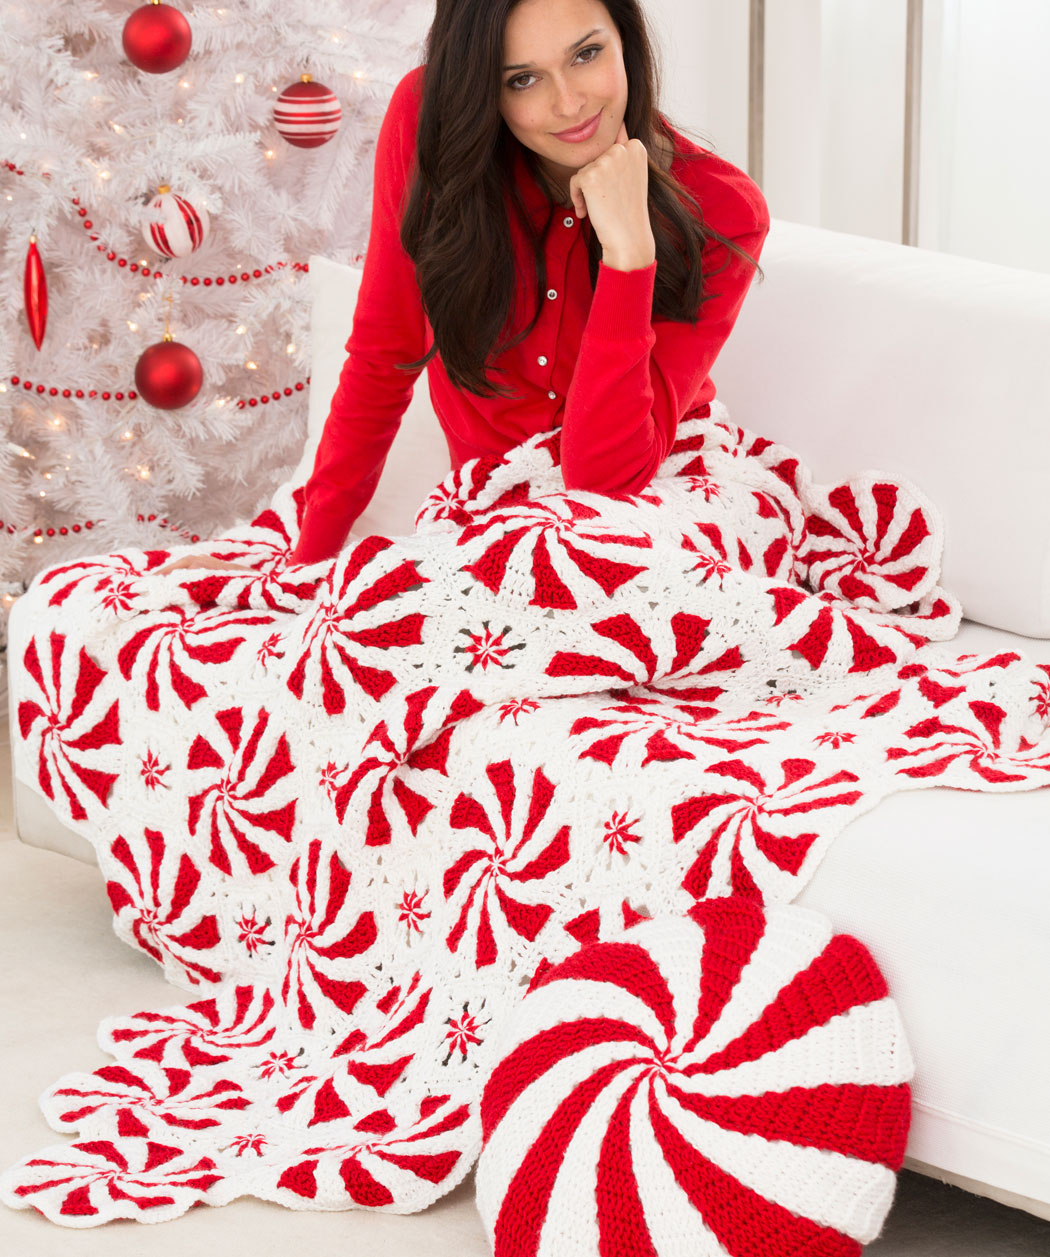
This beautiful throw, with its signature swirl design reminiscent of peppermint candy, makes a fantastic seasonal gift or decorative item to drape over your couch.
How To Crochet Peppermint Throw
In this guide, we'll show you how to crochet a peppermint throw with step-by-step instructions, helpful tips, and customization ideas. Whether you’re an experienced crocheter or just starting, this festive throw will be a satisfying and fun project. Let’s get started!
The peppermint motif is very cleverly designed with a smaller filler motif. To complete the look, we’ve included a peppermint pillow.
You’ll love this Crochet Peppermint Swirl Afghan and it will look fabulous in your home for the Holidays!
Crochet: Peppermint Throw

This would also make a beautiful Christmas gift! Check here the pattern.
Peppermint Throw
Before you begin crocheting your peppermint throw, gather the following materials:
- Yarn: Choose two colors—red and white—of worsted weight yarn for a classic peppermint candy look. You’ll need approximately 900-1200 yards of yarn in total.
- Crochet Hook: A 5.0mm (H) crochet hook is ideal for this pattern.
- Yarn Needle: To weave in the ends and sew sections together.
- Scissors: For cutting your yarn as needed.
- Stitch Markers: To keep track of your rounds and pattern progress.
How to Crochet a Peppermint Throw
1. Start with the Magic Circle
To create the peppermint swirl, you’ll begin with a magic circle. This will be the center of your throw.
- Form a Magic Circle: Wrap the yarn around your fingers to create a loop, and pull through a chain to secure.
- Chain 3: This will count as your first double crochet stitch.
- Double Crochet into the Circle: Work 12 double crochet stitches into the magic circle.
- Pull Tight: Tighten the circle by pulling the tail of the yarn. Slip stitch into the first double crochet to close the round.
2. Create the Swirl Pattern
The peppermint design comes to life as you alternate between red and white yarn in a spiral pattern.
- Change Colors: Switch to your second color (white) by joining the yarn in the same stitch where you finished the red.
- Increase in Each Stitch: Work 2 double crochet stitches into each stitch from the previous round, alternating between red and white.
- Continue Alternating: In each new round, increase the number of stitches between your double crochet increases. For example, in the next round, work 2 double crochets in every other stitch, then every third stitch, and so on.
- Maintain the Swirl: Continue alternating colors and increasing stitches as you spiral out, creating the peppermint swirl effect.
3. Adjust the Size
As you continue working outward, you can adjust the size of your throw by adding more rounds. The more rounds you crochet, the larger your throw will be.
- For a Small Throw: Work up to 50-60 rounds for a smaller, lap-sized throw.
- For a Large Throw: Continue crocheting until you have 80-100 rounds, which will give you a full-sized throw perfect for a couch or bed.
4. Finish with a Border
Once your throw has reached the desired size, finish it with a clean border to give it a polished look.
- Switch to a Solid Color: Choose either red or white to complete the border, or opt for a contrasting color like green for an extra festive touch.
- Single Crochet Border: Work a round of single crochet stitches around the entire throw to create a neat edge.
- Optional Scalloped Edge: For a more decorative border, work a scalloped edge by chaining 3 and skipping every other stitch around the throw.
CHECK MORE CROCHET PATTERNS