How to Make Houses in Crochet: A Step-by-Step Guide to Create Adorable Crochet Homes
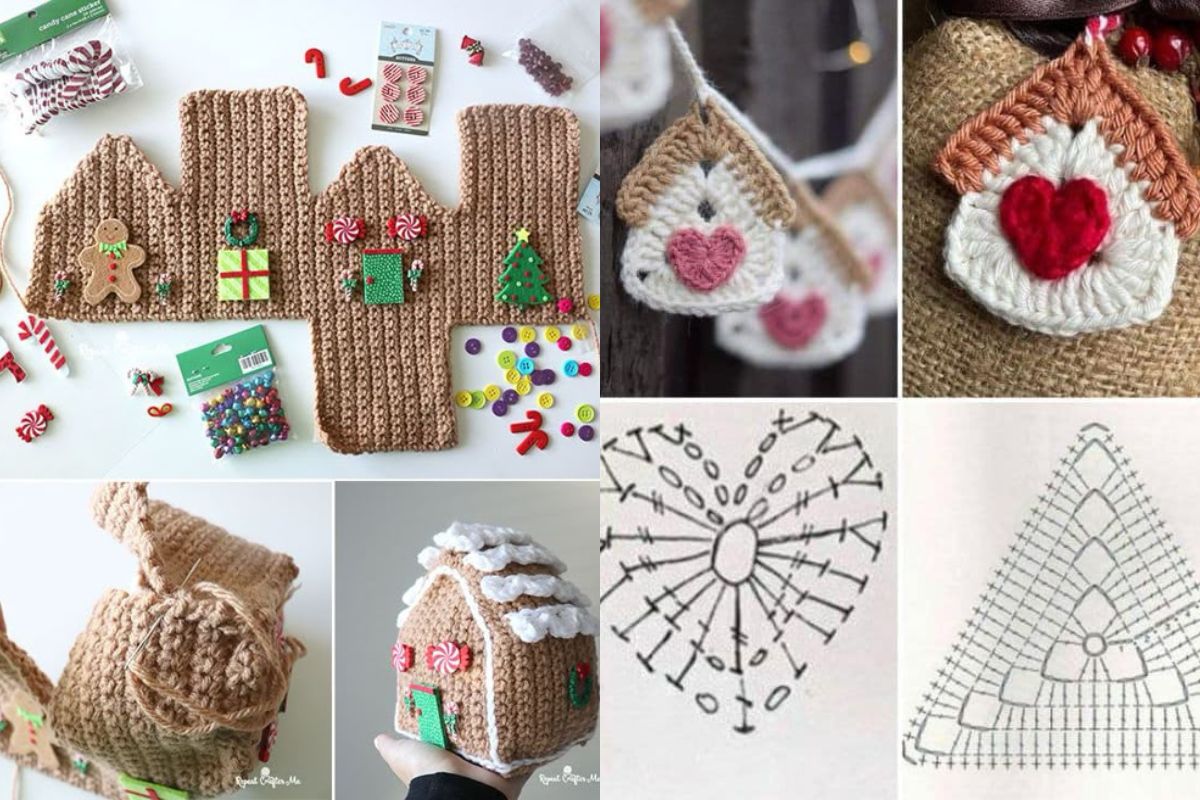
Crocheting houses is a delightful and creative project that can add charm to your home decor or serve as unique gifts.
More ideas: Crochet Christmas Tree Cornucopias: A Festive Guide to Crafting
Whether you want to create a cozy little crochet village or just a single house as an embellishment, this tutorial will guide you through the process step by step.
Let’s dive into the world of crochet houses!
Crochet houses
Before you start making your crochet house, gather the following materials:
- Yarn: Choose a variety of yarn colors. Medium-weight yarn (worsted weight) is ideal for this project.
- Crochet Hook: Size H (5 mm) or as recommended for your yarn.
- Scissors
- Tapestry Needle: For weaving in ends and sewing pieces together.
- Stitch Markers (optional): To keep track of rounds.
- Stuffing: If you want to make your house plush.
Basic Crochet Stitches Used
Familiarize yourself with these crochet stitches that will be used in the house pattern:
- Chain (ch)
- Single Crochet (sc)
- Half Double Crochet (hdc)
- Double Crochet (dc)
- Slip Stitch (sl st)
Step-by-Step Instructions to Crochet a House
1. Create the Base of the House
Instructions
- Make a Slip Knot: Start with a slip knot on your crochet hook.
- Foundation Chain: Chain 20 (or adjust based on the size of the house you want).
- Row 1: In the second chain from the hook, work 1 single crochet and continue across the chain (total of 19 sc). Turn your work.
- Row 2: Chain 1, then work 1 single crochet in each stitch across (19 sc). Turn your work.
- Repeat: Continue this pattern for about 10 rows or until the base reaches your desired width.
2. Crocheting the Walls
Instructions
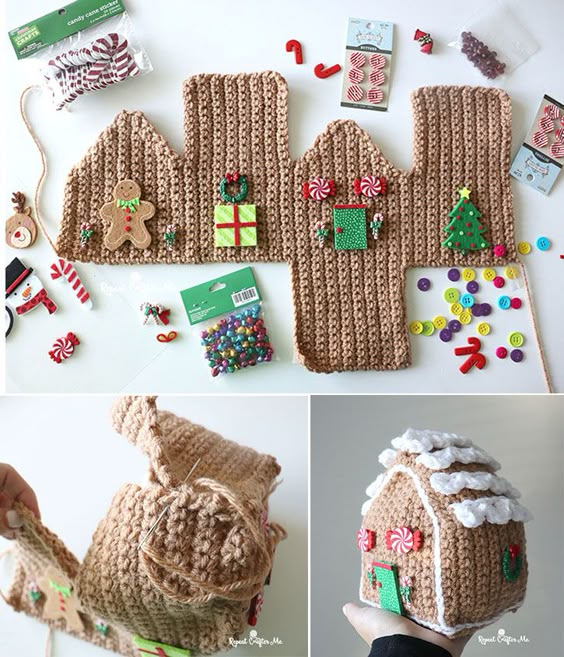
- Create the First Side Wall:
- Chain 1, then work 1 single crochet in each stitch of the last row of the base. This will serve as the side wall of the house.
- After reaching the end, turn your work.
- Increase for Height:
- Work additional rows of single crochet (about 6-8 rows) to reach the desired height of your house.
- Repeat for Other Walls:
- Repeat the process for the other three walls of the house, attaching them at the corners using slip stitches or single crochet.
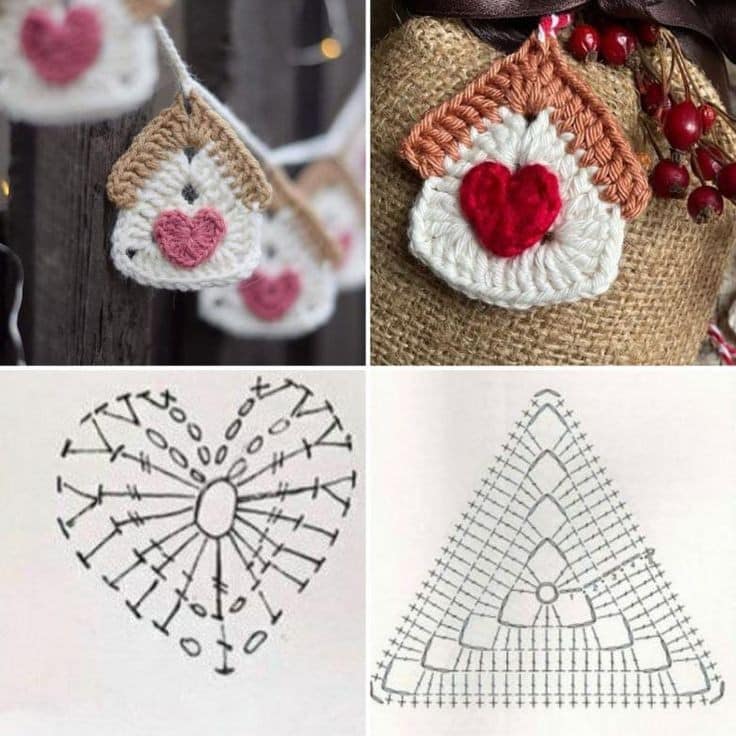
From Pinterest
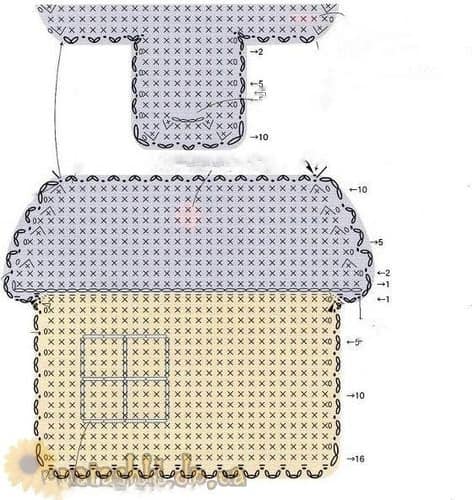
From Pinterest
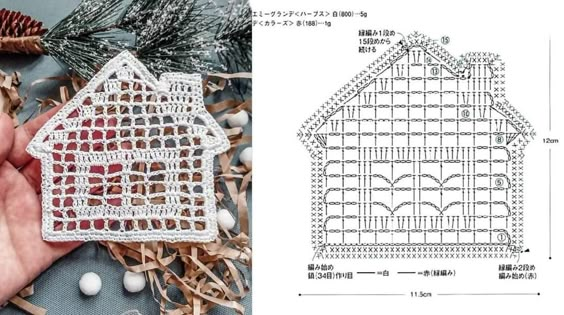
From Pinterest
3. Crocheting the Roof
Instructions
- Create the Roof Base:
- Chain 20 (or the width of the house).
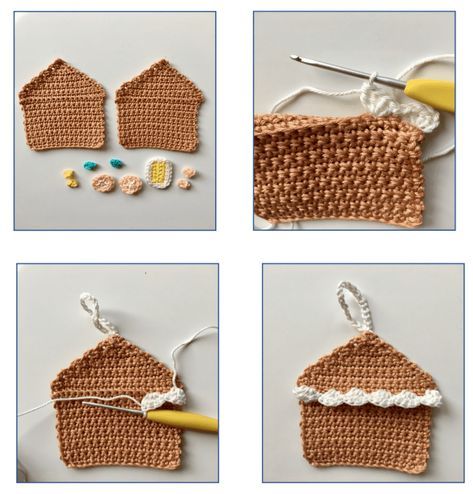
- Work in rows of double crochet or half double crochet for 6-8 rows (depending on how steep you want the roof).
- Shape the Roof:
- Decrease the stitches to create a triangular shape.
- For example, in the last row, chain 2, then double crochet together to create a peak.
- Attach the Roof:
- Once you have two triangles for the roof, attach them to the top of the house walls using slip stitches or single crochet.
4. Adding Windows and Doors
Instructions
- Windows:
- For each window, you can crochet small squares or rectangles using a contrasting color. Attach them to the walls using slip stitches.
- Door:
- Create a rectangle for the door and attach it similarly to the base of the house.
5. Final Touches
Embellishments
- Decorate: Use buttons for doorknobs, add decorative stitching, or even crochet small plants to place outside the house.
- Stuffing (Optional): If you want your house to be plush, add stuffing before closing the bottom.
Using Your Crochet Houses
1. Home Decor
- Place your crochet houses on shelves, mantels, or tables as part of your seasonal decor.
2. Gifts
- These cute houses can be delightful gifts for friends or family, especially during the holidays.
3. Playtime
- Crochet houses can be part of a child's playset, encouraging imaginative play.
Tips for Successful Crochet Houses
- Experiment with Colors: Use different yarn colors to make each house unique and vibrant.
- Combine Patterns: Feel free to mix various crochet techniques to create more intricate designs.
- Practice Makes Perfect: Don’t hesitate to try several times to achieve the desired shape and look for your house.
Discover how to crochet charming houses with our detailed tutorial! Create beautiful decorations and gifts with easy-to-follow instructions. Don’t hesitate to mix different stitch patterns and colors for unique results.
CHECK MORE CROCHET PATTERNS