Knot Bag Free Crochet Pattern and Video Tutorial
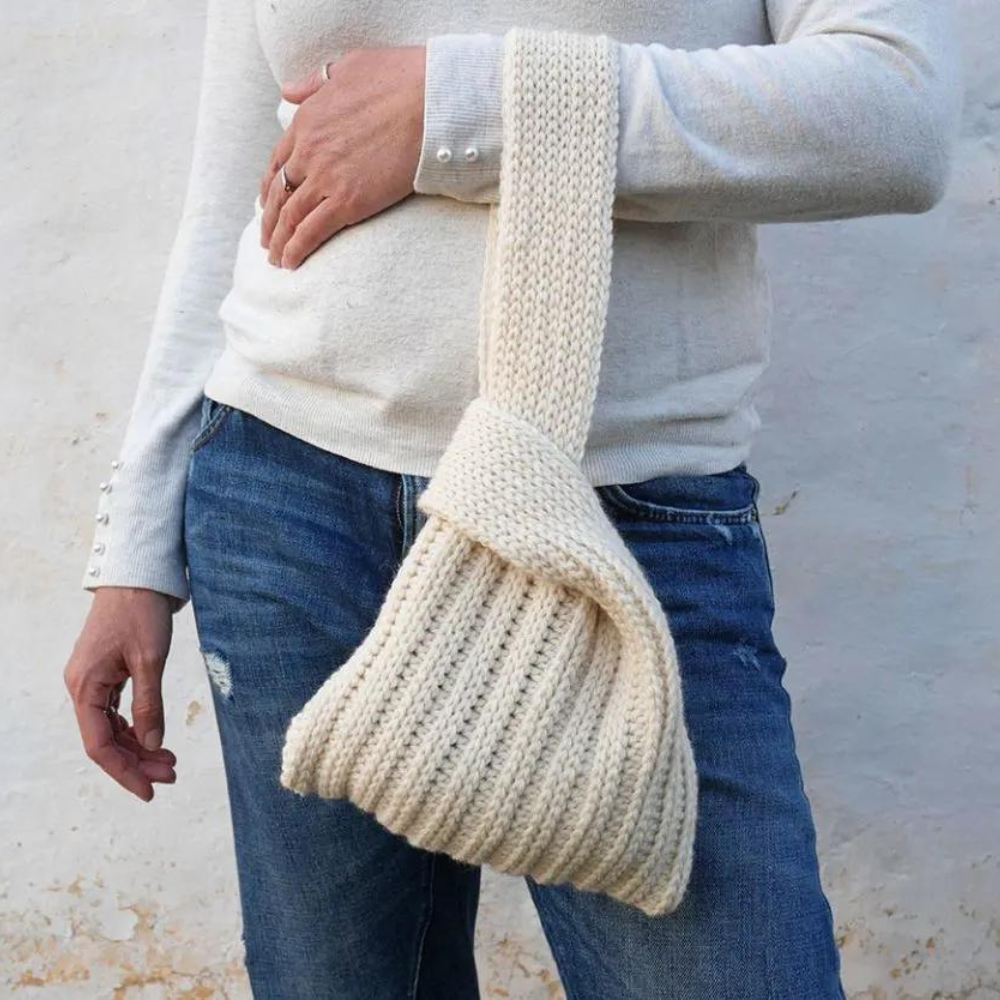
If you're searching for a stylish, minimalist, and functional bag, then the knot bag is the perfect project for you. Inspired by traditional Japanese knot bags, this design is effortlessly chic and highly practical. With just one strap looping through the other, this bag closes naturally without the need for buttons, zippers, or clasps.
In this guide, you'll find a free crochet pattern to create your own knot bag, along with a step-by-step video tutorial to help you visualize the process.
Whether you're an absolute beginner or an experienced crocheter, this project is simple, rewarding, and perfect for daily use.
Why You’ll Love This Crochet Knot Bag
- Minimalist Design – A sleek and elegant look inspired by Japanese culture.
- No Complicated Closures – The knot design eliminates the need for zippers or buttons.
- Perfect Size – Great for carrying essentials like a phone, wallet, and keys.
- Customizable – Easily adjust the size and color to match your style.
- Quick & Easy to Make – Beginner-friendly with basic crochet stitches.

From Pinterest
Materials Needed
Before you start, make sure you have the following materials:
- Yarn – Cotton or acrylic yarn (medium-weight, worsted, or DK).
- Crochet Hook – Size 4.0mm to 5.5mm, depending on yarn choice.
- Tapestry Needle – For weaving in ends.
- Scissors – To cut yarn.
- Stitch Markers – Optional but helpful for keeping track of rounds.
Knot Bag Free Crochet Pattern
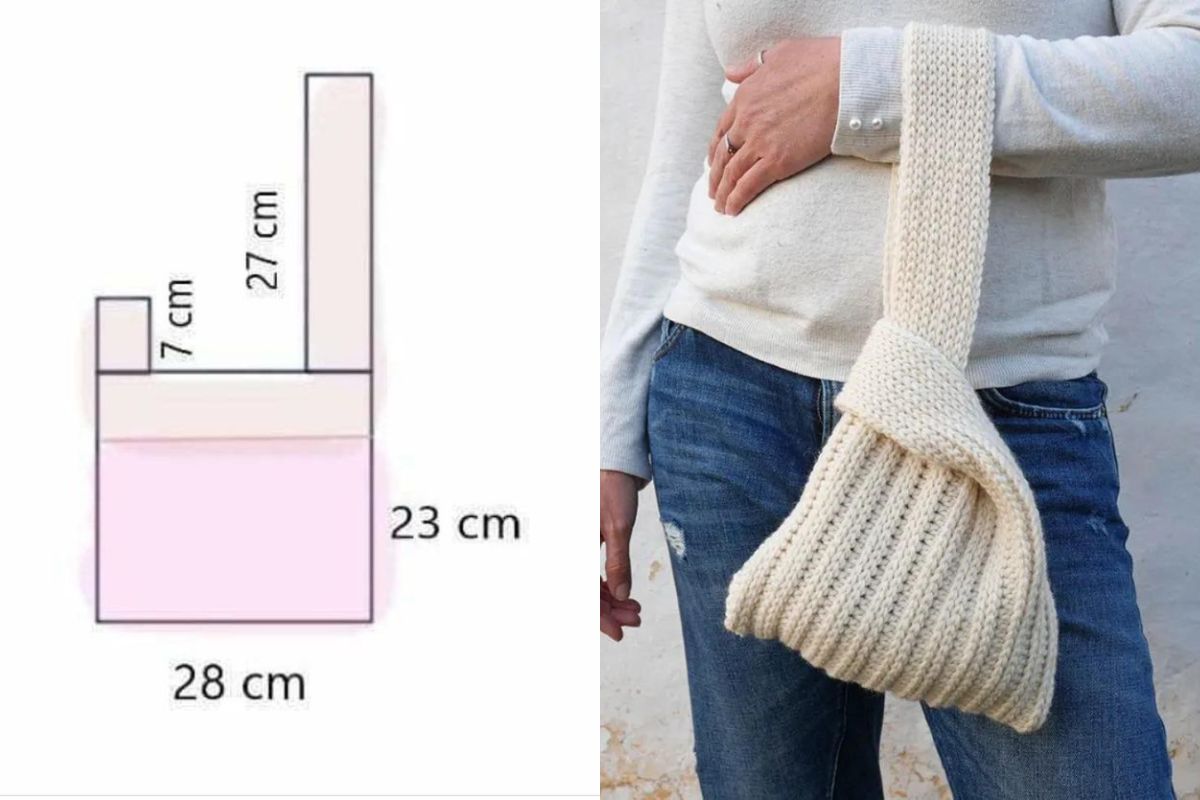
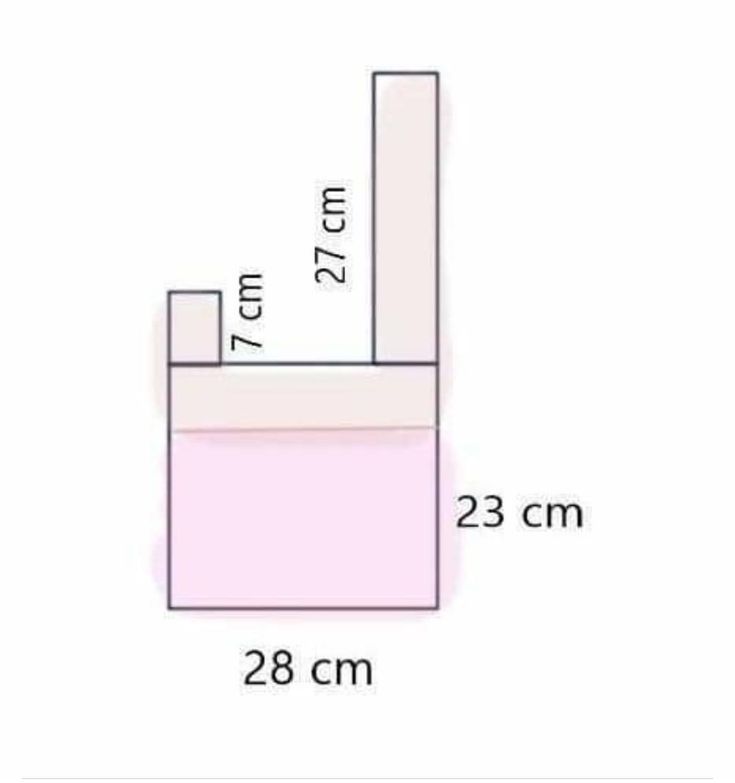
1. Base of the Bag
1. Start with a magic ring and make 8 single crochets (sc) into the ring.
2. Increase: 2 sc in each stitch around (16 sc).
3. Continue increasing: (1 sc, 2 sc in next st) repeat around (24 sc).
4. Keep increasing in this pattern until the base is approximately 6-8 inches wide.
2. Body of the Bag
1. Work in continuous rounds of single crochet (sc) without increasing.
2. Continue until the body reaches your desired height (8-12 inches).
3. You can experiment with different stitch patterns like half double crochet (hdc) or double crochet (dc) for texture.
3. Creating the Handles
1. Identify two opposite sides of the bag where the handles will be placed.
2. Chain 30-50 stitches (depending on how long you want the handles).
3. Skip stitches on the bag’s edge and attach the chain to the other side.
4. Repeat for the second handle, ensuring one is longer than the other.
5. Work in single crochet around the handles for durability.
4. Finishing Touches
1. Secure and weave in all loose ends with a tapestry needle.
2. Block the bag (optional) to shape it properly.
3. Enjoy your handmade crochet knot bag!

It uses simple stitches like single crochet, making it perfect for beginners.Modify the number of base rounds and body height to make it larger or smaller.Cotton yarn works best for durability and structure, but you can use acrylic as well.
Learn how to crochet a stylish and functional knot bag with this free pattern and video tutorial. Perfect for beginners! Step-by-step instructions included.
CHECK MORE CROCHET PATTERNS