Mesh Beanie Crochet Tutorial – Step-by-Step Guide for Beginners and Experts

Crochet isn’t just about granny squares or blankets; it’s about creativity, texture, and wearable art. One of the most versatile accessories you can create with just a hook and yarn is a mesh beanie.
Lightweight, breathable, and stylish, the mesh beanie is perfect for every season. Whether you want a slouchy summer hat or a cozy layering piece, this tutorial will walk you through everything — from choosing yarn to finishing touches.
Materials You’ll Need
- Yarn: Choose a lightweight cotton or bamboo blend for summer, or acrylic/wool for winter.
- Hook size: Typically 4.0 mm – 5.0 mm, but always match it with your yarn’s recommendation.
- Scissors: A sharp pair for neat finishing.
- Tapestry needle: For weaving in ends.
- Stitch markers (optional): Useful for keeping track of rounds.
")
Stitches Used in This Pattern
- CH (Chain)
- SL ST (Slip Stitch)
- SC (Single Crochet)
- DC (Double Crochet)
- CH-SP (Chain Space)
If you’re a beginner, don’t worry — each of these stitches is beginner-friendly.
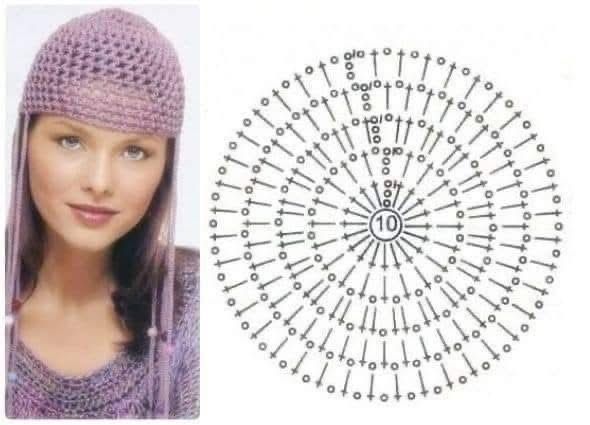
Step-by-Step Crochet Tutorial
Step 1: Start with the Magic Ring
- Create a magic ring (or chain 4 and join with a slip stitch).
- Into the ring, CH 3 (counts as first DC), then make 11 DC.
- Join with SL ST to the top of CH 3.
- Total: 12 DC.
Step 2: Increase the Crown
- Round 2: CH 3, DC in same st, 2 DC in each st around. Join with SL ST. (24 DC)
- Round 3: CH 3, DC in same st, 1 DC in next, 2 DC in next. Repeat around. (36 DC)
- Round 4: CH 3, DC in same st, 1 DC in next 2, 2 DC in next. Repeat. (48 DC)
👉 Continue increasing until the flat circle reaches 6.5 inches for adult, 5.5 for teen, or 4.5 for child.
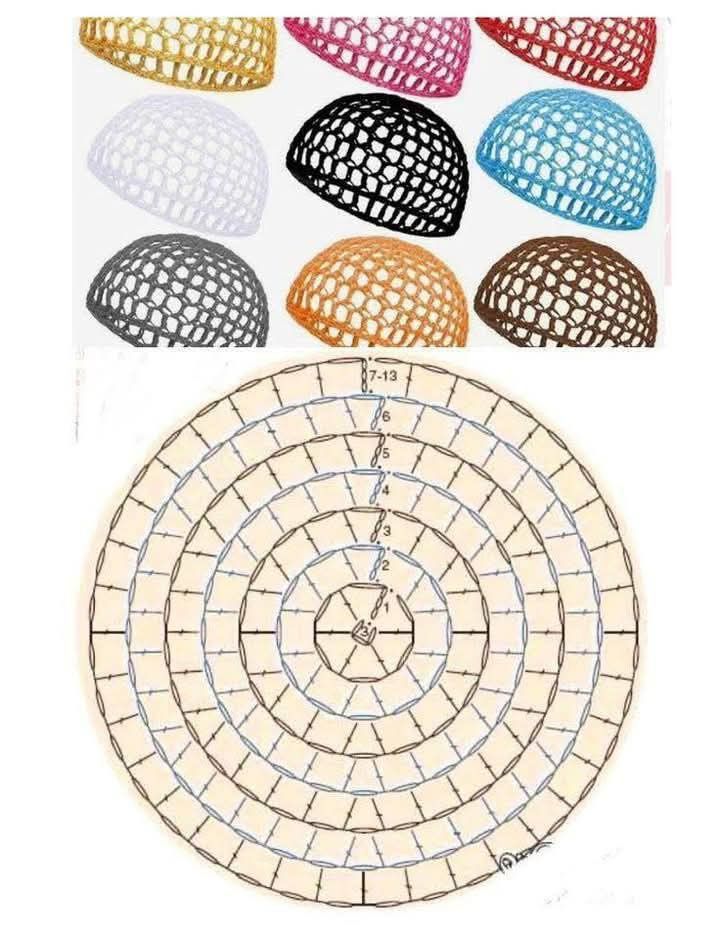
Step 3: Create the Mesh Body
- Round 1: CH 4 (counts as 1 DC + CH 1), SK next st, DC in next. Repeat around. Join.
- Round 2: SL ST into CH-SP, CH 4, DC in next CH-SP. Repeat.
- Continue repeating mesh rounds until the beanie measures 7–8 inches tall.
Step 4: Add the Band
- Round 1: CH 1, SC in each stitch and CH-SP around. Join.
- Round 2–3: SC around. This creates a snug band to hold the beanie.
Step 5: Finish Off
- Fasten off and weave in ends.
- Optionally add a pom-pom, flower applique, or leather tag.
Via Pinterest
Variations of the Mesh Beanie
1. Slouchy Mesh Beanie
Work an extra 4–5 rounds of mesh before adding the band.
2. Tight-Fit Summer Mesh Cap
Stop early for a snug cap that breathes — ideal for hot weather.
3. Striped Mesh Beanie
Alternate two yarn colors every 2–3 rounds.
4. Festival-Style Mesh Beanie
Use multicolor yarn and add beads to chain spaces for a bohemian look.
Styling a Mesh Beanie
- Pair with oversized sweaters in winter.
- Wear with beach outfits in summer.
- Works well with short hair or styled over braids/dreads.
Learn how to crochet a mesh beanie with this step-by-step tutorial. Beginner-friendly pattern, materials list, and creative variations for stylish, breathable hats. Perfect for all skill levels.
CHECK MORE CROCHET PATTERNS