Star Pillow - Free Knitting Pattern
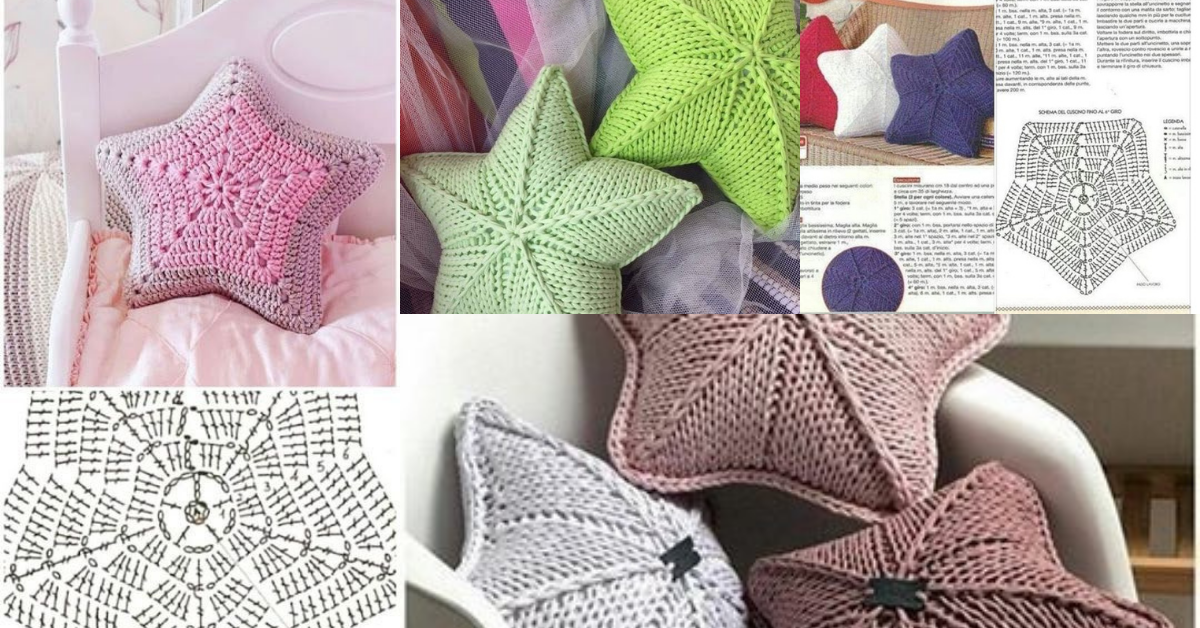
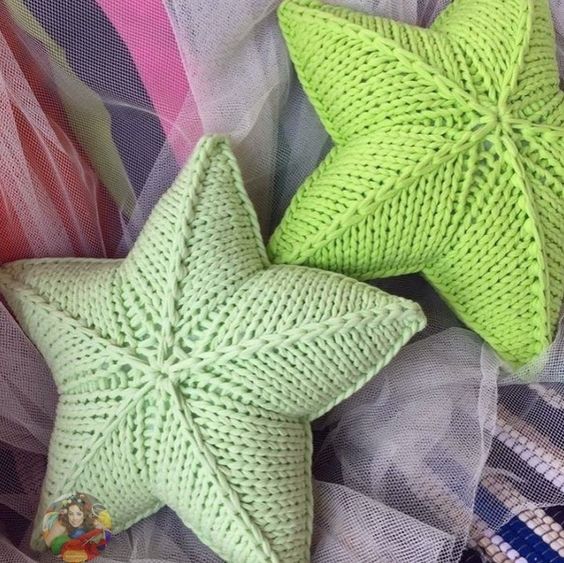
Cushions are the perfect element to add a special touch to your home decor. The star-shaped crochet pillows are very creative and original.
They are the perfect shape for anyone who likes original things. The star-shaped crochet pillows can be used in different spaces in your home, but they go perfectly well in the nursery and children's room.
Today we leave some ideas and even a step by step pillows in the shape of stars.
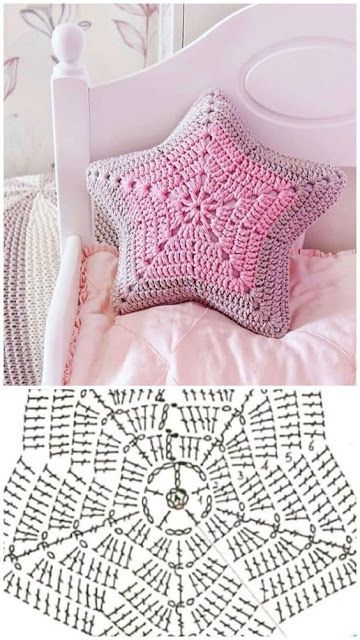
How to crochet Star shaped pillow

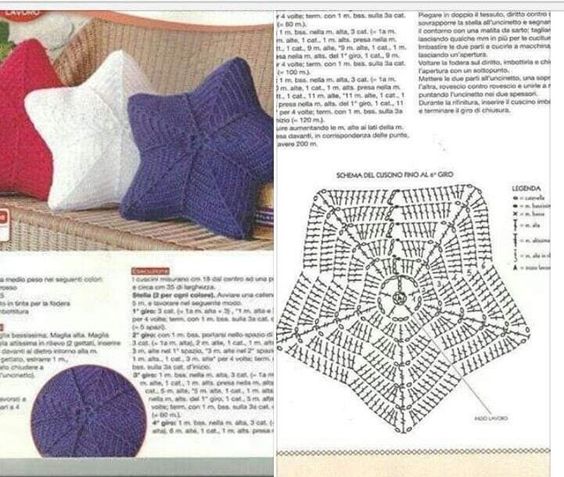
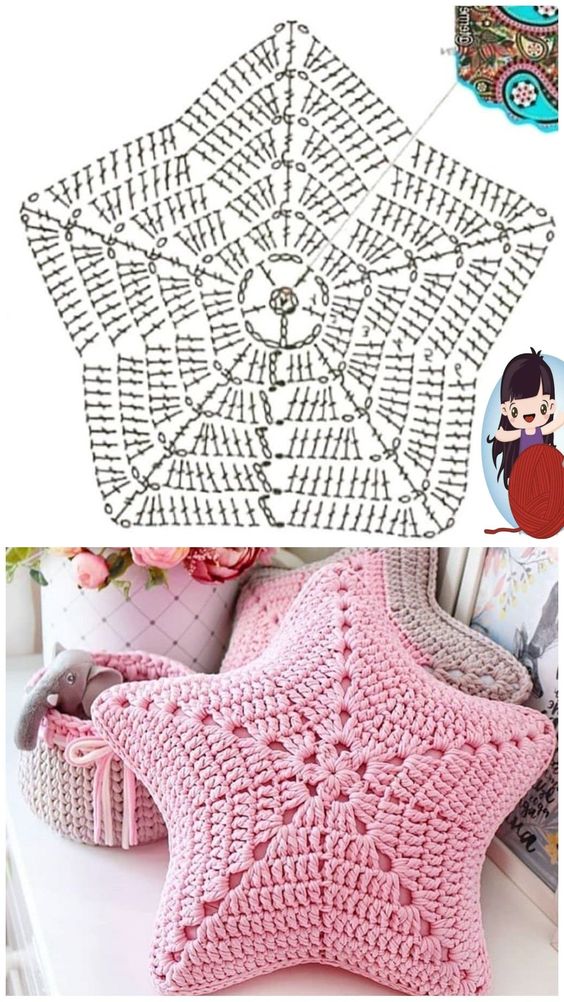
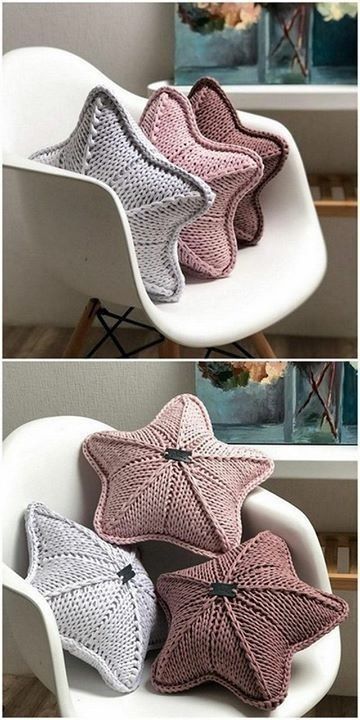
Knitting Star Cushion Ideas
Via Pinterest
Via: lutyartescrochet.blogspot.com
Via: dzen.ru
Via: uzelok.su
Materials You’ll Need
Before you start, here’s what you’ll need to make your own star pillow:
- Yarn: Choose a soft, durable yarn like cotton, acrylic, or a cotton blend. The yarn should be medium weight (worsted weight) for a comfortable texture and suitable structure.
- Crochet Hook: For worsted weight yarn, a 4mm (G-6) or 5mm (H-8) hook works well.
- Fiberfill or Pillow Insert: To stuff your pillow, you'll need fiberfill or a pre-made pillow insert. If you're using fiberfill, be sure to have enough to fill the pillow to your desired firmness.
- Tapestry Needle: For sewing the pieces together and weaving in ends.
- Scissors: For cutting the yarn when finished.
How to Crochet a Star Pillow: Step-by-Step Guide
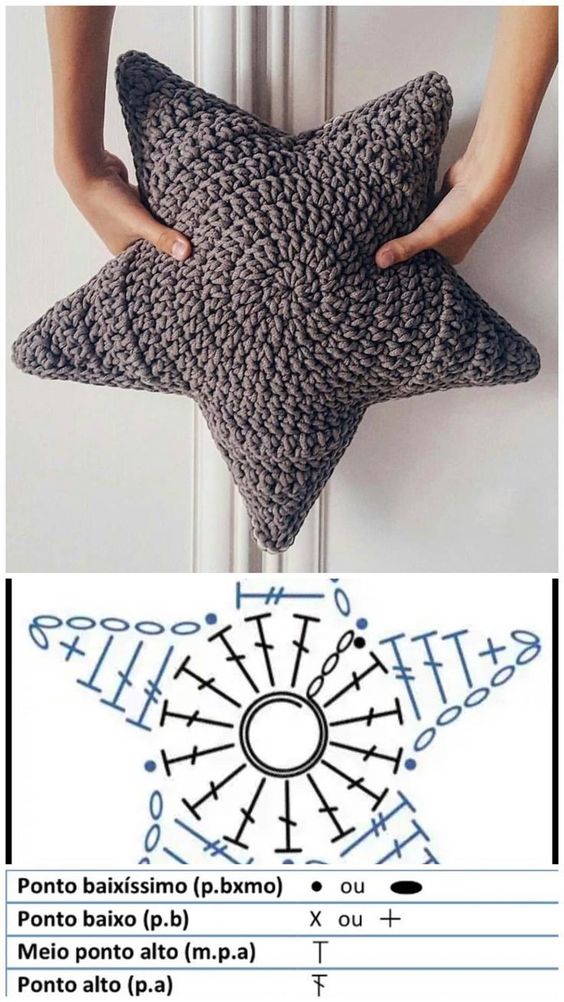
Step 1: Start with the Star Shape
To begin, we need to crochet the star shape. This will form the base of your pillow.
Creating the Star:
- Start with a magic ring. This will be the center of your star.
- Round 1: Work 5 single crochets (SC) into the magic ring. Pull the ring tight to close.
- Round 2: In this round, work 2 double crochets (DC) into each stitch around (10 stitches total).
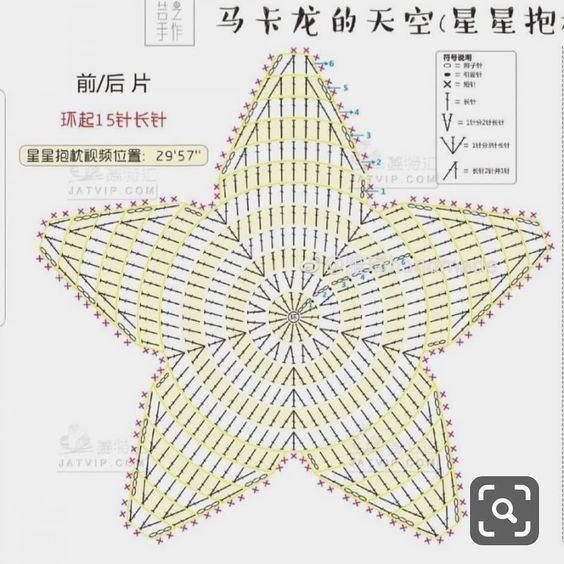
- Round 3: Work 1 DC into the first stitch, then work 2 DC into the next stitch. Repeat this pattern until you complete the round, increasing each alternate stitch (15 stitches total).
- Round 4: For the next round, continue with a similar increase pattern to form the expanding points of the star. You can increase the stitches as necessary to create a larger star, depending on the size of your pillow.
Once your star shape reaches the size you want for your pillow, it’s time to move on to the next step.
Step 2: Crochet the Pillow Back
You’ll need to crochet a matching star shape for the back of the pillow. Use the same pattern, but you can decide if you want the back to be solid (without increases) or if you want it to have a few more textured rows to match the front.
- Simple Back: If you prefer a simple back, crochet a plain star without additional increases.
- Textured Back: Alternatively, you can add a textured back by repeating the increases or even adding a new pattern, such as a shell stitch or a cluster stitch, to make the pillow more interesting.
Step 3: Assemble the Star Pillow
Once you’ve finished crocheting both sides of the star, it’s time to sew them together.
- Place the two stars together, with the right sides facing each other.
- Use a whip stitch to join the two pieces together. Leave an opening at the top to insert your stuffing or pillow insert.
- Stuff the Pillow: Once you’ve stitched most of the way around, stuff the pillow with fiberfill or insert the pre-made pillow form. Make sure to stuff it evenly for a full, comfortable pillow.
- Close the Opening: Once the pillow is stuffed to your satisfaction, stitch the remaining opening closed with the whip stitch.
Step 4: Finishing Touches
For an extra touch of style, consider adding:
- Pom-poms: Attach small pom-poms at the points of the star for a playful, fun effect.
- Decorative Stitching: Use contrasting yarn to add decorative stitches along the edges or around the star points to highlight the shape.
CHECK MORE CROCHET PATTERNS