Turn Crochet Squares into Bags
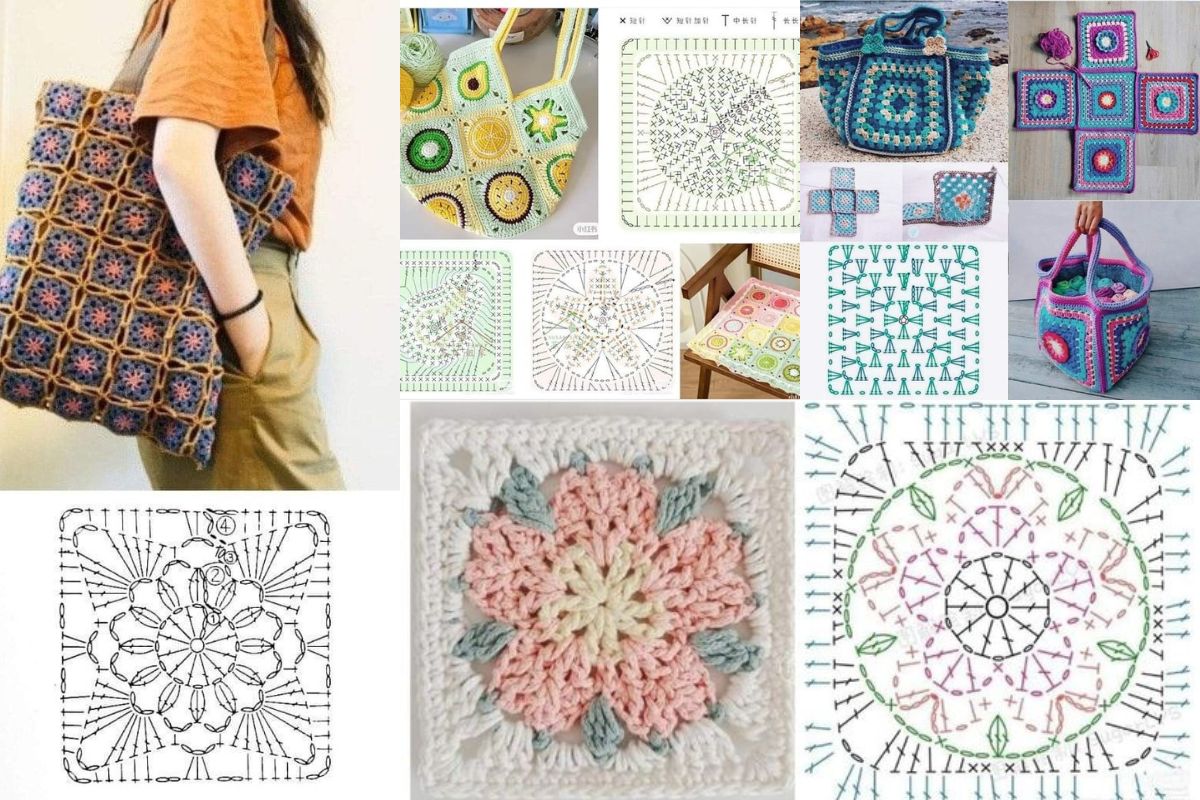
Transforming crochet squares into stylish and functional bags is a creative and rewarding project that combines the beauty of crochet with the practicality of a tote.
Also: Crochet Square Baby Hat: A Simple and Adorable Project
Whether you're looking for a new accessory or a unique handmade gift, this guide will show you how to turn simple crochet squares into stunning bags.
Let's explore the possibilities and techniques to craft your very own crochet square bag.
Crochet Square Bags
Learn how to turn crochet squares into stylish and functional bags with our easy step-by-step guide. Perfect for beginners, discover tips, materials, and creative ideas to craft your unique bag.
Crochet square bags are not just about utility; they embody style, versatility, and personal expression. Here’s why they’re a must-try project:
Using crochet squares makes this project accessible even for beginners.
Mix and match colors, textures, and patterns to create a bag that reflects your personal style.
Handmade bags reduce the need for plastic and are a sustainable fashion choice.
Crochet bags are sturdy and can be used daily without worrying about wear and tear.

Materials Needed
Before you start, gather these essential materials:
- Yarn: Choose a durable yarn like cotton or acrylic in your favorite colors.
- Crochet Hook: Size G-6 (4 mm) or as recommended by your yarn.
- Scissors
- Tapestry Needle: For sewing the squares together.
- Bag Lining (Optional): Fabric to line the inside of the bag for added strength and a polished look.
- Handles: You can crochet your own or use pre-made handles.
Step-by-Step Guide to Making a Crochet Square Bag
1. Create Your Crochet Squares
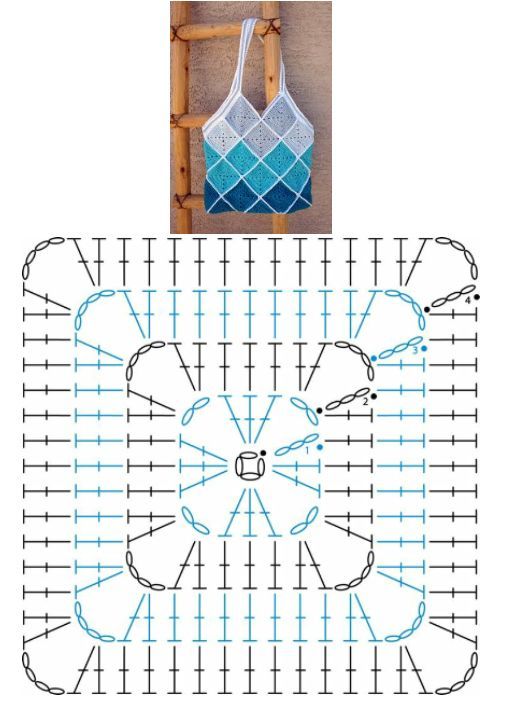
- Choose Your Pattern: Decide on a pattern for your squares. The classic granny square is popular, but feel free to experiment with other designs like floral or geometric patterns.
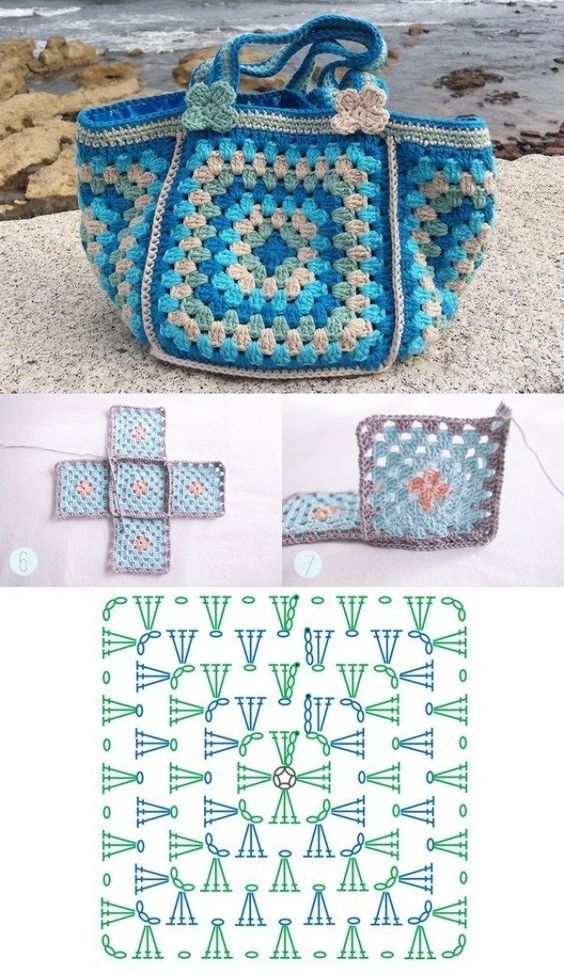
- Make the Squares: Crochet the desired number of squares. For a standard bag, you’ll need at least 6 squares (2 for each side and 1 for the bottom).
2. Join the Squares
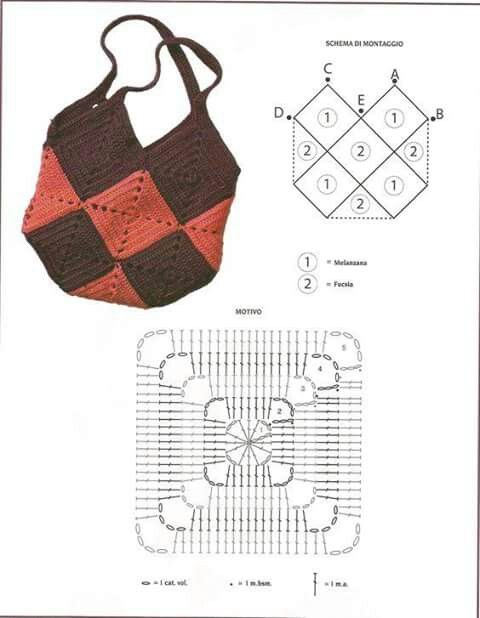
- Layout: Arrange your squares in the desired pattern before joining them.
- Joining Method: Use the slip stitch method or the whip stitch with your tapestry needle to join the squares along their edges.
- Assemble the Bag: After joining, fold the assembly to form a bag shape. Sew the sides together, leaving the top open.
3. Add Handles
- Crochet Handles: You can crochet long strips to use as handles or attach pre-made handles for a different look.
- Attach Handles: Secure the handles to the top of the bag using a strong stitch to ensure they can support weight.
4. Optional Lining
- Cut Fabric: Cut fabric to the size of your bag interior and sew it in place.
- Attach Lining: Hand-stitch or use a sewing machine to attach the lining to the inside of the bag, providing a clean finish and extra durability.
5. Finishing Touches
- Add embellishments like buttons, tassels, or fringe to give your bag a unique flair.
From Pinterest
From Pinterest
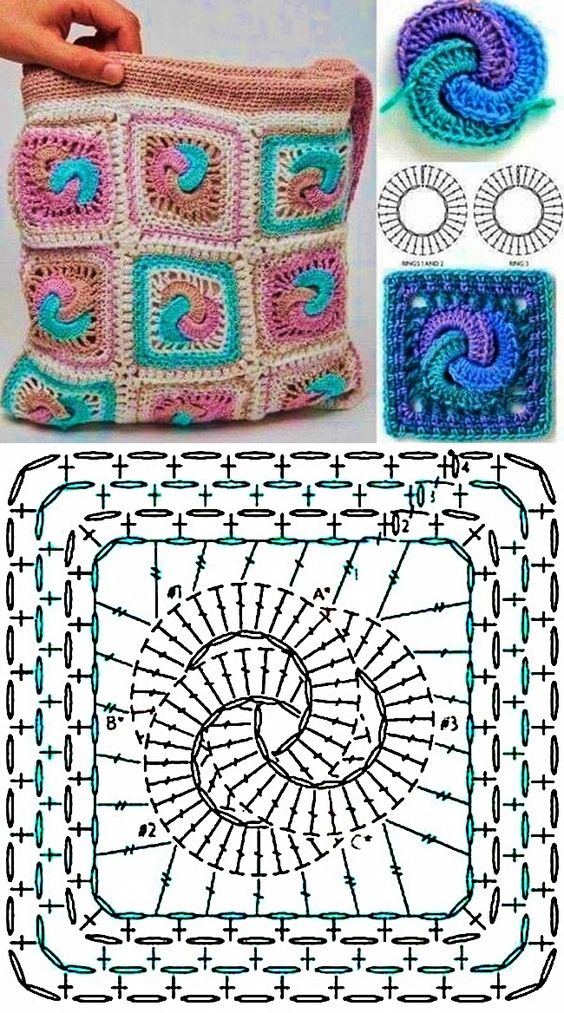
From Pinterest
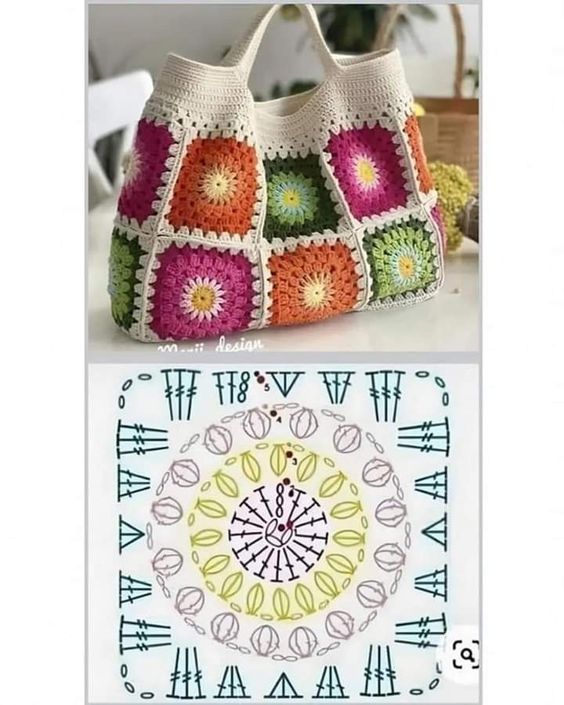
From Pinterest
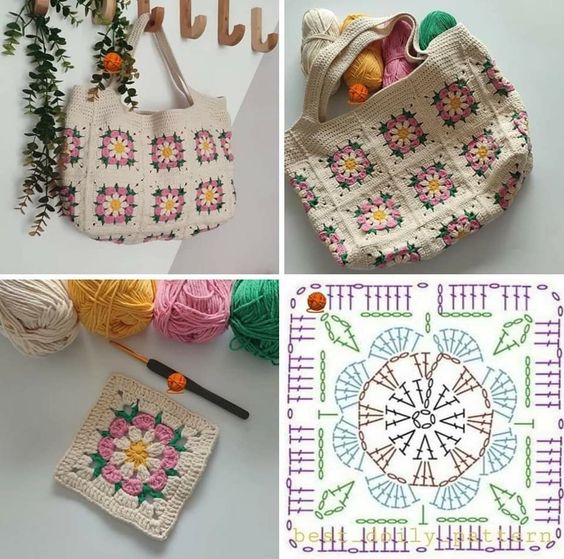
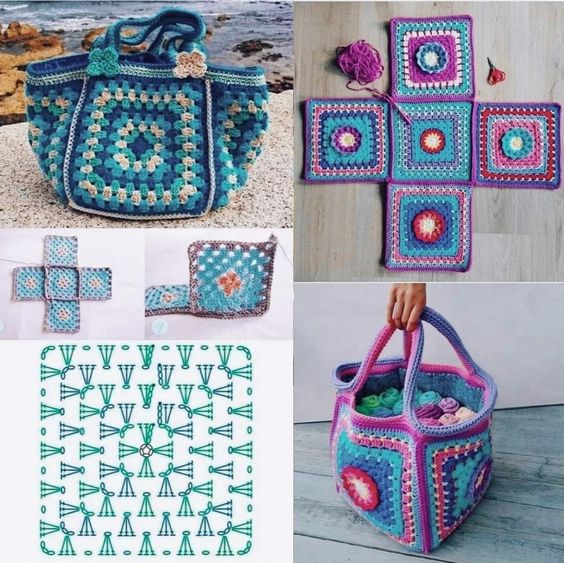
From Pinterest
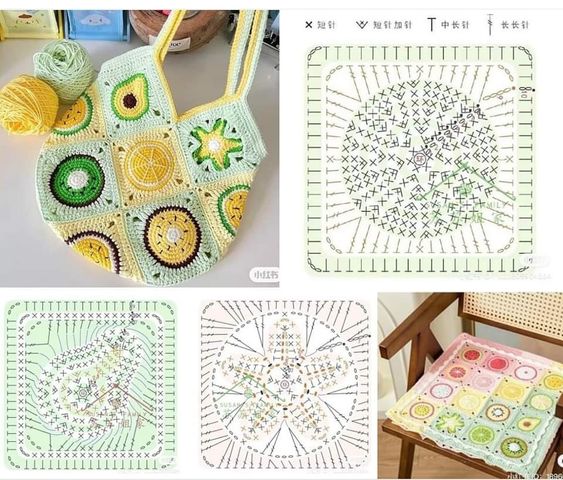
From Pinterest
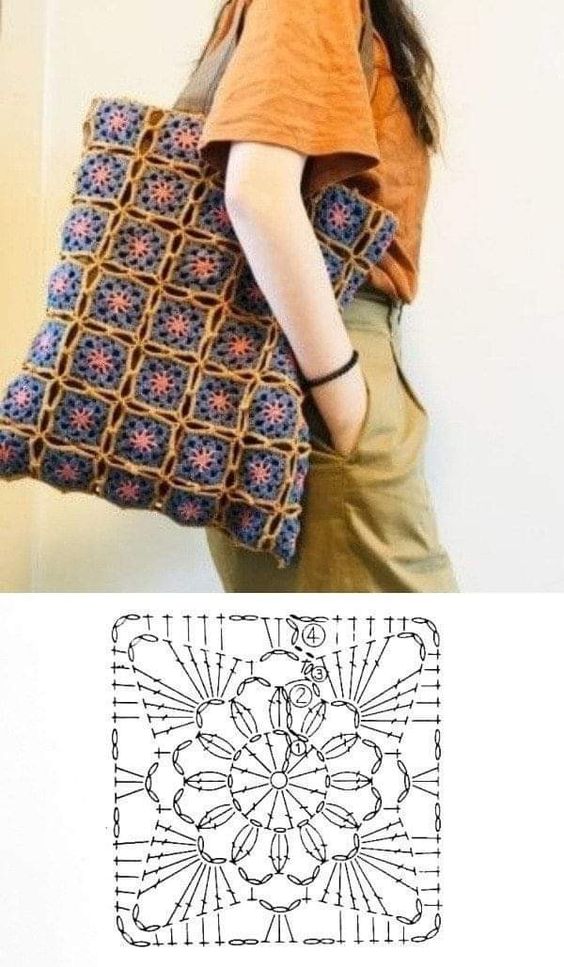
Souce:defrenteparaomar
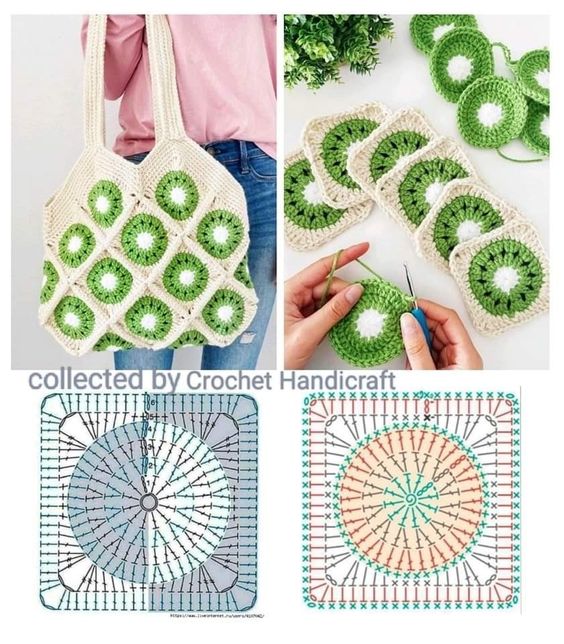
Souce: crochethandicraft
Creative Ideas for Crochet Square Bags
- Color Blocking: Use contrasting colors for each square to create a bold, modern look.
- Patchwork Design: Mix different patterns and textures in your squares for an eclectic, patchwork-style bag.
- Mini Bags: Create smaller squares for a petite version of the bag, perfect for kids or as an evening accessory.
With this guide, you’re ready to turn simple crochet squares into a beautiful and functional bag. Whether for personal use or as a gift, this project is sure to bring both joy and utility. Happy crocheting!
CHECK MORE CROCHET PATTERNS