Christmas Doily Crochet- Ideas and video
Crochet is perfect for those who like Christmas, there are many crochet ideas to decorate your home and even to give away.
Christmas ornaments are something that will complement your home decor. Christmas doily are perfect.
Our suggestion for today are crochet Christmas doily. There are many wonderful ideas, ideas from the simplest to the most elaborate. Options for all tastes.
See too: Crochet Christmas Tree Skirt
Table
How To Make A Christmas Doily For Table
Check out the step-by-step video and some wonderful ideas to get inspired.

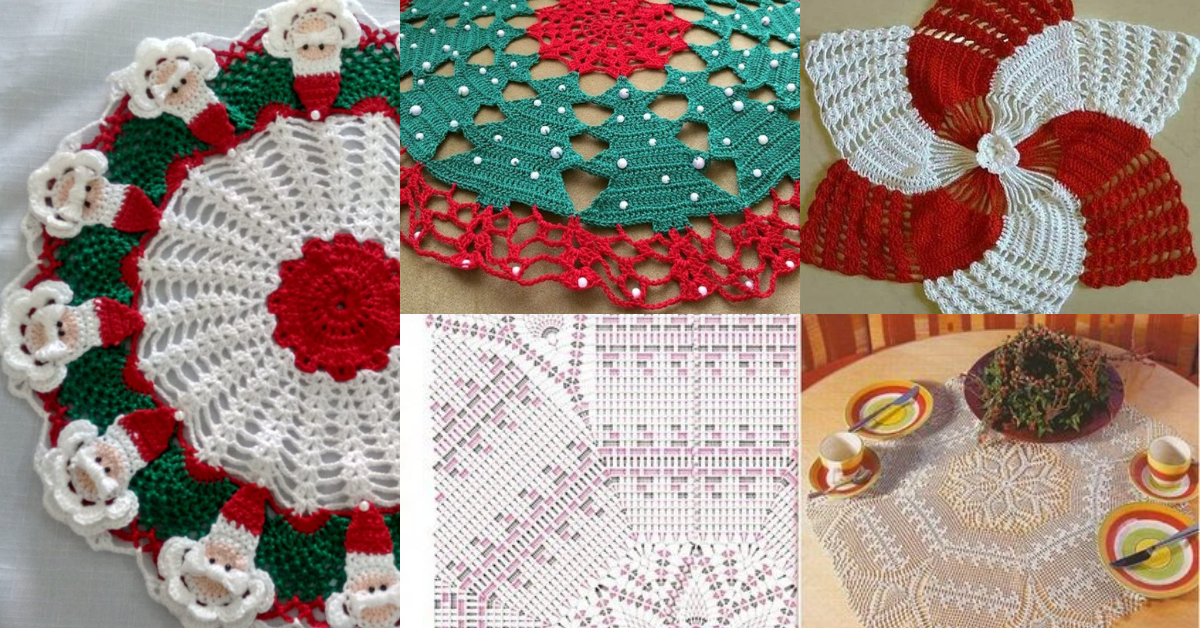
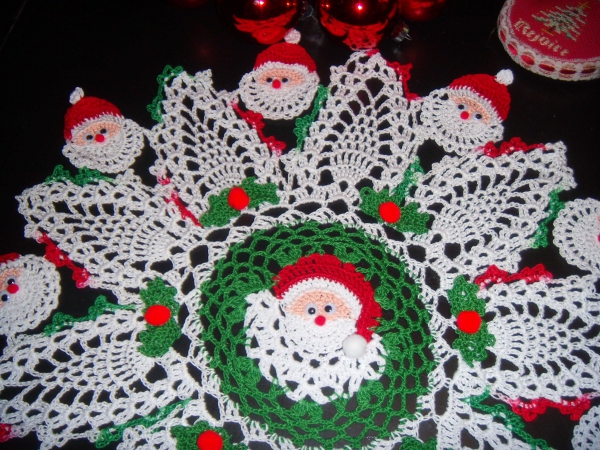
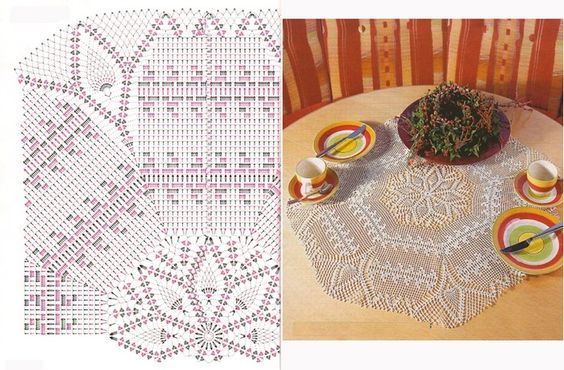
Christmas Doily Crochet Ideas
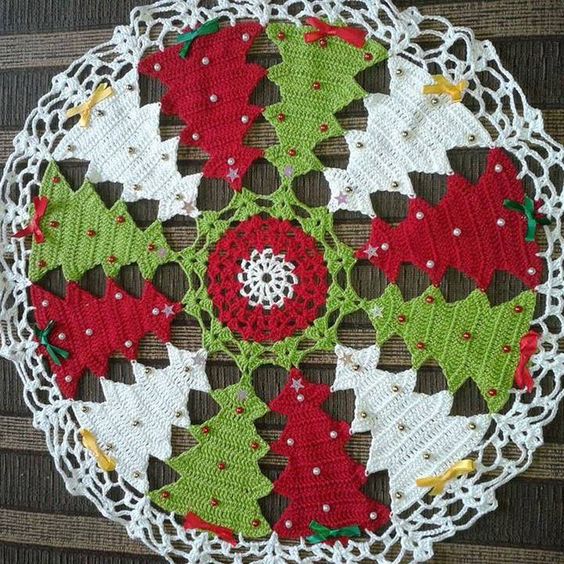
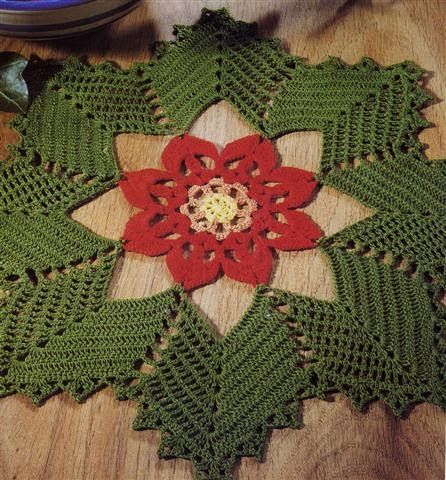

Via Pinterest
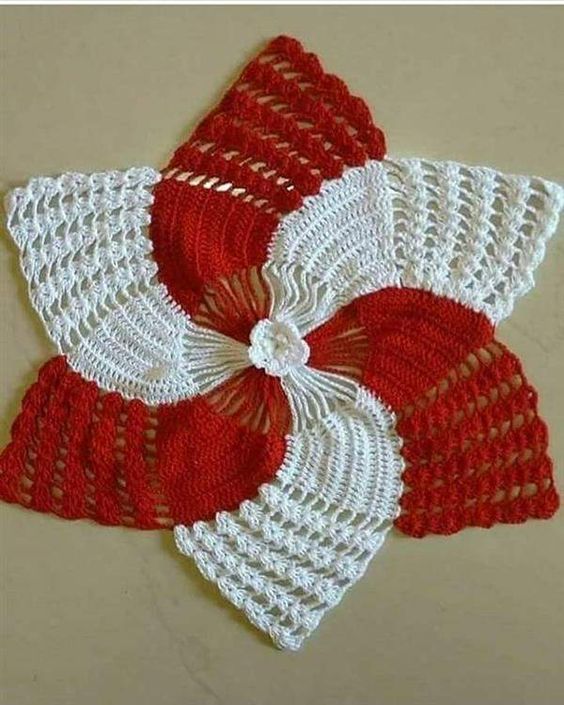

Via: lindacrochets.blogspot.com
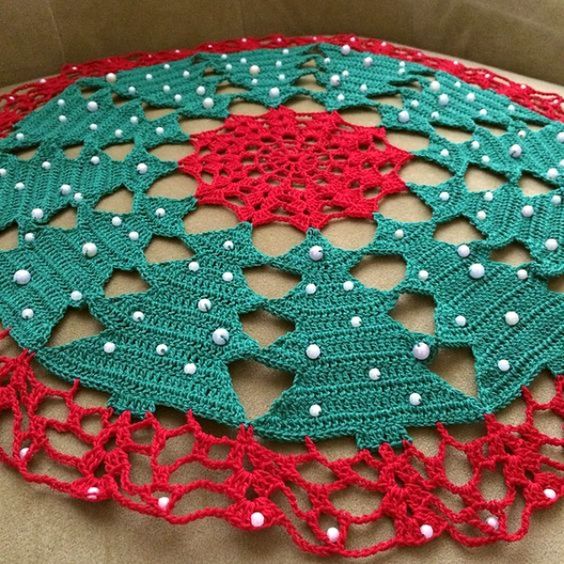
Via: www.boredart.com
How to Crochet a Christmas Doily: Step-by-Step Guide
Step 1: Make a Magic Ring
- Start with a magic ring to begin your project. The magic ring is the most common way to start a doily as it creates a tight and clean center.
- Wrap the yarn around your fingers and insert your hook through the loop.
- Pull up a loop and crochet the first stitch (usually a chain or single crochet) into the ring.
- Tighten the ring by pulling the tail of the yarn.
Step 2: Round 1 - Create the Center
- Ch 3 (this counts as your first double crochet) and then work 15 double crochets (DC) into the magic ring.
- Join the round: Slip stitch into the top of the first chain 3 to close the round.
- You should have a total of 16 double crochets (the starting chain counts as one).
Step 3: Round 2 – Expand the Circle
- Ch 3 (counts as 1st DC) and then make 2 DC in the next stitch. Repeat this pattern around (2 DC in each stitch) until you complete the round.
- Join with a slip stitch into the top of the first chain 3 to close the round.
- You should now have 32 DC in total.
Step 4: Round 3 – Add a Lacy Edge
- Ch 3 (counts as 1st DC), and then make 1 DC in the next stitch, then 2 DC in the next stitch. Repeat this pattern around (1 DC in the next stitch, then 2 DC in the next stitch).
- Join with a slip stitch into the top of the first chain 3 to close the round.
- This round will add lace-like spaces, and you should have 48 stitches by the end.
Step 5: Round 4 – Start the Petal Design
- Ch 3 (counts as 1st DC), and then make 3 DC in the next stitch to create the base of the petal.
- Ch 1, skip 1 stitch, and then make 4 DC in the next stitch to form the next petal.
- Repeat this pattern around, ending with a ch 1 and slip stitching into the top of the first chain 3.
- This round forms the petal shapes that will give your Christmas doily a beautiful texture.
Step 6: Round 5 – Add Christmas Details
- To add more holiday flair, use red and green yarn to create a two-toned effect.
- Repeat similar steps as in the previous rounds but add picots or shell stitches to give the doily more texture and a more festive appearance.
- For picots, simply chain 3 and then slip stitch into the base of the chain to create tiny points on the doily's edge.
- For a Christmas tree design, you could add additional elements like snowflakes, stars, or garlands using contrasting colors like white and gold.
Step 7: Final Touches
- Trim the yarn: Once your doily is the size and design you want, trim the yarn and use your tapestry needle to weave in any loose ends.
- Blocking (optional): To give your doily a crisp, even look, you can block it by gently wetting it and pinning it to a flat surface in the desired shape. Let it dry completely.
CHECK MORE CROCHET PATTERNS