Finger Knitting Bracelets: 4 Free Yarn Tutorials to Try


To make a finger knitting bracelet, loop jersey yarn around your fingers, lift the lower loops over the working yarn, and repeat until the knitted cord fits your wrist. Secure the live loops, then tie the ends together. Start with a narrow version before trying a wider cuff.
These free tutorials show you how to turn t-shirt yarn or ordinary yarn into wearable bracelets. Choose the guide that matches your material, then follow its photos for the exact wrapping and finishing method.
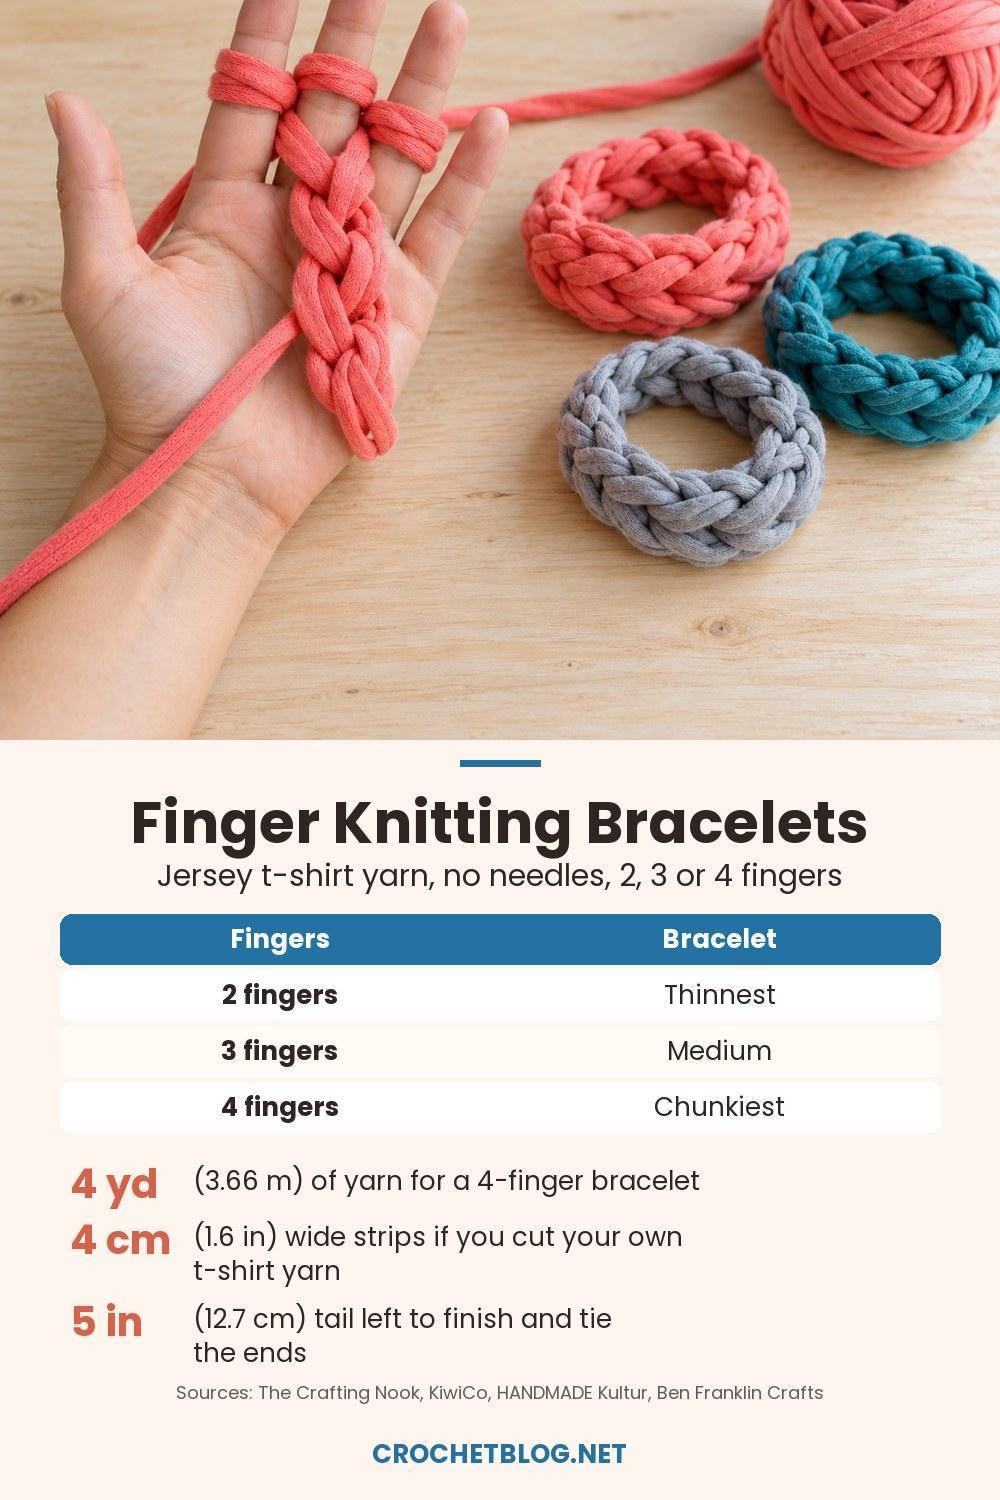
Compare the free finger knitting bracelet tutorials
Use this table to choose your starting point. The measurements belong to the named projects; use each tutorial's own supply list rather than treating the amounts as interchangeable. All linked instructions were freely readable when checked.
| Tutorial and author | Fingers used | Published supply or finishing detail |
|---|---|---|
| The Crafting Nook, Camila Rojas | 2, 3, or 4 | Jersey t-shirt yarn; length fitted to your wrist |
| KiwiCo, Finger Knitting Bracelet | 2 demonstrated; 2–4 suggested | About 5 inches (12.7 cm) of yarn left for finishing |
| HANDMADE Kultur, vidanullvier | 2 in the instructions | T-shirt strips about 1.6 inches (4 cm) wide |
| Ben Franklin Crafts, Finger Yarn Bracelet | 4 in the instructions | 4 yards (about 3.66 m) of yarn |
Free tutorials to follow
Jersey bracelets by Camila Rojas at The Crafting Nook
Follow Camila Rojas's jersey bracelet tutorial for photographed methods using 2, 3, and 4 fingers. Gather jersey t-shirt yarn and scissors; beads or ornaments are optional. Choose this beginner-friendly guide if you want to compare bracelet widths in the same material. Work to your wrist size, as the author does, rather than aiming for a fixed finished length.

Yarn bracelet by KiwiCo
Open KiwiCo's Finger Knitting Bracelet guide if you prefer a close look at the lower-loop-over-upper-loop motion. You need yarn and scissors, and the project recommends bulky, fluffy yarn. Its demonstration uses 2 fingers and leaves about 5 inches (12.7 cm) when cutting the finishing tail. Use this beginner-friendly option to learn the movement with yarn already in your supplies.
Upcycled t-shirt jewelry by vidanullvier
See vidanullvier's bracelet and necklace tutorial at HANDMADE Kultur for an upcycling approach with detailed photos. The German-language page lists an old t-shirt, glue, wire, and scissors, and labels the project easy. Cut strips about 1.6 inches (4 cm) wide for this method. Keep the bracelet and necklace instructions distinct: the page's stated fabric length applies to a necklace.

Finger yarn bracelet by Ben Franklin Crafts
Use Ben Franklin Crafts' Finger Yarn Bracelet instructions when you want a written wrapping sequence across 4 fingers. The supply list specifies 4 yards (about 3.66 m) of Jewel Box yarn, with embroidery floss and beads offered as optional additions. This is a useful next exercise after a narrow bracelet. Follow the shop's instructions for moving the remaining loops along your fingers to finish.
Watch the jersey yarn technique
Watch JewelryTutorialHQ's “DIY Jersey Knit T-Shirt Bracelet Tutorial - Finger Knitting” for a jersey-specific demonstration. The creator describes connecting fabric strips and weaving a chunky bracelet from an old t-shirt. Use the video alongside the written guides when you want to follow the hand movements.

For another view, watch Cami Rojas at The Crafting Nook demonstrate her jersey bracelets. This overview accompanies the photographed tutorial above. Pause as you work, and use the linked page whenever you need to study how the yarn travels around your fingers.

Understand the basic finger knitting technique

Photo: V and Co. The number of fingers sets the width: two, three or four.
Use this short overview to understand the movement before opening your chosen tutorial. Keep that tutorial's wrapping sequence and bind-off together throughout your project.
- Place the starting tail against your palm and hold it with your thumb.
- Weave the working yarn around the fingers used in your chosen method, forming the starting loops.
- Bring the working yarn across or around those fingers as the tutorial shows.
- Lift each lower loop over the new yarn and over the fingertip. Let the released loop fall behind your hand.
- Repeat the wrapping and lifting motion. Keep enough slack to lift the loops comfortably.
- Gently draw the growing cord downward and lay it around your wrist while keeping the live loops secure.
- Follow the tutorial's bind-off, secure the yarn end, and tie the bracelet tails together.

Choose the fit and finish
For your first jersey bracelet, choose a plain color so you can see the loops clearly. Keep the yarn feeding freely from the ball; a caught strand makes it harder to maintain an even rhythm. Straighten a twisted section before working it into the next loop.
Fit the knitted cord around your wrist in its relaxed shape. Leave room for the closure and comfortable movement, then secure the loops before adjusting the knot. If you plan to slide the bracelet over your hand, try that movement before trimming the tails. For a gift, keep the tails available for the recipient to adjust.

Frequently asked questions
Can you finger knit a bracelet with t-shirt yarn?
Yes. Choose The Crafting Nook's jersey tutorial for ready-made t-shirt yarn, or use vidanullvier's guide to prepare strips from an old shirt. Match your material to the tutorial so you can follow the joining and finishing instructions directly.
How many fingers do you use for a bracelet?
The Crafting Nook demonstrates 2, 3, and 4 fingers. Start with its narrow version to learn the motion, then use its wider versions when you want a fuller bracelet.
How much yarn do you need?
For the Ben Franklin Crafts project, set aside 4 yards (about 3.66 m) of its listed yarn. For jersey yarn, follow the selected guide and fit the cord to your wrist; a supply amount for ordinary yarn is not a jersey-yarn requirement.
How do you keep the bracelet from unraveling?
Finish the live loops before tying the bracelet around your wrist. Keep hold of those loops as you remove them from your fingers, and follow the bind-off in your chosen tutorial. Trim the tails after securing the ends and settling the fit.
Choose your next handmade accessory
Save your preferred tutorial so you can return to its finishing photos. When you are ready to try accessories made with a hook, explore the crochet heart bracelet tutorial or these crocheted daisy bracelets. For an accessory to wear at your ankle, browse the handcrafted crochet ankle bracelet ideas.
CHECK MORE CROCHET PATTERNS