How to Crochet the Spider Stitch: A Step-by-Step Guide
Crocheting is a versatile and enjoyable craft that allows you to create beautiful and intricate designs with just a hook and yarn. One popular stitch that adds a touch of elegance and sophistication to your crochet projects is the Spider Stitch. In this article, we will guide you through the process of mastering this stunning stitch, step by step.
So grab your crochet hook and let's get started!
How to Crochet the Spider Stitch
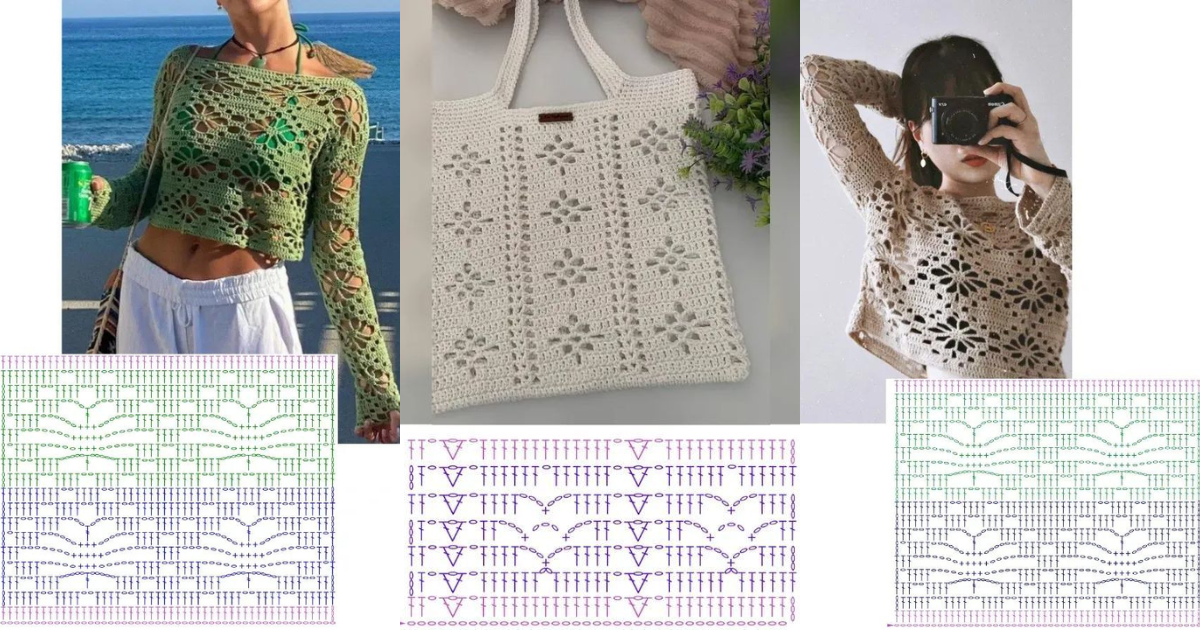
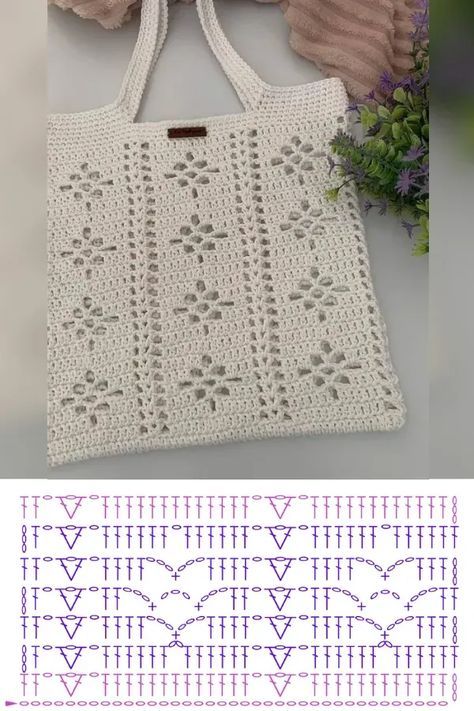
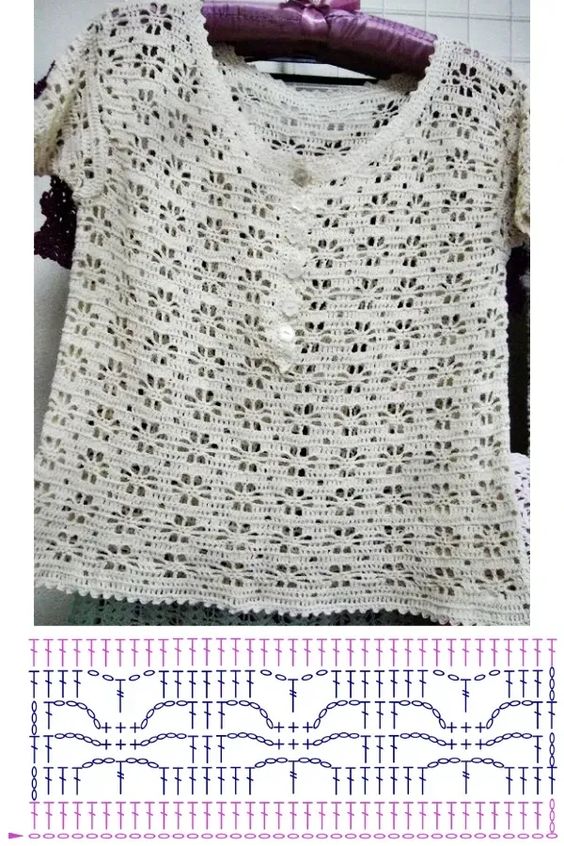
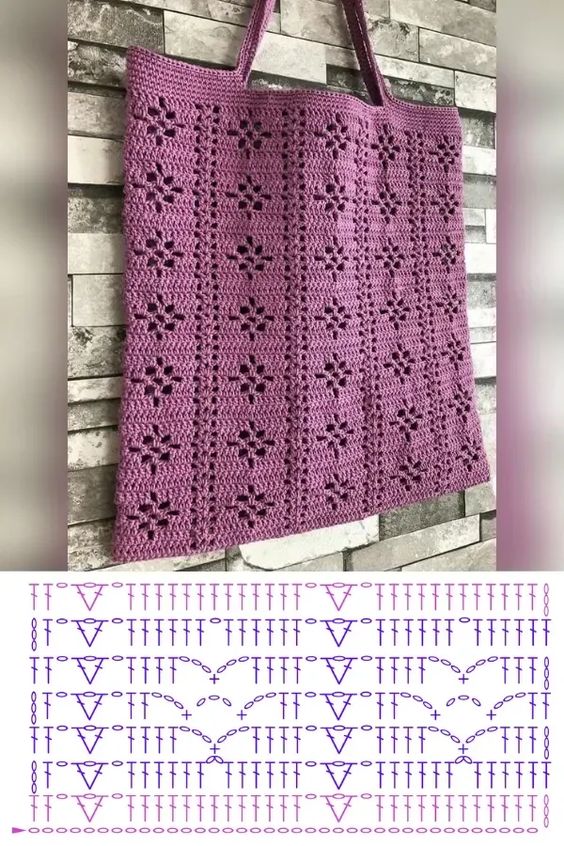
The Spider Stitch is a crochet technique that creates a delicate, lacy pattern resembling spiderwebs.
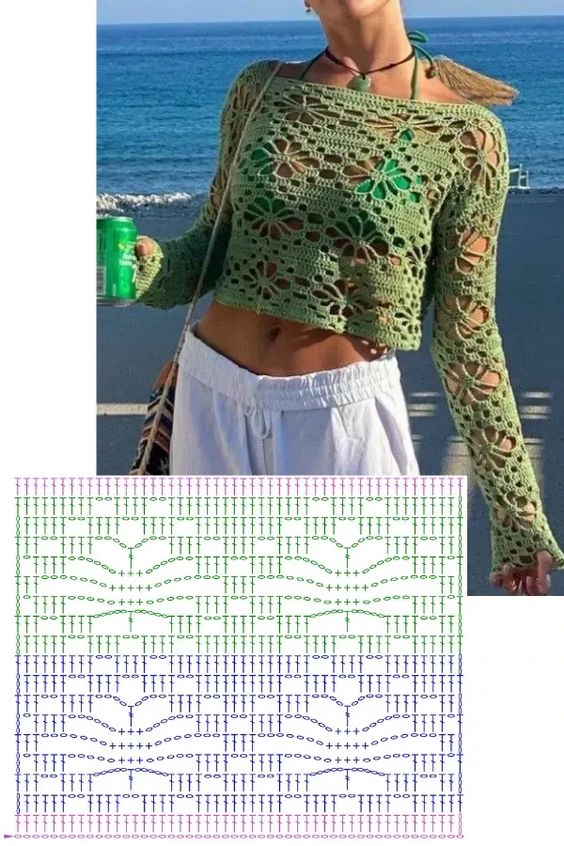
It consists of a combination of chains, single crochets, and double crochets, which come together to form a captivating design. This stitch is perfect for various crochet projects such as scarves, shawls, blankets, and even garments.
Materials
Before we div:e into the Spider Stitch, let's gather the necessary materials:
- Crochet hook (size appropriate for your yarn)
- Yarn (preferably a medium-weight yarn)
- Scissors
- Yarn needle
Once you have all the materials ready, you can proceed to the next step.
To begin crocheting the Spider Stitch, start with a foundation chain. The length of your chain will depend on the desired width of your project. For example, if you're making a scarf, you may want to chain around 30-40 stitches.
Creating the Spider Stitch
Now that you have your foundation chain, it's time to create the Spider Stitch pattern. Follow these steps:
- Insert your hook into the fourth chain from the hook.
- Yarn over and pull up a loop. You should have three loops on your hook.
- Yarn over and pull through the first two loops on your hook. You should have two loops remaining.
- Yarn over again and pull through the remaining two loops on your hook. This completes one single crochet (SC).
Continue this pattern across the row, inserting your hook into the next chain, repeating steps 2-4. Once you reach the end of the row, chain three and turn your work.
Working Rows
To create subsequent rows of the Spider Stitch, follow these steps:
- Insert your hook into the first single crochet of the previous row.
- Yarn over and pull up a loop.
- Yarn over and pull through the first two loops on your hook.
- Yarn over and pull through the remaining two loops on your hook. This completes one SC.
Repeat this pattern across the row, ending with a chain three and turning your work. Keep working rows until your project reaches the desired length.

Tips and Tricks
- Use stitch markers to keep track of your stitches, especially when working on larger projects.
- Take breaks and stretch your hands and fingers to avoid fatigue or cramping.
- Practice tension control to ensure even and consistent stitches throughout your work.
- Experiment with different yarn weights and hook sizes to achieve different effects.
Crocheting the Spider Stitch allows you to create stunning, intricate designs that will impress and delight.
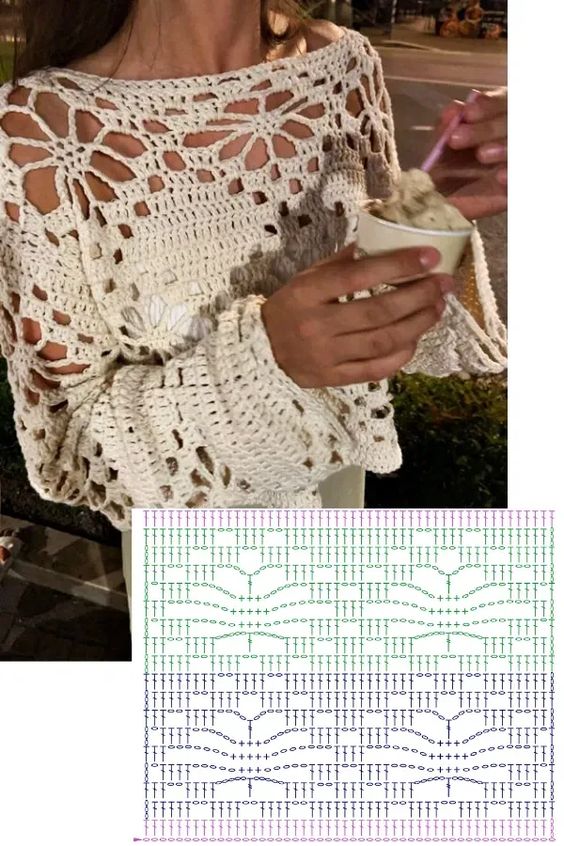
With the step-by-step guide provided in this article, you can confidently embark on your crochet journey and incorporate the Spider Stitch into your projects.
So grab your hook, choose your favorite yarn, and start creating beautiful masterpieces.
CHECK MORE CROCHET PATTERNS