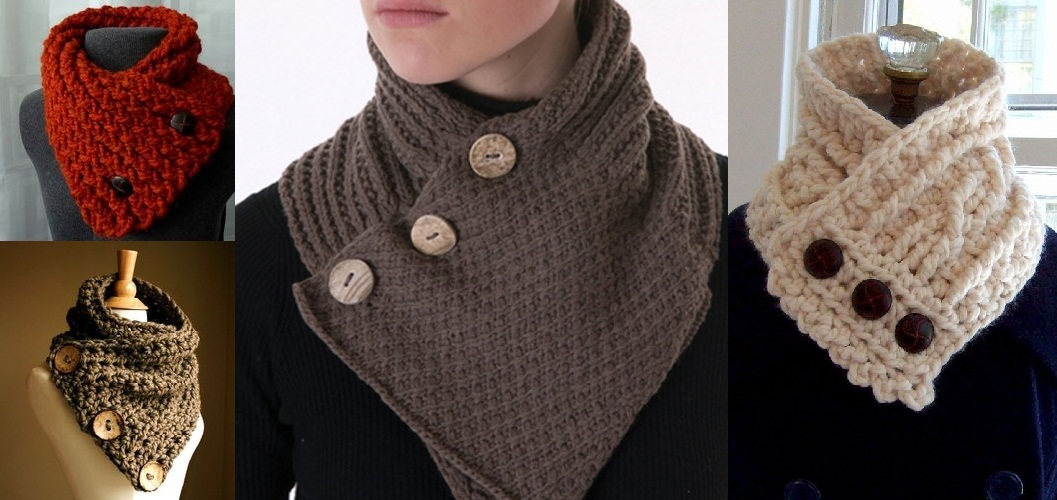
How To Crochet A Collar Scarf

We continue sharing our experience with you ladies and today we got something special for you. Take a look at the video tutorial about crocheting one of the most beautiful scarfs you have ever seen.
It is getting colder and colder so you need more warm clothes to keep your body healthy and beautiful.
So, we give you an opportunity to crochet extremely stylish and lovely scarf, that will make your look much more pretty and fancy.
How To Crochet A Collar Scarf

Materials You Will Need
Before you start crocheting your collar scarf, gather the following materials:
- Yarn: Choose a lightweight yarn, such as cotton or acrylic, that’s comfortable against the skin. Light and breathable options work well for layering.
- Crochet Hook: Use a hook size that corresponds with your yarn weight. Typically, sizes G (4mm) to I (5.5mm) work well.
- Scissors: For trimming yarn ends.
- Tapestry Needle: To weave in loose ends and finish your work.
- Measuring Tape: To ensure the scarf is the desired length.
- Stitch Markers: Helpful for keeping track of rounds, especially in larger projects.
Choosing the Right Yarn
When selecting yarn for your crochet collar scarf, consider these key factors:
- Fiber Content: Cotton yarn is great for breathability, while acrylic blends offer warmth and are easy to care for.
- Color Choices: Opt for colors that complement your wardrobe. Neutral tones can be versatile, while bright colors or pastels can add a pop of fun.
- Texture: A smooth yarn provides a nice finish, while textured yarns can add visual interest to your design.
Recommended Yarns
Here are some excellent yarn options for creating your collar scarf:
- Cotton Yarn: Lightweight and perfect for warm weather, available in a wide range of colors.
- Acrylic Yarn: Affordable and easy to care for, ideal for beginners.
- Blends: Consider yarns that combine different fibers for unique textures.
Basic Crochet Techniques for Your Collar Scarf
Before you start crafting, familiarize yourself with some basic crochet stitches that will be useful for your collar scarf:
- Chain Stitch (ch): The foundation of most crochet projects.
- Single Crochet (sc): A tight stitch that creates a sturdy fabric.
- Double Crochet (dc): Adds height and drape to your work.
- Shell Stitch: A decorative stitch that creates a beautiful texture.
Sample Stitch Pattern: Shell Stitch
To give you a quick start, here’s how to crochet a simple shell stitch pattern, ideal for creating a delicate collar scarf:
- Foundation Chain: Start by chaining a multiple of 6 plus 2 for your foundation chain (for example, chain 26).
- Row 1: Work 1 sc in the second chain from the hook, then skip 2 chains, 5 dc in the next chain, skip 2 chains, 1 sc in the next; repeat across.
- Row 2: Turn, chain 1, and 1 sc in the first shell, 5 dc in the chain-1 space of the next shell; repeat.
- Continue: Repeat Row 2 until you reach the desired length for your scarf.
Step-by-Step Instructions for Crocheting a Collar Scarf
Now that you’re familiar with the stitches and techniques, let’s dive into the step-by-step process of creating your collar scarf.
Step 1: Create the Foundation Chain
- Measure Your Desired Length: Determine how long you want your collar scarf to be. A typical length is around 30-40 inches.
- Chain: Make a foundation chain based on your measurements. For example, chain 26 for a width that comfortably sits around your neck.
Step 2: Begin the Body of the Scarf
- Row 1: Work in the shell stitch pattern, as outlined in the sample stitch pattern above.
- Continue Working: Repeat your chosen stitch pattern until the scarf reaches your desired width (approximately 6-8 inches is standard for a collar scarf).
Step 3: Shaping the Collar
To create the collar effect, you’ll want to shape the scarf so it sits comfortably around the neck:
- Turn: Once you reach the desired width, turn your work.
- Start Shaping: Work in rows while gradually decreasing stitches at the edges to create a rounded shape.
Step 4: Adding the Edging
- Choose Your Edging: Consider adding a decorative edge to finish off your collar scarf. A simple single crochet border works well, or you can try a scalloped edge.
- Work the Edging: Single crochet around the entire scarf, ensuring the edge is neat and even.
Step 5: Finishing Touches
- Weave in Ends: Use a tapestry needle to weave in any loose ends from your crochet work.
- Block Your Scarf: Lightly block your scarf to set the stitches and ensure it lays flat.
Take your time and follow this easy tutorial, it will help you to crochet the scarf very easily and in no time and trust me the result will amaze you. We wish you a good luck. Enjoy.
CHECK MORE CROCHET PATTERNS