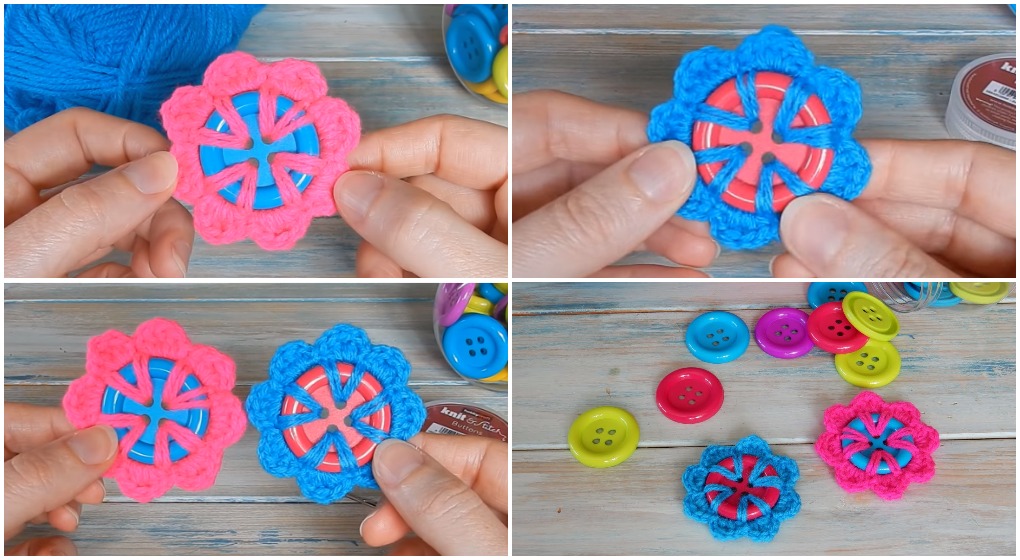
How to Crochet a Flower Button
Crocheters who love elegant and beautiful flowers, this is often another nice chance to create this colorful and amazing flower button with your own hands in just a brief amount of your time.
These flowers are very beautiful and creative. You have to crochet many of these and can decorate many things.
These flowers can take an important place in your crochet works. Wonderful gift for friends and family.
Say which color you’ll choose. Start to crochet today and get a big pleasure.
- Made entirely with yarn and a crochet hook.
- Use a magic ring and work petals in the round (e.g., 5 sc petals or puff stitch).
- Sew in the center of hats, bags, or baby clothes.
Use contrasting thread in the center to mimic a stamen.
- Mold simple flower shapes from polymer clay.
- Add texture with tools or stamps.
- Bake and glaze for a glossy finish.
Use For: Jackets, tote bags, kids’ accessories.
- Cover a flat button with fabric.
- Embroider tiny flowers (e.g., lazy daisy stitch, French knots) onto the surface.
Great For: Vintage-style cardigans, linen pouches, handmade notebooks.
- Cut felt into flower shapes and sew or glue a small button in the center.
- Layer two or three colors for a dimensional effect.
Perfect For: Headbands, brooches, or felt book embellishments.
- Use laser-cut wooden buttons shaped like daisies or roses.
- Can be painted or left natural for a rustic feel.
Works well with: Linen, denim, and other natural fabrics.
- Twist or roll fabric strips into a flower and secure with stitches.
- Sew a button in the center as both anchor and detail.
CHECK MORE CROCHET PATTERNS