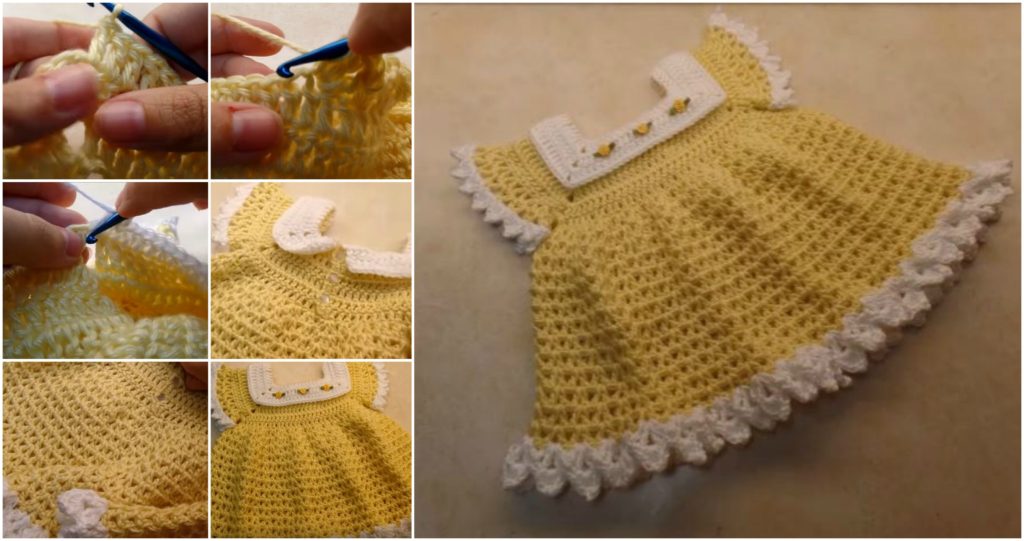
Crochet Sunshine and Roses Dress

Dresses like this one are always very popular on our website and on the internet in total, so we are trying to find some more and more project like this.
I love the dress but maybe even more I love the name of the project, it help me understand how warm and lovely this dress is.
The video tutorial is just great and very easy to follow the steps that are shown there, I think that you won’t have any kind of a problem or misunderstanding while working on this project.
Crochet Sunshine and Roses Dress
The Crochet Sunshine and Roses Dress is a charming and delightful garment that perfectly embodies the essence of summer. With its vibrant colors and floral motifs, this dress is not only a lovely addition to any child’s wardrobe but also a fun project for crocheters of all skill levels.

Step-by-Step Instructions for Making a Crochet Sunshine and Roses Dress
Step 1: Choose Your Pattern and Size
- Select a Pattern:
- Look for a crochet pattern that suits your style. Many free patterns are available online, catering to different sizes and styles.
- Measurements:
- Measure the child’s chest, waist, and desired length for the dress. A typical size for a toddler dress may be around 2T to 5T, but always refer to specific pattern size charts.
Step 2: Create the Bodice
- Foundation Chain:
- Start with a slip knot and chain enough stitches to match the width of the bodice based on the child's measurements. For example, for a 2T size, you might start with about 40-50 chains.
- First Row:
- Work in dc across the foundation chain. This creates the first row of the bodice.
- Subsequent Rows:
- Continue working in rounds or rows until the bodice reaches the desired height. You may choose to alternate between sc and dc for added texture.
Step 3: Shaping the Dress
- Joining the Bodice:
- Once the bodice is complete, you may want to shape it to create a more fitted look. Use decreases to taper the bodice if necessary.
- Start the Skirt:
- After shaping the bodice, start working the skirt of the dress. You can use a different color for the skirt to add a nice contrast.
- Creating the Skirt:
- To create the skirt, work in rounds, gradually increasing the number of stitches to create a flared effect. This can be achieved by adding shell stitches or increasing by 2-3 stitches in specific rounds.
- Length of the Skirt:
- Continue working until the skirt reaches the desired length. A typical length for a toddler dress might be around 10-12 inches from the bodice.
Step 4: Adding the 3D Roses
- Creating the Roses:
- Using a contrasting color, start by making a magic ring and work in dc to form the rose petals.
- For example, in the magic ring, you can work 5 dc, ch 2, sl st to the first dc to form a petal. Repeat this to create several petals for a full rose.
- Securing the Roses:
- Once you have the desired number of petals, pull the magic ring tight and secure it with a slip stitch. You can also create leaves using green yarn by chaining and working sc or dc for texture.
- Attaching the Roses:
- Sew the completed roses onto the skirt of the dress using a yarn needle. Position them where they will be most visually appealing, such as on one side of the skirt or scattered across the hem.
Step 5: Finishing Touches
- Add a Decorative Border:
- Consider adding a decorative border to the bottom of the skirt and around the armholes using a contrasting color or decorative stitch.
- Weave in Ends:
- Use a yarn needle to weave in any loose ends for a clean finish.
- Blocking (Optional):
- Lightly steam block your crochet dress to help it hold its shape.
Step 6: Adding Accessories (Optional)
- Crochet Belt:
- Consider making a matching crochet belt to accentuate the waist. This can be a simple chain with decorative elements added.
- Headband or Hat:
- Create a matching headband or hat using the same yarn and flower patterns for a complete outfit.
Creative Variations for Your Crochet Sunshine and Roses Dress
1. Color Combinations
- Instructions: Experiment with different yarn colors. Consider using variegated yarn for the skirt or floral patterns for added charm.
2. Different Styles
- Instructions: Explore various styles, such as adding ruffles to the sleeves or hem for a playful touch.
3. Themed Dresses
- Instructions: Create themed dresses for special occasions, such as using pastel colors for spring or bright colors for summer parties.
4. Layering
- Instructions: Consider making a lightweight cardigan to layer over the dress for cooler days.
Share the article with your friends too and help them spend their day with more interest too. Enjoy and have a nice day.
CHECK MORE CROCHET PATTERNS